PVE:GM Handbook: Difference between revisions
More actions
Created page with "test" |
Frozentsbgg (talk | contribs) No edit summary |
||
| (33 intermediate revisions by 2 users not shown) | |||
| Line 1: | Line 1: | ||
= Welcome to Being a Game Master = | |||
''Congratulations on being selected through deliberation or welcome back from your break.'' | |||
You probably have a lot of ideas, storylines, and characters you want to play out or tell to players and friends. But what now? You have your role, your access, your tools, but where does one even begin preparing a game, let alone run one? | |||
Well, '''this guide is for new GMs starting to run a game'''; the concept, pacing, philosophy, and steps involved. '''This is not a simplified step-by-step guide,''' but rather a large compile list of everything involving running a PvE game. | |||
'''For an extensive look into the tools necessary to achieve this, check out [[PVE:GM_Toolkit|GM and Admin Tools]]'''. | |||
''This guide has sections partly inspired from BlackDragon's Mission Theory as well as a compile of guides and steps existing and scattered on Discord.'' | |||
---- | |||
= ======== TGS Guide ======== = | |||
This section will talk about extensive use of the '''<U>TGS Webpanel</U>''' web-program to start, close, and update PvE servers. | |||
= Starting the Server = | |||
Before you can begin the preparations, you need to know how to start the server. Generally speaking, when you're in training the Trainer GM will handle it for you, but this is an important aspect nonetheless. | |||
Servers are handled by '''<U>TGS Webpanel</U>''', which is a web-based connection to the server box. '''There are 4 servers available as of July 2025 for PvE: <span style="color:red">Red</span>, <span style="color:lime">Green</span>, <span style="color:blue">Blue</span>, and <span style="color:cyan">Halo</span>.''' Each servers contain a list of '''Test Merges or TMs''' which are modification of the base code that are not officially part of the game. This can range from bug fixes, to maps, to features. | |||
== Choosing Your Server and Test Merges == | |||
[[File:PVE_TGS_Login.png|thumb|300px|''The initial TGS login page.'']] To start the server or access maps and features not yet in the game, as well as bug fixes taken from [https://github.com/cmss13-devs/cmss13-pve/pulls?q=sort%3Aupdated-desc+is%3Apr+is%3Aopen|PRs from the GitHub Pull Request List], you must have the '''<U>Game Master role</U>''' on your CM forum's account to log into the TGS. | |||
Navigating to the TGS WebPanel will show you an '''OpenID Connect Login page''' where you can sign in using your forum account. Afterwards you'll be greeted with this page. | |||
{{Center|[[File:PVE_TGS.png|1000px]]}} | |||
[[File:PVE_TGS_PR.png|thumb|400px|''A list of PRs that are currently Test-Merged'']] From here, you can select and then access a server by clicking on '''Accesss'''. '''<span style="color:orange">You should always check if they are currently being used in the <U>Server tab</U> first by the Online/Offline status</span>''' before doing anything else. | |||
Test Merge list by navigating to the '''<U>Repository tab</U>''' on the left-hand side. '''Each servers retain the list of the last Pull Requests that have been Test-Merged.''' If the list of the PRs are satisfactory, then you can move onto '''[[PVE:GM_Handbook#Starting_and_Closing_the_Server|starting the server proper.]]''' | |||
==== The Quick Short List for Starting and Closing the Server ==== | |||
# Log into TGS Webpanel. | |||
# Choose the relevant server and press '''Access'''. | |||
# At <U>'''Repository'''</U>, review, remove, or add PR TMs as needed. Click compile and check for errors. | |||
# At <U>'''Deployment'''</U>, Compile and Deploy Repository of the compiled TM List. | |||
# At <U>'''Server'''</U>, press '''Start''' | |||
# Once the server is ready to be closed, at <U>'''Server'''</U>, use '''Graceful Action''' dropdown, select '''Shutdown'''. | |||
# Use <U>restart server</U> verb in-game. | |||
=== Making Your Own Test Merge List === | |||
'''But if none of the servers have the PRs you want Test-merged, or has something you want to take out,''' then you'll have to compile the list of the PRs you want instead. Generally speaking, there are some rules to be considered. | |||
[[File:PVE_TGS_TM.png|thumb|450px|''It is as simple as adding and removing PRs using the minus and plus buttons.'']] | |||
* Unless told otherwise by the PR author, do not TM draft PRs. | |||
* Check all the PRs for conflicts with the base code before Test-Merging. | |||
* '''<span style="color:orange">Do not TM PRs with [DNTM]</span> or "Do Not Test Merge" in the title and label.''' | |||
* '''<span style="color:orange">Do not TM PRs that changes anything with character preference</span>''' such as new flavortext system, character creation option, loadout option, etc. | |||
* ''If two PRs change the same files, such as 2 PRs balancing the same gun. There will ''likely'' be conflicts that disallow both PRs to be Test-merged at the same time.'' | |||
* ''If you're not sure, ask, if there's no clear answer; simply don't Test Merge it.'' | |||
'''To add the PRs you want into the TM list, scroll down towards the Test Merges list.''' | |||
[[File:PVE_TGS_TMS.png|thumb|350px]] | |||
* '''To add a new PR, use the <span style="color:lime">green plus button.</span>''' | |||
* '''To remove a PR, use the <span style="color:red">red minus button.</span>''' | |||
* To change a PR's commit version that is already in TM list, use the <span style="color:cyan">blue refresh button</span>, '''rare use case since the PRs are automatically updated by the TGS.''' | |||
A new pop up will appear with the dropdown list of selectable commit versions. ''Generally you will always want to use the latest commit version which is selected by default.'' | |||
[[File:PVE_TGS_Commit.png|thumb|450px]] | |||
* '''Pressing save will confirm the PR's TM status''', where you can find it in the list above. | |||
Once everything you want has been put into a list, the second last step is to '''compile the Test Merges''', this is to ensure that <span style="color:orange">there are no code conflicts between the base game code and the PRs, as well as the PRs between themselves.</span> | |||
[[File:Intercoms.png|thumb|left]] ''You can manually add a PR which has been closed to the TM list by inputing it's PR hash number into the "Manual Test Merge Entry" entry, then hit the blue "Add Test Merge" button. <span style="color:orange">It's inadvisable to do this with any PRs that weren't passing all their checks and closed by the github stalebot however.</span>'' | |||
---- | |||
[[File:PVE_TGS_Fail.png|thumb|200px|''Details on the error of the deployment can be found by clicking Error Details.'']] | |||
=== Compiling Failed === | |||
'''<U>Although last lists of TMs are discouraged</U>''', a frequent side effect of having multiple PRs that touches the same files in the TM list is a <span style="color:red">compile error</span> caused by '''conflicts between the PRs and the base code or between themselves.''' | |||
In short, the two touches the same code and are not compatible with each other and <span style="color:orange">'''the PR causing the conflict must be removed.'''</span> | |||
[[File:PVE_TGS_Reason.png|thumb|400px|''Conflicting PRs are listed here and can be easily referred by the Hash number.'']] This can be done relatively easily by checking the <span style="color:red">'''Error Detail'''</span> below, where a pop up will appear. | |||
* One of the relevant PRs causing the conflict can then be referred to via the '''PR Hash # Number''' as well as conflicting files. | |||
* You may need to open the other PRs on your testmerge list to find which ones are conflicting with the one provided error details. | |||
* The PR itself may be conflicting with the base code, in that case, the author of the PR will need to update it. | |||
=== Successful Compile and Deploying the List === | |||
[[File:PVE_TGS_Deploy.png|thumb|500px|''Here you can deploy the code you've compiled, usually taking no longer than a minute.'']] Amazing, now that you've cleared up the conflict, gotten your PR list, and is ready to start the server, the last step before doing so is to '''deploy the selected TMs onto the server itself'''. ''(Optionally, you can toggle on '''<U>Compile & Deploy after changes</U>''' to automatically deploy the list after a successful compile.)'' | |||
* Simply navigate to the '''<U>Deployment tab</U>''' and press '''Compile & Deploy Repository''' | |||
The code will then '''<U>change on the next restart/reboot of the server</U>''', which means that you can compile and deploy the TM list you want while the server is running without interrupting it. | |||
And that's it! Wait for it to finish deploying and you're ready to start your very first server. | |||
---- | |||
=== Starting and Closing the Server === | |||
[[File:PVE_TGS_Actions.png|thumb|450px|''The action menu for starting, shutting down server in the Server tab.'']] To start a server, navigate to the '''<U>Server tab</U>''' under ''<U>Deployment</U>''. Here you can see the status of the server, numbers of connected client, etc. | |||
Scroll down to '''Actions''' section, which should look like this. | |||
* '''<span style="color:green">To start the server,</span>''' press '''Start''' | |||
* '''<span style="color:orange">To shut down the server,</span>''' use the dropdown menu for <span style="color:orange">'''Graceful Action''' and select '''Shutdown'''</span>. From there you can use the '''<U>restart server</U>''' verb in-game where the server will not reboot once it is restarted. | |||
* '''Do not force the server to stop or restart from the TGS menu unless absolutely necessary''' such as in the case that no GMs are able to connect to the server. | |||
---- | |||
= ===== Setting Up a Game ===== = | |||
This section will talk about '''preparations needed to run a game''' before and after the players arrive as well as '''planning out your game.''' | |||
= Before You Announce = | |||
[[File:PVE_Game_lobby.png|thumb|''Welcome to the game lobby'']] You have everything set up? The server's online and active? That's wonderful, '''now you'll have to do some pre-game preparations'''. These things can take a lot of time and we don't want to let players wait in the lobby or on the ship itself, so we'll start our work before announcement starts. | |||
You will be met with this screen, it may be intimidating at first with all the tools at your disposals, but '''<span style="color:orange">this section will guide you through the minimum needed to get everything going. [[PVE:GM_Toolkit|Check this page for the full list of frequently used tools.]]</span> | |||
<br> | |||
<br> | |||
== Choosing the Factions and the Maps == | |||
[[File:PVE_Map_select.png|thumb|''The menu for map selection should look like this.'']] The first thing to do is to decide your faction and map, '''<span style="color:orange">this must be your first course of action since it involves restarting the server.</span>''' | |||
'''Factions are tied directly to the ship map selected''', for example: USS Golden Arrow for USCM, USS Rover for FORECON, SSV Chapaev for UPP, and so on. | |||
# Go to the <U>'''Server'''</U> tab. | |||
# Use <U>M: Change Ship Map</U> to change the faction's ship map. | |||
# Use <U>M: Change Ground Map</U> to change the ground map. | |||
# <U>M: Override Next Map</U> can be used to change the ground map to a ''.DMM'' map file on your device. | |||
# After the ship and ground map has been selected use <U>Restart Server</U> to apply changes on the next restart. From there, you can continue your preparations. | |||
---- | |||
== Player Factions == | |||
Relatively speaking, you're the GM of your own game. The sky is a limit on what faction you'd like to run and have players play; be it USCM, W-Y, or even factions we do not have ship map for like the CMB, US Army, Colonists, Raiders, or Borgia Industries. | |||
However, '''<span style="color:orange">only the following factions are prepared with adequate content for standard play including a shipmap and balancing.</span>''' The following shipmaps corresponds to the following factions. | |||
{| style="border: 2px solid black; class="mw-collapsible" | |||
! style="background-color:teal; width:150px;"|'''Faction''' | |||
! style="background-color:teal;"|<center>'''Description'''</center> | |||
! style="background-color:teal;"|<center>'''Players'''</center> | |||
! style="background-color:teal;"|<center>'''Shipmap'''</center> | |||
|- | |||
|style="width:200px; border: 2px solid black; border-bottom: 2px solid black; padding: 5px;" | [[PVE:Lore_Guide|USCM (Sun Riders A-Sect)]] | |||
|style="border: 2px solid black; border-bottom: 2px solid black; padding: 5px;" | Your standard run-of-the-mill [[USCM|colonial marine forces]]. Consists of a Platoon Commander on APC or shipside overwatch, a leading Section Sergeant, a corpsman, 2 Squads each with a squad leader, a smartgunner, and two riflemen. | |||
* <u>'''USCM is the default and ideal faction for mosts operations, they're a versatile force for offensive and defensive.'''</u> | |||
* Their fast-firing weaponry alongside large ammo count makes short work of both xenomorphs and human combatant alike. | |||
* The amount of lore established also allows for the most well-crafted characters and immersive experience. | |||
|style="border: 2px solid black; border-bottom: 2px solid black; padding: 5px;" | <center>11</center> | |||
|style="border: 2px solid black; border-bottom: 2px solid black; padding: 5px;" | <center>[[PVE:Lore_Guide|USS Golden Arrow]]</center> | |||
|- | |||
|style="width:200px; border: 2px solid black; border-bottom: 2px solid black; padding: 5px;" | USCM FORECON (Snake Eaters Squad) | |||
|style="border: 2px solid black; border-bottom: 2px solid black; padding: 5px;" | The USCM's own reconnaissance force consists of 7 personnel; a squad leader, an assistant squad leader, a corpsman, a smartgunner, a radio telephone operator, and 2 riflemen. '''FORECON performs mission-critical objectives, scour for intel, and set up the area for future marine operations.''' | |||
* FORECON comes without any sentries, helmets, overwatch, and one of the smartgun replaced with a heavy pulse rifle. | |||
* <u>'''This lowered survivability and makes them less ideal for the standard horde-setting missions for both xenomorphs and human combatants.</u> | |||
* '''FORECON are often used for narrative or special gimmick missions (such as stealth mission or assasination).''' <br> | |||
''<span style="color:orange">For most FORECON missions, the GM's CoyCO is the squad's overwatch. The players will want to be able to contact you, marking another responsibility on top of running the game.</span>'' | |||
|style="border: 2px solid black; border-bottom: 2px solid black; padding: 5px;" | <center>7*</center> | |||
|style="border: 2px solid black; border-bottom: 2px solid black; padding: 5px;" | <center>USS Rover</center> | |||
|- | |||
|style="width:200px; border: 2px solid black; border-bottom: 2px solid black; padding: 5px;" | UPP Naval Infantry (Red Dawn Platoon) | |||
|style="border: 2px solid black; border-bottom: 2px solid black; padding: 5px;" | [[UPP|The Union of Progressive People]]'s equivalent of the USCM marines. The Naval Infantry comes in a platoon of well-trained volunteers led by a platoon sergeant under an officer. | |||
* <u>'''In contrast to the USCM, the UPP specializes more in slower-firing, high damage, high penetration weaponry.''' | |||
* '''This makes them more favored for armored human force engagements.'''</u> <br> | |||
* '''The slower firing rate causes them to be easily swarmed. ''' | |||
* '''The raised armor penetration, incendiary, and impact explosive weaponry ensures that any friendly fire are amplified by a larger amount.''' | |||
|style="border: 2px solid black; border-bottom: 2px solid black; padding: 5px;" | <center>11</center> | |||
|style="border: 2px solid black; border-bottom: 2px solid black; padding: 5px;" | <center>SSV Chapaev</center> | |||
|- | |||
|style="width:200px; border: 2px solid black; border-bottom: 2px solid black; padding: 5px;" | W-Y PMC (AZURE-15/16 Taskforce) | |||
|style="border: 2px solid black; border-bottom: 2px solid black; padding: 5px;" | [[W-Y|W-Y Corporation]]'s private military contractors are a well-equipped force of mercenaries looking to earn some cash doing W-Y's dirty work. | |||
* <u>'''Mirroring that of a USCM and FORECON section respectively, the PMC comes equipped with slightly more advanced weaponry.'''</u> <br> | |||
* '''The PMC's commonly used for espionage and cover-up missions as well as sample and technology procurement amongst other things.''' | |||
|style="border: 2px solid black; border-bottom: 2px solid black; padding: 5px;" | <center>11/7*</center> | |||
|style="border: 2px solid black; border-bottom: 2px solid black; padding: 5px;" | <center>USCSS Obsidian Falk/Onyx</center> | |||
|- | |||
|style="width:200px; border: 2px solid black; border-bottom: 2px solid black; padding: 5px;" | Royal Marine Commandos (Gamma Troop) | |||
|style="border: 2px solid black; border-bottom: 2px solid black; padding: 5px;" | The [[Three_World_Empire|Three World Empire]]'s most elite of troops. Their equipments far superior than any other human factions despite the low number of troops. | |||
* '''The RMC composes of multiple specialists alongside highly trained marines and NCOs forming up Command Section, Assault Team, and Fire Support Team.''' | |||
* Coming with specialist such as mortar operator, marksman, sniper, grenadier, sappers, and all marines equipped with 3-round burst-firing NSG scoped rifle. | |||
* <u>'''The RMC specializes in defending and attacking fortifications. The CN-20 gas grenade takes care of assaulting horde of xenomorphs, but they're easily swarmed, making them less ideal for XAI OPs.'''</u> | |||
|style="border: 2px solid black; border-bottom: 2px solid black; padding: 5px;" | <center>11*</center> | |||
|style="border: 2px solid black; border-bottom: 2px solid black; padding: 5px;" | <center>HMS Brynhild</center> | |||
|} | |||
''* No shipside overwatch officer'' | |||
---- | |||
The following are recommended choices for '''allied prop squad.''' These factions include combat roles that do not need a lot of set up for decent player experience. | |||
{| style="border: 2px solid black; class="mw-collapsible" | |||
! style="background-color:teal; width:150px;"|'''Faction''' | |||
! style="background-color:teal;"|<center>'''Description'''</center> | |||
! style="background-color:teal;"|<center>'''Type'''</center> | |||
|- | |||
|style="width:200px; border: 2px solid black; border-bottom: 2px solid black; padding: 5px;" | United States Army | |||
|style="border: 2px solid black; border-bottom: 2px solid black; padding: 5px;" | The US Army branch of the United America is a more well equipped counterpart to the USCM, though slower to respond and often kept in garrisons of core worlds. | |||
* '''The army lacks individual training and skill which made the USCM indepent, but makes up with more varied specialists and better equipment.''' | |||
* Combat engineers, technicians, gunners, grenadiers, etc. take up a training aspect where a trooper might lack. | |||
|style="width:100px; border: 2px solid black; border-bottom: 2px solid black; padding: 5px;" | <center>Military</center> | |||
|- | |||
|style="width:200px; border: 2px solid black; border-bottom: 2px solid black; padding: 5px;" | United Americas Colonial Guard | |||
|style="border: 2px solid black; border-bottom: 2px solid black; padding: 5px;" | The UACG garrisons the frontier world, often being volunteers enlisting to protect their homeworld from faunas and other threats. | |||
* '''Barely equipped with outdated equipment, the UACG are nonetheless ready to fill in the defensive lines for their family.''' | |||
|style="width:100px; border: 2px solid black; border-bottom: 2px solid black; padding: 5px;" | <center>Militia</center> | |||
|- | |||
|style="width:200px; border: 2px solid black; border-bottom: 2px solid black; padding: 5px;" | United States AeroSpace Force | |||
|style="border: 2px solid black; border-bottom: 2px solid black; padding: 5px;" | The ‘space-navy’ of the United States, the USASF is the branch largely responsible for spacelifting, aerospace combat, and planetary assault support and logistics. | |||
* '''Most USASF personnel are specialists and shipside crew with minimum combat experience.''' | |||
* '''Para-Rescue Technicians and Security Forces should be used for more solid combat experiences.''' | |||
|style="width:100px; border: 2px solid black; border-bottom: 2px solid black; padding: 5px;" | <center>Navy/Airforce</center> | |||
|- | |||
|style="width:200px; border: 2px solid black; border-bottom: 2px solid black; padding: 5px;" | UPP Territorial Guardsman | |||
|style="width:700px; border: 2px solid black; border-bottom: 2px solid black; padding: 5px;" | Like those of the UACG, Territorial Guardsmen are generally lightly trained UPP militias from the frontier colonies for defense of the border systems. | |||
* '''The Territorial Guards make up their lack of discipline and equipment with numbers.''' | |||
* '''The Territorial Guards are often unarmored, making their survivability low.''' | |||
|style="width:100px; border: 2px solid black; border-bottom: 2px solid black; padding: 5px;" | <center>Militia</center> | |||
|- | |||
|style="width:200px; border: 2px solid black; border-bottom: 2px solid black; padding: 5px;" | USCM CBRN Troops | |||
|style="width:700px; border: 2px solid black; border-bottom: 2px solid black; padding: 5px;" | The CBRN are specialized marine troops trained in handling biological and radiological hazards; be it an infestation, an outbreak, a quarantine, or nuclear armageddon. | |||
* '''Equipped with flamethrowers and fire-proof biosuit, they're ideal for handling <i>non-typical</i> threats...''' | |||
|style="width:100px; border: 2px solid black; border-bottom: 2px solid black; padding: 5px;" | <center>Militia</center> | |||
|} | |||
---- | |||
=== Jobs and Adjusting Job Slots === | |||
[[File:PVE_Marine_Squad.png|thumb|''Standard marine organization.'']]The standard player count for most factions are <U>'''11 players total'''</U>. This generally includes '''a Platoon Commander''', '''a Section Sergeant''', '''2 Squad Leaders''', '''a Corpsman''', as well as '''2 Gunners''' and '''4 Riflemans'''. | |||
* ''Beware that the exception to this rule are FORECON, Onyx PMC, and RMC.'' | |||
* ''You can use the adjust-job-slots verb to see what the default slot of each role are.'' | |||
<br> | |||
Sometimes, you may want extra players that are rolled as part of the squad instead of [[PVE:GM_Handbook#Props_and_Player_Props|using player props]]. In this case '''you can manually adjust the job slot before the game starts.''' Opening slots after the game start will allow players in the lobby to join empty slots. | |||
[[File:PVE_Adjust_jobs.png|thumb|250px|''The Adjust Job Slots menu.'']] | |||
# Navigate to <U>'''Server'''</U> tab. | |||
# Use <U>Adjust Job Slot</U> under '''Round''' category. | |||
# Select the job you want to change the number of. | |||
# Change the number and hit confirm. | |||
[[File:Intercoms.png|thumb|left]] '''<span style="color:orange">It must be noted that jobs <u>should always be adjusted up, not lowered.</u></span> The landmark on the maps will attempt to spawn the default amount of jobs, even if the round has the job selected to 0 or less than the default number.''' | |||
---- | |||
<br> | |||
== Preparing the Field == | |||
Now that you have selected the player faction and map to use, it's time to '''do preparations before you announce.''' This is done so that <U>'''players that are spawned in won't have to wait too long until you're ready for their drop.'''</U> | |||
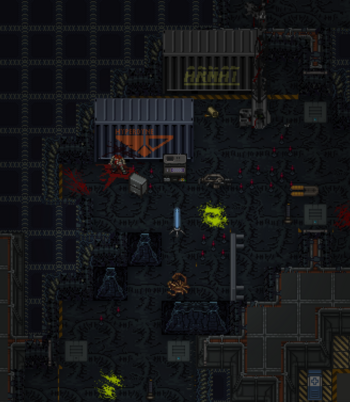
* [[PVE:GM_Handbook#Further Preparations|Many functions and preparations cannot be done until the round starts proper]], this refers to when the '''delay countdown timer reaches 0 and players are spawned in'''. [[File:PVE_Preparation.png|thumb|350px|''A small area set-up.'']] | |||
* In this case, we want to do as much preparations that '''CAN''' be done before the round starts proper. | |||
* <span style="color:orange"><U>'''Ideally, the players should not have to wait longer than 40 minutes after they spawn before they begin to drop onto the mission'''</U></span>, this means [[PVE:GM_Handbook#The_Brief|giving the Platoon Commander brief]] as soon as you can. | |||
So what can we do before the round starts? | |||
* Spawn [[PVE:GM_Handbook#Starting_Equipment|player equipments]] before they spawn in. | |||
* Spawn items, objects, as well as turfs (such as resin walls) to create a scene of the mission area or objectives. | |||
* Mark down [[PVE:GM_Handbook#Gamemode,_Concepts,_and_Objectives|objective areas]] for ease of teleportation between important landmarks. | |||
* Prepare areas and equipment for [[PVE:GM_Handbook#Props_and_Player_Props|player props]] before they are spawned in. | |||
On how to spawn items and turfs, [[PVE:GM_Toolkit#Creating_Objects|visit the GM Toolkit here.]] | |||
=== Gamemode, Concepts, and Objectives === | |||
'''There wouldn't be an operation without an objective or mission the players must accomplish.''' Whether you plan to bring up a horde of controlled enemy or pre-spawn everything and let it all play out without any intervention, the players should be working towards something. [[File:PVE_TacMap_Objective.png|thumb|250px|''Setting up objectives will make them appear on the tac-map for players.'']] | |||
* Objectives should be something that is <u>'''reasonable and accomplishable'''</u> for the player characters to do. | |||
* Objectives should be able to be <u>'''quickly summarized and easily understood'''</u> by players using keywords such as ''fetch'', ''eliminate'', or ''defend''. | |||
* Objectives <u>'''location should be identifiable'''</u> by marking them on the map, given a general area, or given instructions to reach said objective. | |||
* Not all objectives have to be given to the players at the start, but players should have an obvious way to learn of these objective later down the line. | |||
* Objectives are not required for [[PVE:GM_Handbook#Green_and_Blueshift|Greenshift and Blueshift]] where the players may create their own fun or roleplay between each other. | |||
==== Marking Objectives ==== | |||
[[File:PVE_Objective_Menu.png|thumb|200px|''Marking objectives.'']] To mark an objective, [[PVE:GM_Toolkit#Game_Master_Panel|navigate to the GM Panel]]. There you can use <U>Click Objective</U> on any objects to make it an objective. | |||
# Navigate to <U>'''Game Master'''</U> tab. | |||
# Use <U>Game Master Panel</U>. | |||
# Use <U>Click Objective</U> on the item or turf you want made an objective. | |||
# Select the number and color of the objective, which will then show on the map accordingly. | |||
* Marking an objective not only helps the players find where the objective is, but '''allows you as a GM to quickly teleport between them''' in the GM Panel as well. | |||
* '''The objective marker on the map will move with the item marked''', making them easy to find. | |||
* If the marked item is somehow deleted or destroyed, the objective will disappear. | |||
==== Common Objective Types ==== | |||
==== Common Gamemode Types ==== | |||
---- | |||
[[File:PVE_Garrow_Armory.png|thumb|245px|''The Default Golden Arrow Armory.'']] | |||
=== Starting Equipment === | |||
After you've chosen the factions players are up against and how they're going to fight is to adjust the player's equipment accordingly. | |||
* <u>'''Equipment adjustment can make or break the game, causing it to be easier or harder accordingly'''</u>; more sentries will help with security, HEAP rounds will kill enemies faster, etc. | |||
* Conversely, '''lack of equipment''' will cause the players to [[PVE:GM_Handbook#Attrition|attrition and run out of supply.]] This may be desirable in some situations. | |||
<br> | |||
The standard equipment each factions are given also varies, '''some may lack a type of equipment while others having plenty more.''' Here are some of the commonly spawned extra equipment for the players. | |||
{| style="border: 2px solid black; class="mw-collapsible" | |||
! style="background-color:teal; width:64px;"|'''Icon''' | |||
! style="background-color:teal;"|<center>'''Equipment'''</center> | |||
! style="background-color:teal;"|<center>'''Description'''</center> | |||
|- | |||
|style="border: 2px solid black; border-bottom: 2px solid black; padding: 5px;" | [[File:Big_Ammo_Box_10mm.png]] | |||
|style="width:100px; border: 2px solid black; border-bottom: 2px solid black; padding: 5px;" | <center>Ammunition</center> | |||
|style="border: 2px solid black; border-bottom: 2px solid black; padding: 5px;" | Be it just more (or less) ammunition, special types such as HEAP or special buckshot, incendiary, etcetera can heavily impact a round. '''An abundance of ammunition can allow the marines to continue their work without needing resupply while a lack of incentivizes rationing.''' | |||
* Special ammunitions such as HEAP (armor piercing), incendiary, or special buckshot can quickly put down threats, while causing major harm in friendly fire incidents. | |||
* Ammunition should generally be given in-between objectives, as marines cannot carry all the boxes, though it is a good idea to give them extra ammo when more slots are given to players. | |||
|- | |||
|style="border: 2px solid black; border-bottom: 2px solid black; padding: 5px;" | [[File:M40 HEDP.png]] | |||
|style="width:100px; border: 2px solid black; border-bottom: 2px solid black; padding: 5px;" | <center>Grenades</center> | |||
|style="border: 2px solid black; border-bottom: 2px solid black; padding: 5px;" | Unlike ammunition, <u>'''explosives can destroy an entire GM assault wave or the player's own within seconds'''</u>. There are multiple variants that are not given to players by default. Some commonly utilized grenades are; | |||
* Incendiary grenades (HIAM) ignites the area round it, blocking movement and burning targets. Ideal for hordes of xenos. | |||
* Canister shot (M108) turns your grenade launcher into a shotgun. Ideal for close quarter combat. | |||
* White Phosporus (WPSI) explodes into a cloud of smoke that lights anyone within it on fire while blocking vision. Ideal for HAI. | |||
* HEAP grenade (HEAP) <span style="color:orange"><u>'''explodes on direct impact gibbing anyone it hits'''</u></span>, designed to specifically destroy vehicles. Ideal for armored targets. | |||
|- | |||
|style="border: 2px solid black; border-bottom: 2px solid black; padding: 5px;" | [[File:Metal.png]] | |||
|style="width:100px; border: 2px solid black; border-bottom: 2px solid black; padding: 5px;" | <center>Materials</center> | |||
|style="border: 2px solid black; border-bottom: 2px solid black; padding: 5px;" | '''Ideal for defensive operations''', be it sandbags, metal, or plasteel. The amount determines how big and in-depth the defensive perimeter will be for the players. | |||
|- | |||
|style="border: 2px solid black; border-bottom: 2px solid black; padding: 5px;" | [[File:Weaponcase.png]] | |||
|style="width:100px; border: 2px solid black; border-bottom: 2px solid black; padding: 5px;" | <center>Weapon Kits</center> | |||
|style="border: 2px solid black; border-bottom: 2px solid black; padding: 5px;" | Weapon kits are often given to spice up gameplay and give variety to the players; | |||
* '''M5 RPG''', '''SADAR''', or the '''XM99 Plasma rifle''' for anti-armor purposes. <span style="color:orange"><u>'''These can cause extreme harm in a friendly fire.'''</u></span> | |||
* '''M42A Sniper''' or '''HIMAT missile system''' for long range engagements. | |||
* Other little things such as '''M1771 light shotgun''', '''Boiler-T flamethrower system''', '''Silenced M56 Smartgun''', etc. can fill up every niche and gameplay style option for the players. | |||
|- | |||
|style="border: 2px solid black; border-bottom: 2px solid black; padding: 5px;" | [[File:SentryGun.png]] | |||
|style="width:100px; border: 2px solid black; border-bottom: 2px solid black; padding: 5px;" | <center>Sentries</center> | |||
|style="border: 2px solid black; border-bottom: 2px solid black; padding: 5px;" | '''Sentries of any type allows for automated perimeter security.''' Though hard to carry, the deployment of these can fill in marine flanks and give extra firepower during defensive operations. <br> | |||
The less sentry given, the more impactful the loss of one is. '''Sentries are not given to some factions.''' | |||
|- | |||
|style="border: 2px solid black; border-bottom: 2px solid black; padding: 5px;" | [[File:C4.png]] | |||
|style="width:100px; border: 2px solid black; border-bottom: 2px solid black; padding: 5px;" | <center>Explosive Charges</center> | |||
|style="border: 2px solid black; border-bottom: 2px solid black; padding: 5px;" | '''Ideal for sabotage missions''', explosive charges allow marines to destroy virtually any structures or equipment with ease. <br> | |||
If no explosive materials are given on site and no explosive weaponry are issued, it may be ideal to give the players some extra explosive charges for their objectives. | |||
|- | |||
|style="border: 2px solid black; border-bottom: 2px solid black; padding: 5px;" | [[File:Motion_Detector.gif]] | |||
|style="width:100px; border: 2px solid black; border-bottom: 2px solid black; padding: 5px;" | <center>Motion Detector</center> | |||
|style="border: 2px solid black; border-bottom: 2px solid black; padding: 5px;" | Motion detectors or MDs allow for marines to identify threat direction before they descend upon the players. <br> | |||
This gives them better battlefield awareness, allowing better response time. '''Motion detectors are not given to some factions.''' | |||
|} | |||
=== Environment Crafting === | |||
= Game Announcement = | |||
== Player's Rights to Knowledge == | |||
== Event Information Notices == | |||
= After Game Starts = | |||
== Further Preparations == | |||
=== Shuttle and LZ Manipulation === | |||
=== Death Prop and Corpses === | |||
== The Briefing == | |||
= === Running an Operation === = | |||
= Operation Pacing and Length = | |||
== Operation Tone == | |||
= Combat Scenario = | |||
== Hints and Clues == | |||
== Combat Front == | |||
== Difficulty Adjustment == | |||
=== Combat Pacing === | |||
=== Volume === | |||
== A Note on PvP == | |||
= Attrition = | |||
== Resupplying == | |||
= About AI = | |||
= Xenomorph AI = | |||
== Spawning Xenomorph AI == | |||
=== The Xenomorph Ecology === | |||
== XAI Orders == | |||
=== Hives and Capturing === | |||
= Human AI = | |||
== Spawning Human AI == | |||
== About Human AI == | |||
=== Human Armaments === | |||
=== Command and Tactics === | |||
= ======= Story Telling ======== = | |||
== The Story Arc == | |||
== Narration == | |||
=== Command Announcement, TITAN 1200 === | |||
=== Alerts, Atom Narrate, Subtle Message === | |||
== Environmental Storytelling == | |||
== Props and Player Props == | |||
=== Randomized Spawning === | |||
=== Props vs Players === | |||
== OOC Exposition == | |||
= ====== Miscellenous ====== = | |||
== Working With Other GMs == | |||
== Green and Blueshift == | |||
Latest revision as of 23:17, 15 January 2026
Welcome to Being a Game Master
Congratulations on being selected through deliberation or welcome back from your break.
You probably have a lot of ideas, storylines, and characters you want to play out or tell to players and friends. But what now? You have your role, your access, your tools, but where does one even begin preparing a game, let alone run one?
Well, this guide is for new GMs starting to run a game; the concept, pacing, philosophy, and steps involved. This is not a simplified step-by-step guide, but rather a large compile list of everything involving running a PvE game.
For an extensive look into the tools necessary to achieve this, check out GM and Admin Tools.
This guide has sections partly inspired from BlackDragon's Mission Theory as well as a compile of guides and steps existing and scattered on Discord.
======== TGS Guide ========
This section will talk about extensive use of the TGS Webpanel web-program to start, close, and update PvE servers.
Starting the Server
Before you can begin the preparations, you need to know how to start the server. Generally speaking, when you're in training the Trainer GM will handle it for you, but this is an important aspect nonetheless.
Servers are handled by TGS Webpanel, which is a web-based connection to the server box. There are 4 servers available as of July 2025 for PvE: Red, Green, Blue, and Halo. Each servers contain a list of Test Merges or TMs which are modification of the base code that are not officially part of the game. This can range from bug fixes, to maps, to features.
Choosing Your Server and Test Merges

To start the server or access maps and features not yet in the game, as well as bug fixes taken from from the GitHub Pull Request List, you must have the Game Master role on your CM forum's account to log into the TGS.
Navigating to the TGS WebPanel will show you an OpenID Connect Login page where you can sign in using your forum account. Afterwards you'll be greeted with this page.


From here, you can select and then access a server by clicking on Accesss. You should always check if they are currently being used in the Server tab first by the Online/Offline status before doing anything else.
Test Merge list by navigating to the Repository tab on the left-hand side. Each servers retain the list of the last Pull Requests that have been Test-Merged. If the list of the PRs are satisfactory, then you can move onto starting the server proper.
The Quick Short List for Starting and Closing the Server
- Log into TGS Webpanel.
- Choose the relevant server and press Access.
- At Repository, review, remove, or add PR TMs as needed. Click compile and check for errors.
- At Deployment, Compile and Deploy Repository of the compiled TM List.
- At Server, press Start
- Once the server is ready to be closed, at Server, use Graceful Action dropdown, select Shutdown.
- Use restart server verb in-game.
Making Your Own Test Merge List
But if none of the servers have the PRs you want Test-merged, or has something you want to take out, then you'll have to compile the list of the PRs you want instead. Generally speaking, there are some rules to be considered.

- Unless told otherwise by the PR author, do not TM draft PRs.
- Check all the PRs for conflicts with the base code before Test-Merging.
- Do not TM PRs with [DNTM] or "Do Not Test Merge" in the title and label.
- Do not TM PRs that changes anything with character preference such as new flavortext system, character creation option, loadout option, etc.
- If two PRs change the same files, such as 2 PRs balancing the same gun. There will likely be conflicts that disallow both PRs to be Test-merged at the same time.
- If you're not sure, ask, if there's no clear answer; simply don't Test Merge it.
To add the PRs you want into the TM list, scroll down towards the Test Merges list.

- To add a new PR, use the green plus button.
- To remove a PR, use the red minus button.
- To change a PR's commit version that is already in TM list, use the blue refresh button, rare use case since the PRs are automatically updated by the TGS.
A new pop up will appear with the dropdown list of selectable commit versions. Generally you will always want to use the latest commit version which is selected by default.

- Pressing save will confirm the PR's TM status, where you can find it in the list above.
Once everything you want has been put into a list, the second last step is to compile the Test Merges, this is to ensure that there are no code conflicts between the base game code and the PRs, as well as the PRs between themselves.

You can manually add a PR which has been closed to the TM list by inputing it's PR hash number into the "Manual Test Merge Entry" entry, then hit the blue "Add Test Merge" button. It's inadvisable to do this with any PRs that weren't passing all their checks and closed by the github stalebot however.

Compiling Failed
Although last lists of TMs are discouraged, a frequent side effect of having multiple PRs that touches the same files in the TM list is a compile error caused by conflicts between the PRs and the base code or between themselves.
In short, the two touches the same code and are not compatible with each other and the PR causing the conflict must be removed.

This can be done relatively easily by checking the Error Detail below, where a pop up will appear.
- One of the relevant PRs causing the conflict can then be referred to via the PR Hash # Number as well as conflicting files.
- You may need to open the other PRs on your testmerge list to find which ones are conflicting with the one provided error details.
- The PR itself may be conflicting with the base code, in that case, the author of the PR will need to update it.
Successful Compile and Deploying the List

Amazing, now that you've cleared up the conflict, gotten your PR list, and is ready to start the server, the last step before doing so is to deploy the selected TMs onto the server itself. (Optionally, you can toggle on Compile & Deploy after changes to automatically deploy the list after a successful compile.)
- Simply navigate to the Deployment tab and press Compile & Deploy Repository
The code will then change on the next restart/reboot of the server, which means that you can compile and deploy the TM list you want while the server is running without interrupting it.
And that's it! Wait for it to finish deploying and you're ready to start your very first server.
Starting and Closing the Server

To start a server, navigate to the Server tab under Deployment. Here you can see the status of the server, numbers of connected client, etc.
Scroll down to Actions section, which should look like this.
- To start the server, press Start
- To shut down the server, use the dropdown menu for Graceful Action and select Shutdown. From there you can use the restart server verb in-game where the server will not reboot once it is restarted.
- Do not force the server to stop or restart from the TGS menu unless absolutely necessary such as in the case that no GMs are able to connect to the server.
===== Setting Up a Game =====
This section will talk about preparations needed to run a game before and after the players arrive as well as planning out your game.
Before You Announce
You have everything set up? The server's online and active? That's wonderful, now you'll have to do some pre-game preparations. These things can take a lot of time and we don't want to let players wait in the lobby or on the ship itself, so we'll start our work before announcement starts.
You will be met with this screen, it may be intimidating at first with all the tools at your disposals, but this section will guide you through the minimum needed to get everything going. Check this page for the full list of frequently used tools.
Choosing the Factions and the Maps

The first thing to do is to decide your faction and map, this must be your first course of action since it involves restarting the server.
Factions are tied directly to the ship map selected, for example: USS Golden Arrow for USCM, USS Rover for FORECON, SSV Chapaev for UPP, and so on.
- Go to the Server tab.
- Use M: Change Ship Map to change the faction's ship map.
- Use M: Change Ground Map to change the ground map.
- M: Override Next Map can be used to change the ground map to a .DMM map file on your device.
- After the ship and ground map has been selected use Restart Server to apply changes on the next restart. From there, you can continue your preparations.
Player Factions
Relatively speaking, you're the GM of your own game. The sky is a limit on what faction you'd like to run and have players play; be it USCM, W-Y, or even factions we do not have ship map for like the CMB, US Army, Colonists, Raiders, or Borgia Industries.
However, only the following factions are prepared with adequate content for standard play including a shipmap and balancing. The following shipmaps corresponds to the following factions.
| Faction | |||
|---|---|---|---|
| USCM (Sun Riders A-Sect) | Your standard run-of-the-mill colonial marine forces. Consists of a Platoon Commander on APC or shipside overwatch, a leading Section Sergeant, a corpsman, 2 Squads each with a squad leader, a smartgunner, and two riflemen.
|
||
| USCM FORECON (Snake Eaters Squad) | The USCM's own reconnaissance force consists of 7 personnel; a squad leader, an assistant squad leader, a corpsman, a smartgunner, a radio telephone operator, and 2 riflemen. FORECON performs mission-critical objectives, scour for intel, and set up the area for future marine operations.
For most FORECON missions, the GM's CoyCO is the squad's overwatch. The players will want to be able to contact you, marking another responsibility on top of running the game. |
||
| UPP Naval Infantry (Red Dawn Platoon) | The Union of Progressive People's equivalent of the USCM marines. The Naval Infantry comes in a platoon of well-trained volunteers led by a platoon sergeant under an officer.
|
||
| W-Y PMC (AZURE-15/16 Taskforce) | W-Y Corporation's private military contractors are a well-equipped force of mercenaries looking to earn some cash doing W-Y's dirty work.
|
||
| Royal Marine Commandos (Gamma Troop) | The Three World Empire's most elite of troops. Their equipments far superior than any other human factions despite the low number of troops.
|
* No shipside overwatch officer
The following are recommended choices for allied prop squad. These factions include combat roles that do not need a lot of set up for decent player experience.
| Faction | ||
|---|---|---|
| United States Army | The US Army branch of the United America is a more well equipped counterpart to the USCM, though slower to respond and often kept in garrisons of core worlds.
|
|
| United Americas Colonial Guard | The UACG garrisons the frontier world, often being volunteers enlisting to protect their homeworld from faunas and other threats.
|
|
| United States AeroSpace Force | The ‘space-navy’ of the United States, the USASF is the branch largely responsible for spacelifting, aerospace combat, and planetary assault support and logistics.
|
|
| UPP Territorial Guardsman | Like those of the UACG, Territorial Guardsmen are generally lightly trained UPP militias from the frontier colonies for defense of the border systems.
|
|
| USCM CBRN Troops | The CBRN are specialized marine troops trained in handling biological and radiological hazards; be it an infestation, an outbreak, a quarantine, or nuclear armageddon.
|
Jobs and Adjusting Job Slots

The standard player count for most factions are 11 players total. This generally includes a Platoon Commander, a Section Sergeant, 2 Squad Leaders, a Corpsman, as well as 2 Gunners and 4 Riflemans.
- Beware that the exception to this rule are FORECON, Onyx PMC, and RMC.
- You can use the adjust-job-slots verb to see what the default slot of each role are.
Sometimes, you may want extra players that are rolled as part of the squad instead of using player props. In this case you can manually adjust the job slot before the game starts. Opening slots after the game start will allow players in the lobby to join empty slots.

- Navigate to Server tab.
- Use Adjust Job Slot under Round category.
- Select the job you want to change the number of.
- Change the number and hit confirm.
It must be noted that jobs should always be adjusted up, not lowered. The landmark on the maps will attempt to spawn the default amount of jobs, even if the round has the job selected to 0 or less than the default number.
Preparing the Field
Now that you have selected the player faction and map to use, it's time to do preparations before you announce. This is done so that players that are spawned in won't have to wait too long until you're ready for their drop.
- Many functions and preparations cannot be done until the round starts proper, this refers to when the delay countdown timer reaches 0 and players are spawned in.
A small area set-up. - In this case, we want to do as much preparations that CAN be done before the round starts proper.
- Ideally, the players should not have to wait longer than 40 minutes after they spawn before they begin to drop onto the mission, this means giving the Platoon Commander brief as soon as you can.

So what can we do before the round starts?
- Spawn player equipments before they spawn in.
- Spawn items, objects, as well as turfs (such as resin walls) to create a scene of the mission area or objectives.
- Mark down objective areas for ease of teleportation between important landmarks.
- Prepare areas and equipment for player props before they are spawned in.
On how to spawn items and turfs, visit the GM Toolkit here.
Gamemode, Concepts, and Objectives
There wouldn't be an operation without an objective or mission the players must accomplish. Whether you plan to bring up a horde of controlled enemy or pre-spawn everything and let it all play out without any intervention, the players should be working towards something.

- Objectives should be something that is reasonable and accomplishable for the player characters to do.
- Objectives should be able to be quickly summarized and easily understood by players using keywords such as fetch, eliminate, or defend.
- Objectives location should be identifiable by marking them on the map, given a general area, or given instructions to reach said objective.
- Not all objectives have to be given to the players at the start, but players should have an obvious way to learn of these objective later down the line.
- Objectives are not required for Greenshift and Blueshift where the players may create their own fun or roleplay between each other.
Marking Objectives

To mark an objective, navigate to the GM Panel. There you can use Click Objective on any objects to make it an objective.
- Navigate to Game Master tab.
- Use Game Master Panel.
- Use Click Objective on the item or turf you want made an objective.
- Select the number and color of the objective, which will then show on the map accordingly.
- Marking an objective not only helps the players find where the objective is, but allows you as a GM to quickly teleport between them in the GM Panel as well.
- The objective marker on the map will move with the item marked, making them easy to find.
- If the marked item is somehow deleted or destroyed, the objective will disappear.
Common Objective Types
Common Gamemode Types

Starting Equipment
After you've chosen the factions players are up against and how they're going to fight is to adjust the player's equipment accordingly.
- Equipment adjustment can make or break the game, causing it to be easier or harder accordingly; more sentries will help with security, HEAP rounds will kill enemies faster, etc.
- Conversely, lack of equipment will cause the players to attrition and run out of supply. This may be desirable in some situations.
The standard equipment each factions are given also varies, some may lack a type of equipment while others having plenty more. Here are some of the commonly spawned extra equipment for the players.
| Icon | ||
|---|---|---|

|
Be it just more (or less) ammunition, special types such as HEAP or special buckshot, incendiary, etcetera can heavily impact a round. An abundance of ammunition can allow the marines to continue their work without needing resupply while a lack of incentivizes rationing.
| |

|
Unlike ammunition, explosives can destroy an entire GM assault wave or the player's own within seconds. There are multiple variants that are not given to players by default. Some commonly utilized grenades are;
| |

|
Ideal for defensive operations, be it sandbags, metal, or plasteel. The amount determines how big and in-depth the defensive perimeter will be for the players. | |

|
Weapon kits are often given to spice up gameplay and give variety to the players;
| |

|
Sentries of any type allows for automated perimeter security. Though hard to carry, the deployment of these can fill in marine flanks and give extra firepower during defensive operations. The less sentry given, the more impactful the loss of one is. Sentries are not given to some factions. | |

|
Ideal for sabotage missions, explosive charges allow marines to destroy virtually any structures or equipment with ease. If no explosive materials are given on site and no explosive weaponry are issued, it may be ideal to give the players some extra explosive charges for their objectives. | |

|
Motion detectors or MDs allow for marines to identify threat direction before they descend upon the players. This gives them better battlefield awareness, allowing better response time. Motion detectors are not given to some factions. |