Your IP address will be publicly visible if you make any edits.
Marine Quickstart Guide
From CM-SS13 - Wiki
More actions
Ignore the macho bravado you’ve overheard drunken marines spout at bars—especially those with no scars on their faces and all their limbs intact. They arecocky and alive because they haven’t actually seen a xeno in real life. If they knew anything worthwhile about these things, they would be shaken andreserved. If you see a xeno, you do one thing: run. You don’t stand a chance, you never did and you never will. You think you’ve got superior firepower in your hands? Use all your big and fancy toys to cover your escape, but get the hell out of there. - excerpt from the Free league's Alien Roleplaying Game.
So you've just joined for the first time as a Marine? No idea what you're doing? Our Space Station 13 Guide is pretty good as an introduction to the interface! Otherwise, let this guide get you up to scratch! If you have any questions, we have an inbuilt mentor questions system made specifically so you can ask for help in-game. Just press F1 and click the (Gameplay Mechanics/ Mentorhelp) option and one of the server's mentors will be happy to help you. We also have an ever expanding ingame Tutorial. Just join the server and you will be able to enter it from the Lobby screen.
As a foreword, rounds on this server may last between one hour to three hours! Make sure you have the time commitment to sit a full round (provided that your character survived that long).
The Rules
Read the rules! CM-SS13 is a medium role-play server and you are expected to abide by the rules established by the server staff. If a staff member says to do something, do it. If they tell you to stop doing something, stop. It will save both you and the staff a lot of trouble and effort. There is no excuse for not reading the rules. If you have been banned, fairly or unfairly, you can click here Ban Appeal to appeal your Ban. You have been warned. Thank you and enjoy the game.
Character Setup
This is simple for the most part. You will create your character on the setup character page. You have many options for character appearance, such as head hair, facial hair, and skin tone. Experiment until you're satisfied or just leave it - the default works just as well.
Now, take note of Marine Role Preferences - this won't be too useful for you currently, but you'll need it when you get more experienced and start trying new roles. Close the character window.
Upon finishing your character design, don't ready up - instead wait for the game to start. Click "Join the USCM!" and select the Squad Marine role from the list.
Keep in mind - roles that are simple on other servers, such as Cargo Technician, don't translate perfectly into Colonial Marines. Cargo Technician, for example, still requires a basic to fair knowledge of the server and mechanics in order to function. Stick to Squad Marine.
Who Orders Who
As a Standard Marine you're at the bottom of the chain of command. You take orders from all ranks above you, but should focus on sticking to your squad, led by your Squad Leader and Staff Officer. You are assigned to one of four squads at round start - Alpha, Bravo, Charlie, or Delta.
Should your Squad Leader be unavailable to lead, command of the squad will be passed down to the Fireteam Leader or anyone named by the outgoing Squad Leader or Staff Officer.
Keep in mind the chain of command. If both the squad leader and FLs are killed, the Specialist (LCPL) will take over as the acting squad leader due to their combat focused gameplay rather than the Medics and Engineers who are also the same rank (LCPL).
Please note: depending on your squad, these icons will change colors. Make sure you're following the color on your armor and the squad on your ID!
Marine Law
In rare cases, you may be given illegal orders. There is a big difference between orders that violate Marine Law versus orders that violate the Server Rules. Orders that break Marine Law are considered an In Character (IC) issue and are thus something you may resolve in game so long as the situation is roleplayed. Orders that break the server rules are an Out Of Character (OOC) affair. Should you be given orders that would violate the rules then you should contact the staff via A-Help (F1). It's better to be thrown in the brig because you wouldn't murder someone the Squad Leader didn't like, than being banned for doing so.
Senior Enlisted Advisor
Whenever you're in-game, there may be a Senior Enlisted Advisor on the ship. Their job is to help new players go through the basics and teach you anything if you have a question for them. Their office is in cryogenics, where you spawn. They're here to help you so don't be afraid to ask them questions.
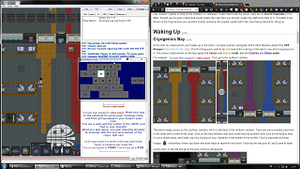
At the start of a deployment, you'll wake up in the ship's cryosleep quarters alongside all the other Marines aboard the USS Almayer (Click here for the map). If you have not set your preferred squad in your character setup then you will be randomly assigned to one of four squads, Alpha, Bravo, Charlie and Delta.
For example:
When you spawn you will notice you will be very hungry, you will want to grab some food from one of the food vendors in the room you spawn in. Food is important as being hungry(red/yellow) slows you down, furthermore eating food helps to replenish lost blood. Once you've had your fill, you'll want to head out the door on the left and go to the prep rooms to get geared.
Waking up during red alert
During red alert the ship is in active danger to both itself and the crew onboard. If you are unfortunate enough to have woken up from cryosleep during red alert, stay calm. You are issued with a self defense kit with a few things inside. A loaded Mod 88 4 Pistol with a Rail Light attached, an M5 'Night Raider' Bayonet , and a random large food component from any type of MRE . It is important to get geared as soon as possible and report to your active Squad Leader as quickly as you can. It is also recommended to ask on general shipside radio chat by writing :g before your message to ask what is the reason behind the red alert.
Preparations Room
One key to success is ensuring that you are well equipped. Attacking without a weapon may result in catastrophe. These next steps should prepare you for combat.
Go to an ColMarTech Automated Closet in your squad's room (click it once with an empty hand to see the interface), select the Standard Marine Apparel button, this equips you with your standard issue uniform and helmet.
After this, you will want to vend a set of medium armor (from the Armor Set), a satchel (from the Backpack Set) if you don't have one, a Flare Pouch and a First-Aid Pouch (splints, gauze and ointment) (from the Pouches Set). These items should all be automatically equipped to your character. See the Combat and First Aid sections for the pouches' uses, respectively. Other equipment such as kits, attachments, ammunition and extras are optional and can be vended as long as you have points for it.
At this point you will notice you have 45 points to spend on extra items. The breadth of options may feel overwhelming so this guide will recommend some items you may want to consider purchasing.
SensorMate Medical Hud (15p): Lets you see the health of yourself and all other humans/marines, this can be useful for you to tell how injured someone is at a glance
B12 Pattern Marine Armor (30p): Provides protection almost as good as heavy armour but with the movement speed of medium armour.
M41A Extended Magazine (10p): Larger magazines for your primary weapon that hold 60 bullets instead of 40.
Webbing (10p): Grab this and click your uniform to attach it. This lets you carry up to three items on your uniform, including magazines.
Brown or black webbing. (10p) This is similar to the base webbing, the important difference is the storage space and the size limit. Brown/Black webbing can hold five small items such as splints or gauze alongside MREs.
After this, head to one of the ColMarTech Automated Weapons racks at the left of the automated closets.
{{SItem|M41A_Variants.gif]] Vend an M41A Pulse Rifle and an M41A Magazine. Load the M41A with the magazine[[File:M41Amag.png}}by clicking on the rifle with the magazine in your active hand. The Rack offers a good basic attachment, the Rail Flashlight. Take one and click on your rifle with the attachment in your active hand to attach it to your rifle then click Toggle Rail Flashlight in the bottom right to turn it on. Lastly, place the M41A onto your suit storage.
Fill your ammo rig with 5 M41A magazines .
Fill your Satchel with M94 Flare Packs. Flare Packs are used to refill your Flare pouch and will also provide you with an abundance of flares to use when advancing against the enemy.
There are three slots in your armor, you can put two magazines and an MRE in it.
If your uniform and armor are the snow variant , you are going to Shivas Snowball. The environment on the planet is cold and will harm you over time, so make sure your keep your armor and other clothes that keep you warm or else you will freeze to death.
This is but one basic loadout, as you become more experienced with the game you will discover and learn more advance or unique loadouts.
A basic marine inventory loadout.
There are many more options for weaponry and gear in the vendor, but it's best to keep things simple and effective while you're still learning the rest of the game.
Communication
T to talk
Use T or the chat box at the bottom of the screen (you need to type Say before your message if you use the chat box at the bottom).
Once you've geared up and put on your radio earpiece, you should start hearing radio communications. It is very important in this game to communicate with others. As a squad marine, you'll have your squad channel on your earpiece, you can talk on it by typing ; before your message. Your squad channel can be heard by everyone in your squad.
You are able to talk in general chat with :g before your message. This only works when you're on the ship.
There are intercoms around the ship. To use them, stand next to one, add :i in front of your message. You can also click the intercom to open its interface, then engage the mic.
List of radio channels and relevant keys:
Keep in mind that you can examine your headset to see a list of radio keys available to you, don't expect to have access to all of these unless you're playing a command role.
Radio Channel:
Key(s):
Command
:v
Military Police
:p
Requisitions
:u
Medical
:m
Engineering
:n
Alpha Squad (command headset)
:a
Bravo Squad (command headset)
:b
Charlie Squad (command headset)
:c
Delta Squad (command headset)
:d
Echo Squad (command headset)
:e
Your squad's channel or Common channel (If not a squad role)
;
Common channel (If you are a squad role, only works when you're on the ship. )
:g
Responder channel (Both Friendly and Hostile) Department channel (based on headset)
:h
Intel
:t
JTAC
:j
Requisitions Bay
After gearing up, you may choose to go to kit your weapons out with the attachment vendors in your prep or the requisitions office (west of briefing) and line up to receive your optional attachments. The Quartermaster (QM) and Cargo Technicians (CT) are not obligated or guaranteed to serve you, but they will usually dispense some attachments, grenades and small amounts of extra back room gear to you, such as a webbing or a machete. Being polite to the requisitions staff makes things easier for everyone, including saying please and thank you.
Briefing Room
If you joined in late in the game, there will be no briefing thus you should head straight for the hangar.
If you woke up at the start of the round, there will usually be a briefing either in the designated briefing room, west of Requisitions, or in the hangar between the Dropships. Command will clarify the location of briefing through an announcement, and you can always ask your squad. Find a seat in your squad's color-coded seating area. The acting Commanding Officer will be along soon to describe the situation and his/her overall game plan and will issue your squad their initial orders. Remember to behave yourself. Listen to what your Commanding Officer has to say, listen to your Squad Leader, and overall watch your fellow Marines' backs. Stay with the team and you'll do fine.
The Dropships to the Surface
Once briefing ends, head west of the briefing room to the hangar with the rest of your squad. There are two dropships; Dropship One ("Alamo"), deploys to Landing Zone 1 (LZ1), and Dropship Two ("Normandy") deploys to Landing Zone 2 (LZ2), Normandy is on the western side of the hangar and Alamo is on the east. Take the dropship your squad is assigned to, or whichever one drops you to the Forward Operating Base (FOB) if you joined late. Typically one dropship is assigned to close air support, so you can expect there to only be one dropship running transport to the surface, it's just which one. Ask your squad on the radio what to do if you're unsure of where a dropship is or which one takes you to the surface (It will usually be the one mentioned in the top right corner of the screen as the Primary landing zone). The ride isn't smooth, so you'll want to sit down and buckle in by standing on top of a chair and dragging your Marine's sprite to the chair. To unbuckle yourself, click the chair with an empty hand or click Resist .
In the field
It's highly recommended you read the bullet path guide so that you understand how the bullet mechanics work on this server. In regards to friendly fire, apologize to them and call a medic over or if the person you shot is heavily injured, drag them to one.
Lighting
A flare can cover a 7x7 area so spread them out
Light and vision are vital to your success. There are three main ways to see further into the darkness.
Turn on your shoulder lamp by clicking the armor icon in the top left corner. This provides a consistent but short range of light around you.
Turn on a rail flashlight attachment by clicking the activate rail flashlight button on the bottom right of the UI . This provides more light than your shoulder lamp (it also works when the weapon is equipped at waist).
Toss flares around to illuminate the area around you. To use flares, click the Flare Pouch with an empty hand to take a flare out, clicking the flare (or press Z) to activate it. Activating automatically sets it to throw so you can just click a tile to throw it or drop it (Q). If you are pushing and run out of flares, you can pick up flares which are already on the ground and throw them.
Turning on floodlights, click the floodlight with an empty hand.
Movement
Optimal offensive corner positioning.
Avoid being out of position. Stick with your squad. Ask yourself, if you got pounced on and dragged away, are there marines near you to save you? If the answer is no, you should fall back to your squad. Stay away from positions that are isolated or could easily get you isolated, such as around corners and being near doorways. Watch others positions and firing lanes, don't move into their firing lanes and stop shooting when others move into yours. If you want a marine to move out of your way, point at them (shift + middle click) and ask them to move. Catch up if you fall behind and ask the squad to wait; wait if you went ahead. If you're out of sight of friendlies, they can't help you if you are attacked. When pushing into a room/choke point, move aside immediately after passing the door/choke point, allowing following squadmates to move in and fire.
Intents
Avoid using
Help intent (top left, 1) during combat, use
Grab intent (bottom right, 3) instead. The reason being is it replaces shuffling between friendlies with pushing when there is another marine in your way. Though, don't push others into danger (fire, acid globs).
Harm intent (bottom left, 4) is also a good choice as it allows you to point blank enemies next to you if you click on them. Make sure to switch from harm intent if you are being treated by a medic, as you will automatically knock autoinjectors from their hand if they try to inject you.
Use
Help intent when you are out of combat as it allows you and other marines to move past each other. The one occasion to use
Help intent during combat is to allow wounded marines to retreat past you in a narrow space, after they have gone past switch back to
Grab or
Harm.
Help intent killsHelp intent kills
Interacting with the environment
Overcoming obstacles
Climb: drag yourself onto the obstacle (barricades without barbed wire, window frames and tables).
Move marines over obstacles: click them with
Grab intent or right-click -> pull a marine, then click (Z) two times (few seconds cooldown in between) to upgrade it to . Then click the unbarbed wire barricades/window frame/table next to you. You can also use throw to throw them up to 7 tiles away and over unbarbed wire barricades but not over window frames/tables.
Flip tables: drag the table to the direction you want to flip toward then release, or right-click -> flip table. Reverse the drag or right-click -> flip table again to set the table back.
Ladders & Wall Holes
Click the ladder to go up or down
Look up or down a ladder or through a wall hole: drag the ladder or wall sprite onto your character, to cancel this view you can either walk away from the ladder or click Cancel camera view in the Object tab (you can bind a hotkey for it with Macros).
Throw a flare up or down a ladder or through a wall hole: activate the flare then click on the ladder/wall hole. Also applies to flashlights.
Throw a grenade up or down a ladder or through a wall hole: without priming the grenade, click on the ladder/wall hole with a grenade in your hand, the grenade will be automatically primed and thrown.
Weapon handling
Avoid firing one-handed on rifles, shotguns, SMGs... See the full GIF
The pulse rifle takes two hands to shoot properly. If fired in one hand, the accuracy will be severely reduced, and recoil and spread is greatly increased, meaning that you would have a hard time hitting the target with it. To wield it with both hands, click on the rifle in your active hand (Z). You'll know you've wielded your rifle when your other hand shows that it's occupied, your character's graphic readies the rifle, and you move slower. To shoot the rifle, just point the cursor at a spot and click. Be very careful not to shoot fellow Marines. Aim for centre mass, so a friendly fire will not be too deadly. To lower the rifle again, click it (Z) in your active hand.
Although most weapons can be fired one-handed, you'll have decreased accuracy and increased recoil due to it. To counter the drawbacks, you can use attachments, though be aware that if you want to later on two hand the weapon your attachments won't provide the same effects for two handed as they did for 1 handing it. Due to how most weapons can be fired 1 handed you'll want to use Alt + Click to toggle the gun safety on and off so you don't accidentally fire into friendlies.
You will eventually need to reload your rifle once it runs out of ammo. If you hear a long beeping sound, your rifle's automatically ejected its magazine. You can also unload the magazine early by clicking the rifle with your other hand or by clicking the eject magazine button in the bottom right. Then you can reload the gun as usual. You can reload the gun with one hand (Tactical Reload) by dragging a magazine onto the weapon in your hand.
How to use attachments
Click Activate Weapon Attachment at the bottom right to activate (Underslung Grenade Launcher/Mini Flamethrower/Masterkey Shotgun, etc) or press Shift and Space to activate the underbarrel attachment. You can alter this keybind in setup character. The UGL on M41A comes unloaded.
Reloading weapon attachments: activate the attachment then feed the attachment with its ammo type. Underbarrel grenade launchers take M40 grenades, Masterkey Shotguns take buckshot shells, and Mini Flamethrowers take flamethrower tanks.
Using Rail Scope: other than Activate Weapon Attachment , Toggle Rail Flashlight also works for it.
Removing attachments: click field strip weapon in the Weapon tab to select which attachment to remove, or install another attachment to replace it.
How to reload other types of firearms
Reloading a shotgun: Hold the shotgun shell boxwith one hand, then swap to your other hand and click the shell box to take out a handful of shells. Drop the shell box and pick up your shotgun and load it with the shells one by one (M37 can hold eight shells plus one in the chamber). Pump the shotgun' with Unique Action Button or use Space by default. You need to pump it after each shot fired.
Reloading revolver: Click it with an empty hand to open the revolving cylinder, load the speedloader, click the revolver again with an empty hand to close the revolving cylinder
Refilling Incinerator Tanks: Incinerator Units can only be refueled once a tank is completely out of fuel. Once emptied, pull out the Incinerator Tankby either unloading the weapon or clicking the incinerator unit with an empty hand, then clicking on a fuel tank, welder pack or welding tank with the tank in your hand.
Tips
Avoid moving if you are burst firing near friendlies
Turn on/off gun's safety: alt-click the gun. You cannot fire during this mode, but this is useful when clearing hive structures (such as weeds, sticky resin) with your weapon instead of the knife.
Toggle burst fire mode: Click the Toggle Burst Fire Mode Button , you're hear a soft clicking sound and a message indicating that a weapon has set to burst fire mode. You'll start to fire your weapon in bursts but with decreased accuracy, increased spread and recoil. Toggling Burst Fire Mode again will set the gun back to its regular firing mode.
Reload when you're almost out of rounds: When you got time to reload and you're almost out of rounds in your magazine in your weapon, it's better to exchange magazines with your weapon than keeping a low round magazine. This will ensure you that you will not suddenly run out of ammo when you're suddenly facing a hostile threat. Don't forget to reload when you need to.
The same goes with shotguns, always insert shells when you have the time, again, to ensure you're prepared for a sudden attack. And maybe pump the shotgun to ensure you're ready to fire.
Checking rounds on a weapon without an inbuilt ammo counter (M41A, M39 SMG, etc): This only applies to mag-fed weapons. Hold the weapon in one hand and click the weapon to pull out the magazine, then examine the magazine in your hand. This shows how many rounds do you have in the magazine. Then insert the magazine back when you need it.
You are able to throw items above certain objects and people where you're normally not able to. In order to do so, press Ctrl+R to activate a high toss. Click where you want to throw it and there will be a 1 second delay before you throw it over an object/mob.
Grenade
Throwing: Priming (Z) then click the place you want to throw to (priming automatically sets it to throw). Though, it's better to use the UGL. Do NOT throw/fire grenades (directly/diagonally) if there is a marine/wall next to you in the firing direction, it will bounce back to you.
M56D mounted smartgun
Man the gun: drag the gun onto yourself.
Toggle burst fire or automatic fire: ctrl-click it.
Has IFF so go hog wild shooting over friendlies but watch out for survivors who do not have IFF.
Watch out for shooting barricades as it only takes a couple of bursts to completely destroy a non ceramic armored barricade.
Use a wrench to turn the gun and a screwdriver to assemble and disable the gun after activating the gun in hand.
Fires fastest and most accurate on semi automatic.
Reasons that your firearm is not firing
"*click*"
The weapon is out of ammo or a loaded magazine/shell/rocket has not been loaded. Hold a gun and its respective ammo with two hands and click the weapon while your ammo is in the active hand, this will load the weapon or using any reloading methods listed above with their respective weapon. If the weapon does not have an auto-unload system (the gun blares beeps to signify the weapon ran out of ammo), you unload the empty magazine manually by clicking on the unload magazine button.
A shell from a recently fired pump-action shotgun is not 'pumped' or loaded. Activate Unique action to the shotgun to unload the spent shell and load a new one.
A bullet inside the revolver is not in the right chamber. Either pull the trigger (fire) or activate Unique Action to the weapon a few times until the bullet is in the chamber.
"You need a more secure grip to fire the weapon!"
You're using a two-handed weapon with one hand. Two hands are required to fire two-handed weapons (Like sniper rifles, flamethrowers, rocket launchers, etc.), use the two-handed gun to wield it with both hands.
Rifles, shotguns, SMGs and such weapons, on the other hand, can be fired with one hand, but firing such weapons will have their recoil increased majorly, which throws off your cursor's aim.
Pistols, machine pistols and revolvers can be wielded properly with one hand, as such, you can fire these weapons without a lot of recoil.
A Gyroscopic Stabilizer attachment will make a two-handed weapon greatly decrease recoil and increase accuracy while firing one handed.
"The safety is on!"
Your weapon's safety fire mode is on, alt-click the gun to disable safety mode.
"You don't know how to use [Weapon]..."
You're either holding a Smartgun or a Specialist Weapon with a role that does not have the knowledge to use this weapon. Only a Smartgunner (as well as a Commanding Officer) and a Specialist can use these weapons respectively. A simple squad marine cannot use the Smartgun without smartgun training, a Smartgunner cannot use the M5 RPG without heavy weapons training and so on.
"The [Weapon] flashes a warning sign indicating unauthorized use! "
This applies to Corporate Weapons due to their inbuilt fingerprint scanner which means that only Corporate personnel can use this weapon.
|}
Inventory management
What to recover from a dead marineView a container's content: drag the backpack, belt, box, etc onto yourself. This works for containers on the floor or equipped on you, though backpacks will have to be in your hand, or on the floor.
Remove equipment from other marines: drag their sprites onto yours to open their equipment window, click the item names to strip. If the weapon has Magnetic Harness attached, remove their armor. If you see Remove Accessory, it means they have a webbing which often contains ammo or other valuable items, click to take it then either apply it to your uniform or drop the webbing/drop the contents for other marines to use.
To check a pile of items in a tile, alt + click the tile next to you to open the Tile Contents tab, allowing you to view and pick up the items in a big list, instead of right clicking the tile.
Restocking/refill items: drag them to an appropriate vendor. Useful restockable items are Autoinjectors to Nanomed and food/drinks to food/drink vendors.
Your helmet can take two tiny items (protein bar , throwing knife, etc) into it.
Backpack can hold 7 normal size items (2 more than Satchel) but you can't access its content when it's on your back.
Foolishly stumbling out into the darkness alone is one of the easiest ways to get dragged off and killed. An effective and protected marine is one who sticks with as many fellow marines as possible. For your first game, you may want to play a little safer and stay alive longer to get used to the experience, so try to hang around the back or find a well-lit, well-populated area to guard. There's no shame in being terrified of your enemies.
If you are reinforcing the front and you see marines retreating en masse, ask them if the front is lost, fall back with them if yes.
After arriving the front, don't be in the very front, as you don't know about the enemy number/position and the terrain, stay inside the parameter first.
Devoured But Awake
So somehow you find yourself facehugged and awoken inside of an alien? Well some good news. Though you can't blast your way out of it, you can at the very least stab the alien while inside of them. Simply grab either your boot knife by pressing ALT+E or any pointy object and start moving inside of them. You'll start to hear the alien take damage with a distinct squelching sound. It probably won't be enough to bust out of higher tiered aliens but with some luck, you'll be able to reverse chestburst out of an alien, killing them and freeing you in the process.
Captured But Alive
In the unfortunate event that you find yourself facehugged and captured, do not lose hope. Depending on where you are, and how far marines relative to your location, rescue will come soon. Be sure that you inform them beforehand where you are, the xenomorphs will not hesitate to kill you if they feel as if the marines are closing in on your location, or will devour you again to transport you to somewhere more secure. Sadly most of the time, you will be dragged back to their hive, where unless the marines are closing in, will mean certain death due to chestbursting. Upon being secured to a hive nest, you will be given a choice to Ghost your body to spectate the rest of the round or to stay in hopes that someone will come save you.
Knocking on Death's door
Now that you're here and if you have chosen to stay, it is time for self reflection and coordination with the team. Inform them of a few critical things to note if you are able to perceive these things. You don't have to do any of this, but it is sure to help in some capacity.
Location of the hive. If you are unsure if they don't know where it is and communications on the radio are still possible, ask CIC if they can check your tracker location. This will give them a clear indicator of where the hive is, or at least- where you are being kept for the time being.
Structure of the hive. Where the Hivecore and other Captured People are being held. Inform them if there are any traps that they have to look out for when breaching into the hive.
Where is the Queen? Are they on their Ovipositor or did they shed it and began moving elsewhere? If so, in what direction and probable location?
How many other Captured People are there and their status. Be sure to be as accurate as possible, as too little will increase complacency and too many will cause panic in your team mates. Inform CIC of any changes regarding other captured marines. If they are bursted, dead, or still alive.
After that, it is up to you to decide what else to do in this situation. Is your character staying hopeful and prays to God that they will be saved? Is your character pessimistic and curses out each person that wronged them over their lifetime? Whatever happens next, it is up to chance. In any case, thank your for your service to the USCM.
First Aid
First-Aid Pouch
Each First-Aid Pouch contains:
Used to hold a broken/fractured bone of yours in place so you don't die. The time spent of using the splints depends of one's medical skill. It is usually better to ask another Marine to apply this splint as it takes longer for someone to apply a splint to themselves.
A three-use EZ version of the Tricordazine autoinjector. This will inject a chemical that will slowly heal all forms of damage, a good generalist.
A gauze packet with 10 uses that stops bleeding and heals brute damage.
An ointment packet with 10 uses that heals burn damage.
Gauze and ointment need to be targeted to the specific injured body part, you can do this by selecting the body part at the bottom right. Expended autoinjectors can be restocked at NanoMed on Almayer and Dropships by clicking on them with the injector in hand on the NanoMed.
Helping yourself
You can examine yourself for injuries by clicking yourself with an empty hand with
Help intent (top left) .
If you catch on fire, click Resist to roll on the floor and extinguish the flames (you can bind a hotkey for it with Macros).
Critical
If your health went to flashing CRIT, disengage, apply first aid and seek a medic. Otherwise, you will collapse mid-fight.
Broken bones
If you see Something feels like it shattered/ripped in your ____! / broken bone moving in your ____!, stop moving unless you must, as moving with broken bones will cause organ damage. Medics can't treat broken bones other than applying a splint , if a Medic tells you to evac, do it. You can splint yourself too but the process will take a while, instead, you should ask another medic to splint you. Likewise, you can splint other marines.
Organ damage
If your health worsens/vision goes blurry without being attacked, you might have organ damage, seek a Medic and evac if told to do so.
Impeded objects and Shrapnel
If you've been impaled by sharp objects like shrapnel, bone chips or any foreign object lodged into your body, you'll need to remove them quickly so you won't sustain any further damage. It'll look something like this in chat: Your movement jostles the ____ in your ____ painfully. To remove them, simply grab your knife and activate it in your hand (click the knife in your active hand or press Z in hotkeys mode). There will be a small delay before you remove the shrapnel, so stay still while you're doing it. Any sharp object will do, like glass shards and machetes if you have one.
Helping others
You can examine (Shift + Click or Right click -> Examine) other marines to see their visible injuries. If the marine has blood soaking through from under his _____, it means he is bleeding on that part of the body. Use gauzeon the body parts {{SItem|Hud-target.png]] to stop the bleeding. If the marine has a fresh burn on his ______ , it means he has untreated burns in that part of the body. Use ointment[[File:Gauze.png}}on the body parts to salve the burns.
It is vital to move fellow Marines out of danger and pull them to a Medic (Medics can revive dead marines). One less marine being left behind and captured means two less Xenomorphs to be dealt with in the future.
To pull, you can:
Ctrl + Click (in hotkey mode, you don't need to switch to the empty hand with this method)
Click with an empty hand using
Grab intent
Right Click -> Pull.
To help put out the fire on a marine, click them with an empty hand using
Help intent.
If a marine has fallen over, you can help get them up by clicking on them with an empty hand using
Help intent. It works for neurotoxin spit, facehugger (after fallen off) and pain (if not critical).
If you see a marine gasping for air, click them with an empty hand using
Help intent to perform CPR.
Death
Once your character is dead you have two options:
Stay in your body and wait for revival. After five minutes, you will no longer be able to be revived. This is signified by a skull icon in medical HUDs.
Ghost in the OOC tab, then observe the round (Medics can still revive you if you Re-enter Corpse in the Ghost tab. Otherwise you can use the "Go DNR" (Do Not Revive) verb to make yourself unrevivable).
Revive notification
After to the point where you are not revived anymore...
To play as Xeno, click Toggle SpecialRole Candidacy in the Preferences tab, then turn on Xeno preference, you will get this message: You will now be considered for Xenomorph events (where possible). Alternatively, you can turn on "Xenomorph after unrevivable death" so you will get xeno only after the revive timer runs out. You can also click Join as Xeno in the Ghost tab to see if there is any SSD (i.e. away from keyboard) Xeno you can take up.
If you see the announcement "Additional troop reinforcements are being taken out of cryo." or "Emergency troop reinforcements are being taken out of cryo." , you can click Join Response Team in the Ghost tab after to have a chance of respawning as marine reinforcement.
Dog Tags
When one of your brothers and sisters dies in battle, you're able to take their dog tags off.
To do this drag their sprite onto yours while they're deceased, and remove them by clicking on the remove dogtag button.
You're able to stack multiple dog tags by clicking them on each other.
With your collected dog tags, you can put them on the memorial. To do this have your dog tags in your hand and click on the memorial.
The names of the people whose dog tags are in the memorial will be listed at the end of the round.
Tips
Stay away from cornersStay one tile behind cades and close cadesAvoid CQC
If there are a bunch of items on a single tile, instead of right clicking it to see things, you can simply alt+click the tile to see its contents.
Don't panic.
Follow orders unless the orders are considered not advisable or illegal.
Stay with the Squad Leader unless otherwise ordered.
Never go anywhere alone.
Communicate as much as possible with your squad. It would be hard to talk too much.
Report all enemy contact.
Damage is relatively realistic and getting wounded sucks. Don't rambo around or charge in.
Be safe, fall back, stay alive.
Stay one tile behind barricades.
Wearing helmets prevents decapitation (losing your head, killing you instantly).
Your M3 Personal armor has a random chance to soften or even absorb the blow!. The M3-H Pattern Heavy Armor can slow you down, but it has a higher chance of softening or absorbing blows while the M3-G4 Grenadier Armor (Grenadier Specialists only) has a even higher chance of doing so.
If you see a dead body that may be recently deceased, drag them to a squad medic. They MAY be revivable. Remember that dead players may be also online players too!
See also
The following are some links that go further into explaining details and some other Marine roles:

 in your squad's room (click it once with an empty hand to see the interface), select the Standard Marine Apparel button, this equips you with your standard issue uniform and helmet.
 (from the Armor Set), a satchel
 (from the Backpack Set) if you don't have one, a Flare Pouch
 and a First-Aid Pouch (splints, gauze and ointment)
 (from the Pouches Set). These items should all be automatically equipped to your character. See the Combat and First Aid sections for the pouches' uses, respectively. Other equipment such as kits, attachments, ammunition and extras are optional and can be vended as long as you have points for it.
 SensorMate Medical Hud (15p): Lets you see the health of yourself and all other humans/marines, this can be useful for you to tell how injured someone is at a glance
 B12 Pattern Marine Armor (30p): Provides protection almost as good as heavy armour but with the movement speed of medium armour.
 M41A Extended Magazine (10p): Larger magazines for your primary weapon that hold 60 bullets instead of 40.
 Webbing (10p): Grab this and click your uniform to attach it. This lets you carry up to three items on your uniform, including magazines.
 Brown or black webbing. (10p) This is similar to the base webbing, the important difference is the storage space and the size limit. Brown/Black webbing can hold five small items such as splints or gauze alongside MREs.
 After this, head to one of the ColMarTech Automated Weapons racks at the left of the automated closets.
 . Take one and click on your rifle with the attachment in your active hand to attach it to your rifle then click Toggle Rail Flashlight
  in the bottom right to turn it on. Lastly, place the M41A onto your suit storage.
 Fill your ammo rig with 5 M41A magazines
  .
. . Flare Packs are used to refill your Flare pouch and will also provide you with an abundance of flares to use when advancing against the enemy.
 in it.
 , you are going to Shivas Snowball. The environment on the planet is cold and will harm you over time, so make sure your keep your armor and other clothes that keep you warm or else you will freeze to death.


 Turn on your shoulder lamp by clicking the armor icon in the top left corner. This provides a consistent but short range of light around you.
 around to illuminate the area around you. To use flares, click the Flare Pouch with an empty hand to take a flare out, clicking the flare (or press Z) to activate it. Activating automatically sets it to throw so you can just click a tile to throw it or drop it (Q). If you are pushing and run out of flares, you can pick up flares which are already on the ground and throw them.


 at the bottom right to activate (Underslung Grenade Launcher/Mini Flamethrower/Masterkey Shotgun, etc) or press Shift and Space to activate the underbarrel attachment. You can alter this keybind in setup character. The UGL on M41A comes unloaded.


 with one hand, then swap to your other hand and click the shell box to take out a handful of shells. Drop the shell box and pick up your shotgun and load it with the shells one by one (M37 can hold eight shells plus one in the chamber). Pump the shotgun' with Unique Action Button
  or use Space by default. You need to pump it after each shot fired.
 , click the revolver again with an empty hand to close the revolving cylinder
 by either unloading the weapon or clicking the incinerator unit with an empty hand, then clicking on a fuel tank, welder pack or welding tank with the tank in your hand.
 , you're hear a soft clicking sound and a message indicating that a weapon has set to burst fire mode. You'll start to fire your weapon in bursts but with decreased accuracy, increased spread and recoil. Toggling Burst Fire Mode again will set the gun back to its regular firing mode.


 To check a pile of items in a tile, alt + click the tile next to you to open the Tile Contents tab, allowing you to view and pick up the items in a big list, instead of right clicking the tile.
 and food/drinks to food/drink vendors.
 Your helmet can take two tiny items (protein bar
  , throwing knife, etc) into it.
 Backpack can hold 7 normal size items (2 more than Satchel) but you can't access its content when it's on your back.

 Used to hold a broken/fractured bone of yours in place so you don't die. The time spent of using the splints depends of one's medical skill. It is usually better to ask another Marine to apply this splint as it takes longer for someone to apply a splint to themselves.
 A three-use EZ version of the Tricordazine
  A gauze packet with 10 uses that stops bleeding and heals brute damage.
 An ointment packet with 10 uses that heals burn damage.


