Tools of the Trade
The Basics
Power Duty
To setup power, you'll want to locate the geothermal generators ![]() and assess the damage. Depending on the sprite, the generator will need different steps:
and assess the damage. Depending on the sprite, the generator will need different steps:
Note that you can also examine a geothermal generator to see what tool is required for the next step.
APC Maintenance
If the APC hasn't been blown up or destroyed during a gunfight always check the apcs wires by unscrewing the apc frame and click on the apc with your wirecutters, if the wires come up with a mend option, mend the wires with the wirecutters. (Click on mend while holding wirecutters in your active hand.) If someone blew up the apc or blasted it into another dimension follow the steps below.
So, someone decided to throw a grenade next to the APC or you just arrived to a broken APC and your SL has tasked you with fixing it whilst the squad holds off the incoming xeno tide. No need to panic as this section will get you to quickly repair that APC.
- First you'll want to whack off the cover; to do this just hit the APC with any sort of weapon, generally a combat knife is good for this.
- Take out the battery (Power cell) in the APC once the cover is off with an empty hand.
- Use a screwdriver on the APC.
- Use wirecutters on the APC.
- Use a crowbar on the APC.
- Build an APC frame from 2 metal sheets then click on the APC with the APC frame in hand.
- Use wires (Cable Coil) on the APC.
- Click on the APC with a power control module in hand.
- Use a screwdriver on the APC.
- Place a new battery (Power cell) in the APC. (Just click on the APC with the battery in hand.)
- Use a crowbar on the APC.
- Open up the APC pop up window once you've completed all previous steps and turn on the breaker.
SMES Setup
SMES units are used to store power, and then output it to the colony. If you setup power without setting the SMES units, power will not be stored and be wasted. There are two kinds of SMES units to be setup:
Shipside:
While shipside, there will be a total of five SMES units to setup, with one optional one near requisitions, three on the lower floor and two on the upper floor. For the ship, you'll want to tinker with the settings to get the most optimal setup. One simple rule is to make sure the charge is higher than the output, and that all SMES units are equal. You'll want to use the power monitoring computers to see how much to allocate per SMES
Planetside:
On the planet, the generators will provide enough power to be set to max charge and to less output. It won't need fine tuning like the Almayer's systems, as long as it's above 100,000 watts for output on each SMES.
Hacking
Doors
| Wires: | Description: |
|---|---|
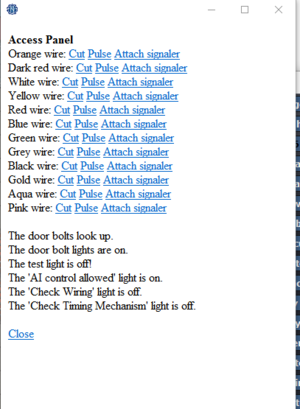
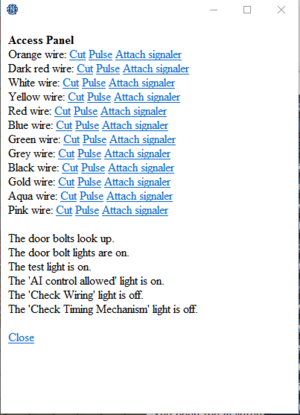
| The door bolts look down | Means that the bolts are currently down, and you will be unable to open the door. Pulsing this wire will open or lower it. |
| The door bolt lights are off | Indicates when bolts are up or down. Off means you won't be able to tell it's bolted |
| The test light is off | The power wire. There are two of these. If the test light is off, you can crowbar it open. |
| The AI control allowed light | Allows control for the AI. Functionally useless in CM |
| The Check Wiring light | No use. |
| The Check Timing Mechanism light | How fast the door closes. If it's on, it will close instantly, crushing people under it. |
| Picture examples | Description |
|---|---|
|
Example of a door that has been modified . In the picture, it shows that the test light has been pulsed, turning it off and making it show you can crowbar your way through the door. | |
|
Example of an untouched door. In the picture, it shows that the door has not been tampered with yet. You'll need the correct ID to open it, and you will not be able to crowbar it open. |
Vendors
| Wires: | Description: |
|---|---|
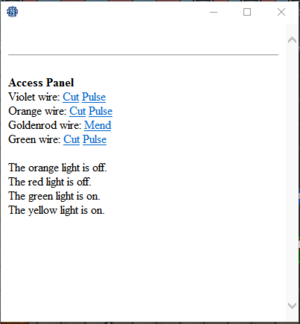
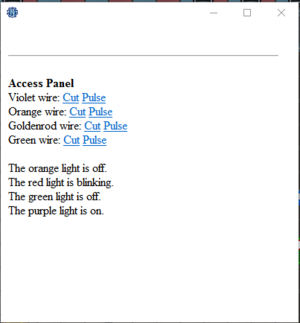
| Orange Light | Electricity wire. If this is on, whenever the vendor is used it will shock the user. |
| Red Light | Firing wire. If this this on, it will launch the contents of the vendor at nearby people. |
| Green Light | Contraband wire. Turning this wire on means non-standard gear will be avaliable. |
| Purple Light | Access wire. Turning this wire off changes it to a yellow light, making it so anyone can dispense the contacts. |
| Picture examples | Description |
|---|---|
|
Example of a vendor that has been modified . In the picture, it shows that the contraband wire has been turned on, allowing for hidden goods to be displayed, and it shows that the access wire is now yellow, allowing anyone to use the vendor, regardless of ID | |
|
Example of an untouched vendor. In the picture, it shows that the vendor has not been tampered with yet. You'll need the correct ID to access it, and you will not be able to dispense hidden items from the vendor |
FOB Defences
Defensive Equipment
Fortifications of the Trade
| Image | Name | Material Needed | Function |
|---|---|---|---|
 |
Wood Barricade | Wood | Used for a hasty defence against aliens. Mostly seen prespawned. |
 |
Metal Barricade | Metal | Used for areas that will be under constant attack. Can be repaired with a blow torch. |
 |
Sandbags | Sandbags | Used for making directional defences, multiple can be applied to a tile. Needs to be filled up with empty sandbags and an entrenching tool. 25 in a filled stack. |
 |
Plasteel Barricade | Plasteel | Used to allow passage by closing it, and providing heavy protection. Can be repaired with a blow torch |
| Barbed Wire | Metal | Used to make barricades and sandbags stronger, and making it so they can't be ran or climbed over. Also damages any thing that attacks it. | |
 |
Wall | Metal | Used to fully block off an area. |
FOB Construction Quick Tips
Barricade Placement
| Barricade Placement | Description |
|---|---|
|
This is an example of what not to do when constructing a defensive position. In the picture on the left you'll see that the xenomorphs are able to hit the barricade without being shot due to it's forward position and as such the xeno will be able to break through and kill that marine with ease. | |
|
This is an example of what you should do when constructing a defensive position. To rectify the above barricade placement errors you'll want to move the barricades back one tile like the photo on the left. By moving the barricades back this will allow you to shoot xenomorphs who are attacking them. |
Barbed Wire
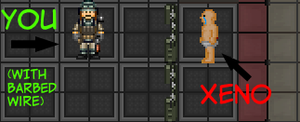
 Barbed wire is a string of sharp metal that will harm and prevent xenos from pouncing over barricades once attached.
| Barbed Wire Tactics | Description |
|---|---|
| In the picture you'll see that the engineer was killed due to the xeno being able to pounce over the barricade. | |
|
Due to the engineer placing barbed wire onto the barricades the xenomorph was unable to jump over. |
FOB Space
| How To: Fob Space | Description |
|---|---|
|
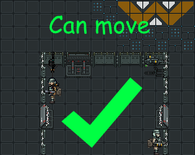
This is an example of what not to do when constructing a defensive position. In the picture you'll see that the FOB has very little space for the marines to move around in which will lead to:
| |
|
This is an example of what you should do when constructing a defensive position. In the picture you'll see that the FOB has ample space to move which means:
|
Fixing Breaches in Defences
| Fixing Defensive Breaches | Description |
|---|---|
|
This is an example of what not to do when attempting to fix a breach in the defensive line with hostiles nearby. In the picture you'll see that this is a highly dangerous and ineffective way to fix the breach in a defensive line if hostiles are nearby. This will let you get slashed up by an alien running up willy nilly, and will give you less time to react if multiple xenos decide to push the defensive line. | |
|
This is an example of what to do when attempting to fix a breach in the defensive line with hostiles nearby. In the picture you'll see that it shows the optimal way of repairing a breach in your defences if xenos are nearby.
|
Misc. FOB tips
| Fob Tips | Description |
|---|---|
|
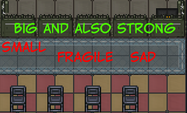
In the picture you'll see that it demostrates that windows, even if reinforced, are not an acceptable replacement for a line of all-american steel barricades.
In summary, avoid using them as a defence. | |
|
Barricades will end up damaged due to the ravages of war and incompetence, and if it isn't horribly damaged, you'll be able to use a blowtorch on it to repair it. This works on metal and plasteel barricades.Note that if a barricade is too damaged you will be unable to fix it.
|


