Guide to Git
Setting up your Coding Environment
Though you can use DreamMaker, and external Git software, for modifying your code and maps, all modern SS13 tooling is set up for Visual Studio Code, so it is highly recommended. You can jump to variable definitions, procs and atoms with ease.
Step 1: Downloading Visual Studio Code
Visual Studio Code is a free code editor (from Microsoft) that you can use to edit, test and publish your code to GitHub.
You can download it from https://code.visualstudio.com/ and run the installer.
Step 2: Forking the Repository
Go to https://github.com/cmss13-devs/cmss13, and at the top right, hit “Fork” - you’ll need a GitHub account for this.
Follow the prompts that come up, and you’ll have your own copy of the code on GitHub.
Step 3: Download Git
You’ll need Git installed to make any changes to the repository. Download it from https://git-scm.com/downloads.
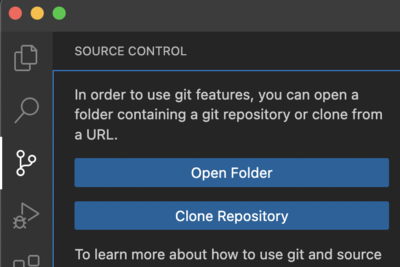
Then, on Visual Studio Code, under the Source Control tab on the left bar - the third option down, you should be presented with the option to “Clone Repository”.
Paste the URL of your fork into the box that pops up - this should be in the format of https://github.com/[YOURUSERNAME]/cmss13. Select a folder to download the repo into, and let it run. It may take awhile.
Step 4: Download Extensions
These extensions to Visual Studio Code will allow the program to read DreamMaker code intelligently and allow you to navigate through the code faster.
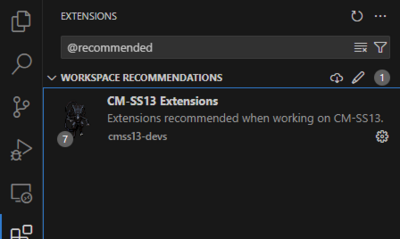
You can get them by clicking on the extensions tab - probably the fourth or fifth option, it looks like three boxes with a fourth being added - and downloading all the “Recommended” extensions.
Also - search for and install GitLens. It makes using the source control features of Visual Studio Code much easier.
Step 5: Finishing Up
You’ve now got a complete clone of the CM-SS13 codebase on your local computer - excluding the xenomorph sprites you would see on the main server. Don’t be alarmed if you can’t see them.
Making a Change
All changes you make to the code must be done on a new branch.
A branch is another version of your codebase - made from your “master” branch - which should be identical to the “master” branch present on the main repo - which changes can be made to without affecting your “master” branch.
A “commit” is a save of your changes to the code you’ve made. Every time you “commit” your changes to the branch, you are saving all your changes made so far. All code must be “committed” before it can be sent to the main repository.
To start with making changes, you must make a new branch on your forked repository, from your master branch. Your master branch should never be committed to, and should be a clean state.
Every PR you make should have a new branch. This allows for commits you make on different branches to not affect your other branches, letting you work on multiple projects at once.
Step 1: Making a New Branch
Press Control + Shift + P to bring up the Command Pallet. This allows you to control Visual Studio Control easily, but we want the command “Create branch from...”. Type that in and press enter to run it. Give your branch a name - like new-helmet. Select which branch to make it from - that will be your master branch.
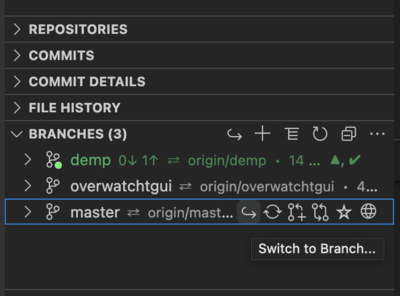
Then, switch to this branch. You can do this at the bottom of the Source Control tab, under the Branches title - you might have to click on it to show all your branches. Right click on your new branch, and select the option to switch to it.
Now, you can make whatever changes you like, and you can commit them to this branch without altering your master branch.
Step 2: Modifying the Code
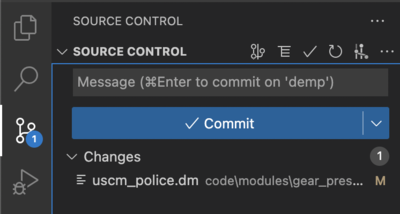
Now, if you make any change to any file within the repo, Git will notice and add it to the modified files in the Source Control tab.
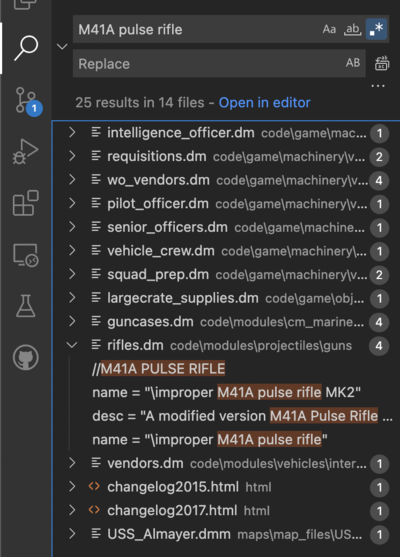
You can make a simple change - such as altering an item description - just to see your code changes reflected in game. To find an item, use the Search tab on the left - the magnifying glass - and type in the name or description if the item as it is in game.
Once you’ve made this change, it’ll be noticed at the top of the Source Control tab.
Step 3: Testing your Code
Press F5 - this will start your code with the debugger attached. This will automatically pause the server and tell you when an error - usually known as a runtime - occurs.
You can press Control-F5 to start without the debugger.
Then, at the bottom right of your Windows interface, click the chevron to view your hidden processes. Click on the green DreamDaemon circle, and you can see the server process that has booted up. Then, on the World tab at the top, press Join. This will log you in to the server, where you will automatically have full Admin permissions.
Find your item in game - or spawn it in with the admin game-panel - and it should have the changes you’ve made in the code. If it doesn’t- you probably didn’t save the file. Terminate the server using the stop button on Visual Studio Code or by right clicking on the DreamDaemon process and pressing Stop.
Step 4: Committing your Changes
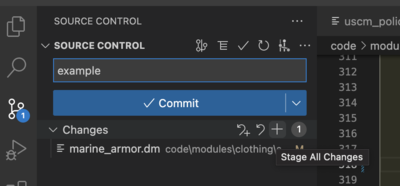
At the top of the Source Control tab, your modified file should be under “Changes”. Hover over the file name you have modified, and press the Plus symbol - or do the same over the Changes button to “stage” your changes.
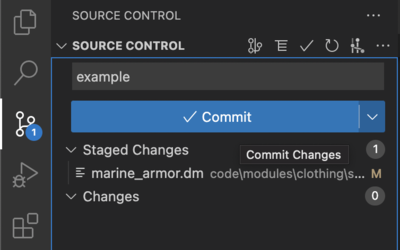
Once your changes have been “staged”, they have been selected to be committed. You can give it a commit message on the box with “Message”, and press the tick at the top to commit those changes.
Once this has been completed, you’ve committed your changes locally - but they have not been published to your GitHub fork.
Step 5: Publishing to GitHub
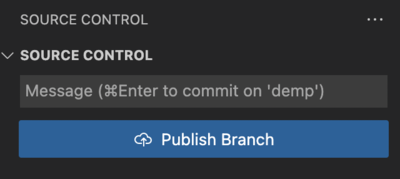
This is quite simple. On the Source Control tab, you should now see the “Publish Branch”. This will publish your branch, along with your changes, to your fork on GitHub. You can navigate to it on the web to see these changes.
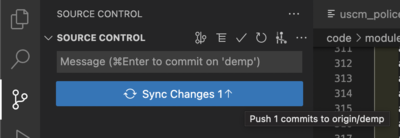
If you make any further changes to this branch and commit them, you will see the “Sync Changes” option instead. This does the same thing - “pushing” all your changes to your fork on GitHub.
Making a Pull Request
A “pull request” is a *request* for the main repository to *pull* - or more accurately, merge - the contents of your branch into the master branch. This process allows for code to be tested and reviewed by maintainers/developers, before being merged into the master branch.
Head to your repository on GitHub - not the main CM-SS13 repo. Then, click on “master” and type in the name of your branch.
Hit “Contribute” on the right, and it’ll bring up the option to Create Pull Request. Clicking on this automatically sets the merge as being from your branch to the master branch at the main CM-SS13 repository.
Hopefully, there's no merge conflicts, and it gives the happy green "Able to automatically merge" - however, if someone else has changed code you're changing in your PR after you made the branch for this feature, you'll need to manually deconflict the files. Read on for more about merge conflicts.
Step 2: Creating the Pull Request
Give your PR a good title - this will be the message of the commit to the main branch containing all your code.
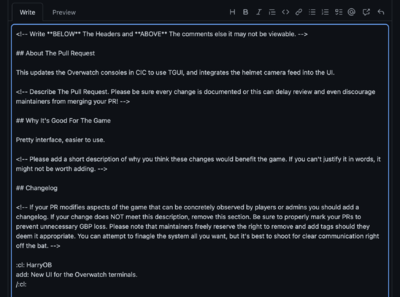
Then, fill in the PR description, including a descriptive changelog. Put your BYOND username next to the first :cl: to ensure you are accurately credited.
Then, hit Create Pull Request (or don’t, if you’re uselessly changing one description as a test).
Step 3: Code Review
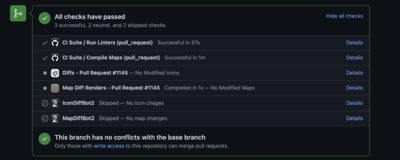
GitHub will automatically run some tests on your code, which may fail, resulting in you having to change your code. The developers will review your code, and may also request changes. That'll look like this.
In order to carry out the changes, simply make the changes on your branch on your local repository, and press “Sync Changes”, this will automatically update the PR.
If a developer has marked your PR as a draft, you will have to mark it as being ready for review. You can do this at the bottom of the web interface on your PR.
Staying in Sync
As other PRs are merged into the repository, your branch will slowly become out of date. This will become an issue over time, as you modify code that has been changed by another recent PR, and you find conflicts that didn’t need to happen.
To avoid this, regularly go to your master branch of your fork on the web interface, and press “Sync fork” and "Update branch", to add all the commits recently merged to your fork.
Then, on Visual Studio Code, you can “Sync Changes” to update your local copy of the master branch.
Do this regularly to ensure you don’t fall out of date with any changes.
Appendix
Merge Conflicts
Mapping Conflicts
Install the git hooks in tools/hooks by hitting “Install.bat”. This will help during mapping conflicts by marking areas that are conflicting, allowing you to open an editor (such as StrongDMM), look for the conflict markers and resolve the issue.
It will look like the conflict has entirely disappeared - but it *hasn’t* - the MapMerger has just automatically dumped everything from the conflicting branches together in a mess that *you* have to fix.
Code Conflicts
Find the conflict markers, indicated with a bunch of >>>>>>>>> and <<<<<<<<<. VSC should make this obvious, and in some cases, deconflict the files itself. Where it fails to do so, you will need to remove the conflict markers and add the code together from both branches, and test it so it works, and merge the changes together.
Glossary
Branch
A version of your fork that you can freely commit changes to without affecting other branches.
Commit
A change to a branch, can be of any size from a single space added to one file to completely rewriting the entire repository.
Fork
A copy of the CM-SS13 repository that you own, and can make whatever changes to that you like without impacting the main repo.
Repository
Often known as a repo. Ours contains all of the code, maps and assets for CM-SS13 - excluding the xenomorph sprites.
PR
Pull Request - a request for the main repository to merge the changes present in one of the branches of your fork into the master branch of the main, upstream repository.
Merge
Where all the commits from a branch are applied to another branch. For example, merging your origin branch containing a new feature to an upstream master branch.
Merge Conflicts
Where two branches from separate contributors have touched the same code, when one of them is merged, you will have a conflict preventing automatic merging. This involves manually fitting the code together, allowing both changes to exist without overwriting either.
Remote
A remote is a version of your repository that is not stored on your computer - such as on GitHub. This includes both your fork and the upstream, main CM-SS13 repo.
Origin
This will be your fork of the CM-SS13 repository.
Upstream
The upstream of your fork will be the main CM-SS13 repo. Think of changes flowing down a stream from the main repo to your fork when you “Fetch Upstream”.
Git
The version control system used by CM-SS13, allowing us to synchronise changes being made by many different contributor - and easily go back if something goes wrong.
Diff
Shows the changes between the current copy of the code and the new code that you have committed.
VSC / VS Code
Visual Studio Code, the text editor we use for DM development.

