\\N's Guide to Marine Combat
Gearing Up
Whether you are a Leader, a Specialist, an Engineer, a Medic, or just a Marine, there are a few things to keep in mind. One, there are specific guides written about these roles so I will not bother going over them in great detail. Instead, I will hit the highlights.
Know your role. If you are playing a Specialist, pick a weapon and stick to it. If you are an Engineer, keep in mind that another engie may want the mine box or plasteel. If you just want to build barricades, take all the necessary supplies for that. Try not to mix and match too much; being good at one thing is often more helpful than being marginally decent at a few things. Nobody cares for a combat medic who only carries enough medicine to treat himself, for instance.
Your backpack is an important tool. While it may be cool to carry your weapon on your back instead of the suit storage, it isn't entirely practical. Your backpack can hold a a lot of useful material, including flares, secondaries, building material, and anything else you can fit inside.
Light is everything to a marine. I will go into more detail later, but for now keep in mind that you should have at least two flares on your person. If you find an abandoned flashlight on the ground, pick it up and stash it in your pack. It's a flare that never goes out, and you will probably find it helpful later. I generally bring at least four light sources on any sortie--don't rely on the shoulder lamp, it will get you killed.
Ammunition is important, and you can run out, especially when assaulting hives. Your primary weapon will depend on your playstyle, attachments included, but I think the standard 10mm is perfectly acceptable in any and all circumstances. Go ahead and stash all the magazines for your primary you can fit in to your belt, as there is no reason not to. If you bring a secondary, it's actually more convenient to just carry another one in your pack instead of reloading.
If you can, attach a bayonet so you do not need to smack weeds with your knife. Purple sacs take several hits from the butt of your rifle to clear, and a bayonet greatly speeds up the process. You can conserve ammunition by destroying alien structures with the bayonet rather than the knife. In case you are attacked by a hostile while clearing out a resin door or some such, you can quickly fire off warning shots and radio for backup, or just blast the door to pieces and escape. A bayonet is also a potent melee weapon, and will serve you well if you are captured. It is a very versatile, tactical attachment, and I highly recommend it. You can make your own bayonet by combining some wires with a combat knife.
Tricord injectors are another thing I find very helpful for a standard marine. Other roles don't have the space for them, if fully loaded, but a standard can greatly benefit from a quick injection of tricord while moderately wounded. It may even prolong your life enough to get out of dodge and into safety, or continue fighting until proper medical attention is found. You can get tricord injectors from the white NanoMed machines scattered around the Sulaco. They are also present in the drop pod.
Tip: You have two empty slots in your armor.
Squad Tactics
Squads operate on a simple principle: watch your buddies and they will watch you. Whether you are a leader or just a standard, you should always have an eye on friendlies. If you lose sight of them at any point, FIND THEM. And do it quickly. If someone is lagging behind, WAIT for them, or go see why they are delayed. A squad operates as a single unit, and that is what gives it strength. Lack of cohesion, disorder, and panic are death.
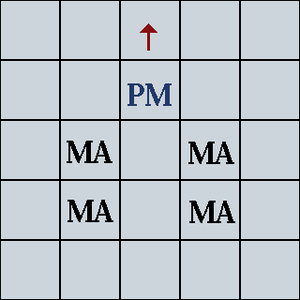
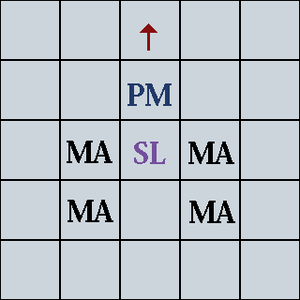
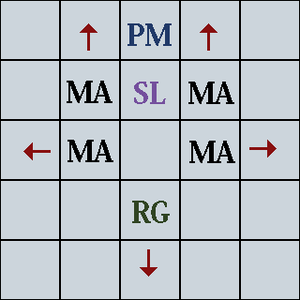
Some tips on positioning and formation:
- A good squad sets up the buddy system. Everyone in the squad has someone who is their BB (battle buddy)to essentially form the squad into pairs. When the combat gets thick, you stick with your BB. If your BB is dead or wounded, that's your fault. But don't feel bad, good teamwork usually means the other party isn't mad at you as you did everything you could to keep them alive.
- A good squad has a pointman. This is the person responsible for moving ahead and reporting on enemy movement. Specialists with sniper rifles excel at this role, as do marines who throw flares before moving. If the pointman begins shooting, that usually means there is an enemy ahead. That does not mean begin wildly chasing the enemy. It is up to the pointman whether or not to pursue. If they start moving, the squad moves behind them. If they start running back, the squad moves back with them.
- A good squad has a competent leader. A leader should always communicate with their squad, even when the squad does not respond back. They are still paying attention and will recognize competence. They will follow orders by necessesity. A mark of a competent leader is knowing WHEN to retreat. A competent leader will minimize losses when they know they are at a disadvantage. A leader should generally stick in the middle of the squad--if they are an actual Squad Leader, losing them means Command will no longer have eyes on the ground. The breakdown of communication is a slow and excruciating death. Protect your SL. Get them out of combat and into safety if possible.
- A good squad has a rearguard. A rearguard has only one duty: to watch for any sign of the enemy at the rear and act accordingly. They should REPORT hostile sightings to the rest of the squad so everyone is aware of what the enemy force is like. The rest of the squaddies should watch their rearguard in case they go down--that usually means the enemy has flanked and will proceed to tear the squad apart if nothing is done. The best course of action in that situation is to cover fire in the direction of the hostile until the rearguard is on their feet, then reassess the situation.
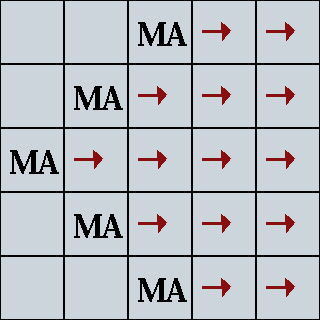
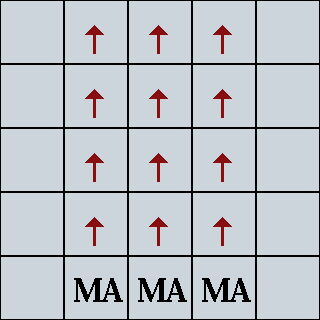
- A good squad watches their fire. Firing lanes are very important in CM as one stray bullet can mean the difference between a healthy soldier and one with broken bones and lung punctures, one who requires 20 minutes of evac and Sulaco-side surgery before getting back on their feet. The best way to form firing lanes is to stand shoulder to shoulder while firing at the same point. If you must break formation to deal with an enemy, such as a charger, make doubly sure that no one is in the path of your projectiles. If they are, DON'T FIRE WILDLY! They may move in to your line of fire by accident, that means STOP SHOOTING! Friendly fire is far more dangerous to a marine than the xenomorph menace. And remember, aim for center of mass.
