More actions
(Start the Fire Missions) |
|||
| Line 515: | Line 515: | ||
== Fire Missions == | == Fire Missions == | ||
[[File:CAS_Tutorial.png|thumb|link=https://www.youtube.com/watch?v=fN0PPvF8Iss |[https://www.youtube.com/watch?v=fN0PPvF8Iss ''Click to see the tutorial.'']]] | |||
Fire Missions are custom made air strikes designed to fire in straight lines that cover a wide area. They allow the pilot to unleash a full arsenal of democracy on any would be trouble maker that dares try to harm your marines. | |||
You have access to a special channel primarily dedicated to coordinating with the ground troops who are able to ask for airstrikes. These include the Scout Specialist, Squad Leader and any one who has the JTAC kit or encryption key. Use ''':j''' to talk in that channel. | |||
When setting up a fire mission you should have a weapon loadout in mind. Rocket pods give more single-shot power, but can only fire once per fire mission and once per flight, while minirockets, GAUs, and Lasers can fire multiple times. Lasers are good for most threats since they set the ground on fire, while GAUs and minirockets can deal damage to all Xenos. | |||
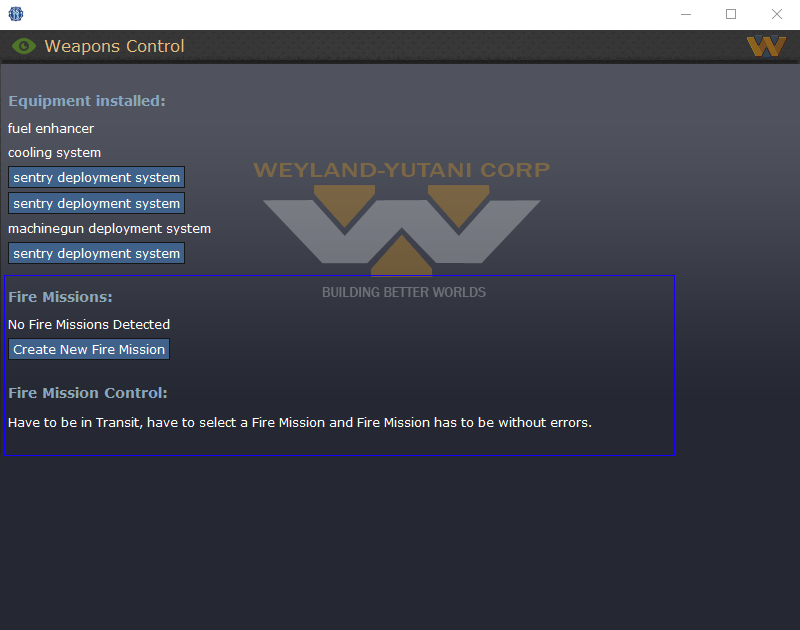
Once you select your weapons, you can create a fire mission on the Weapons control console by giving it a name and picking a length/range (more on this later) | |||
Once you do so, click to edit the fire mission | |||
[[File:CAS_Menu_1.png]] | |||
on this screen there's a few rules to remember: | |||
# Tile coverage is the number you gave while making the fire mission and represents the number of tiles you pass over from start to finish | |||
# Every fire mission has 12 "steps" (represented by the columns numbered 1-12 that make up most of the screen) regardless of length that weapons can fire during. | |||
# Each Step is 0.3 seconds long, so a fire mission lasts 4 seconds from first shot to completion. | |||
# Weapons can fire during any step so long as they aren't on "cool down." For GAUs, this means one step between fire commands (fire-wait-fire), two for minis (fire-wait-wait-fire), three for lasers (fire-wait-wait-wait-fire) and zero for rocket pods (which can only fire one shot). | |||
# Weapons have a gimbal. Ones mounted on the left can fire at an offset from -6 to 0 and ones on the right from 0 to 6, with zero being dead center on the tile you're flying over. | |||
# To cancel a weapon from firing with the gimbal, simply replace the number with a hyphen. ( - ) | |||
# The number of steps you spend of a tile depends on the tile coverage. If it's 12, it's one step per tile. If it's two, it's six steps per tile. The way to figure this out is simply 12 divided by tile coverage (which is set when making the fire mission). | |||
# Weapons can fire simultaneously or in succession. This makes multi-GAU runs powerful for staggered fire or parallel lines | |||
# A fire mission cannot be launched if you don't have enough ammo in every weapon to complete it. If the ammo count is <span style="color:#f28926">'''orange'''</span> you can only use it once with your current ammo supply and <span style="color:#db1e1e"> '''red'''</span> if you don't have enough ammo for a run. | |||
Once a fire mission is set up, it can be launched while in flyby mode. To do so, you select the fire mission and click "go to fire mission" at the bottom of the screen. After this you do the following: | |||
# Select a flare or lase target. | |||
# Activate Camera to view location or request offset information if the camera doesn't work | |||
# Select a direction. You can only offset in one direction and you will travel in that direction once you start. | |||
# Input an offset from 0 to 12. If you're viewing through the camera, it will recenter on the starting point of your fire mission. | |||
# Confirm that the fire mission is a safe distance from Marines and will hit hostiles. Remember that many weapons have a large area of effect that can easily wound or kill Marines. | |||
# Engage the Fire Mission. Once you do so, you have approximately five seconds to make final adjustments before the dropship is locked in. | |||
Revision as of 13:34, 18 February 2019
Who am I?
Hi, I'm Sargeantmuffinman, the current wiki maintainer that will add various things to areas of the wiki. I mainly work on the marine side of things and will do general grammar changes to here and there. If other more things are needed then I'll usually be the person for it.
This will also be a place for where I test wiki code.
To-Do List
- Look through the alien page and update it.
- Make a better Fire Mission guide.
- Add the armaments and ammunition list to requisitions.
- Make more tea.
Proving grounds
The areas below are usually the place where I test and learn wiki code. Hopefully it might be useful to others if anyone actually reads this.
Section 1
<xspan style="color:#HTML Colour here"> COLOURS
[x[The page where it is#The Subtitle of where it is|Words]x] Just without the Xs. Flamer Pack
| Equipment: | Description: |
|---|---|
 M34A2 Longstreet light tank |
A giant piece of armor with a big gun, you know what to do. |
| Name: | Description: | |
|---|---|---|
 Testing Zone |
A generic description would be here.
| |
|
Requisition's Armament and Ammunition Vendor
|
Fire Missions
Fire Missions are custom made air strikes designed to fire in straight lines that cover a wide area. They allow the pilot to unleash a full arsenal of democracy on any would be trouble maker that dares try to harm your marines.
You have access to a special channel primarily dedicated to coordinating with the ground troops who are able to ask for airstrikes. These include the Scout Specialist, Squad Leader and any one who has the JTAC kit or encryption key. Use :j to talk in that channel.
When setting up a fire mission you should have a weapon loadout in mind. Rocket pods give more single-shot power, but can only fire once per fire mission and once per flight, while minirockets, GAUs, and Lasers can fire multiple times. Lasers are good for most threats since they set the ground on fire, while GAUs and minirockets can deal damage to all Xenos.
Once you select your weapons, you can create a fire mission on the Weapons control console by giving it a name and picking a length/range (more on this later)
Once you do so, click to edit the fire mission
on this screen there's a few rules to remember:
- Tile coverage is the number you gave while making the fire mission and represents the number of tiles you pass over from start to finish
- Every fire mission has 12 "steps" (represented by the columns numbered 1-12 that make up most of the screen) regardless of length that weapons can fire during.
- Each Step is 0.3 seconds long, so a fire mission lasts 4 seconds from first shot to completion.
- Weapons can fire during any step so long as they aren't on "cool down." For GAUs, this means one step between fire commands (fire-wait-fire), two for minis (fire-wait-wait-fire), three for lasers (fire-wait-wait-wait-fire) and zero for rocket pods (which can only fire one shot).
- Weapons have a gimbal. Ones mounted on the left can fire at an offset from -6 to 0 and ones on the right from 0 to 6, with zero being dead center on the tile you're flying over.
- To cancel a weapon from firing with the gimbal, simply replace the number with a hyphen. ( - )
- The number of steps you spend of a tile depends on the tile coverage. If it's 12, it's one step per tile. If it's two, it's six steps per tile. The way to figure this out is simply 12 divided by tile coverage (which is set when making the fire mission).
- Weapons can fire simultaneously or in succession. This makes multi-GAU runs powerful for staggered fire or parallel lines
- A fire mission cannot be launched if you don't have enough ammo in every weapon to complete it. If the ammo count is orange you can only use it once with your current ammo supply and red if you don't have enough ammo for a run.
Once a fire mission is set up, it can be launched while in flyby mode. To do so, you select the fire mission and click "go to fire mission" at the bottom of the screen. After this you do the following:
- Select a flare or lase target.
- Activate Camera to view location or request offset information if the camera doesn't work
- Select a direction. You can only offset in one direction and you will travel in that direction once you start.
- Input an offset from 0 to 12. If you're viewing through the camera, it will recenter on the starting point of your fire mission.
- Confirm that the fire mission is a safe distance from Marines and will hit hostiles. Remember that many weapons have a large area of effect that can easily wound or kill Marines.
- Engage the Fire Mission. Once you do so, you have approximately five seconds to make final adjustments before the dropship is locked in.


