More actions
 |
Difficulty: Medium Supervisors: Chief Engineer Rank: Sergeant Duties: Make custom ordnance for the marines to use. Maintain the orbital cannon and the dropships. Guides: Construction, Guide to Engineering Unlock Requirements: Three hours as squad engineer. Detailed Description: Your job is to maintain the integrity of the USCM weapons, munitions and equipment, including the orbital cannon. You can use the ordnance workshop in the portside hangar to construct new custom armaments for the marines. However you remain one of the more flexible roles on the ship and as such may receive other menial tasks from your superiors such as ship maintenance. |__________| |
The Ordnance Technician (OT) is an enlisted USCM crewmember of the USS Almayer's engineering department. Trained in all types of engineering work and directly supervised by the commissioned Chief Engineer. They are primarily responsible for maintaining the integrity of the USCM ordnance such as tinkering with armaments and using powerloaders to reload the dropships and the orbital cannon. But as a flexible shipside technician with superior engineering skills, situations may arise where they are given orders by a superior to assist with various other duties such as ship maintenance, special construction projects or FOB duty.
Overview
You begin the mission in either the ordnance workshop in the hangar or the engineering department at the back of the ship. Reach out over the engineering radio (:e) to report to your department, composed of fellow Ordnance Technicians and the Chief Engineer, whose orders you must carry out. The workshop has everything you need in the storage room, and you may find some additional supplies in the engineering department. There are also many rooms maintenance rooms and engineering outposts strewn around the Almayer with supplies you can use for emergency repair should an accident happen.
The Ordnance Workshop
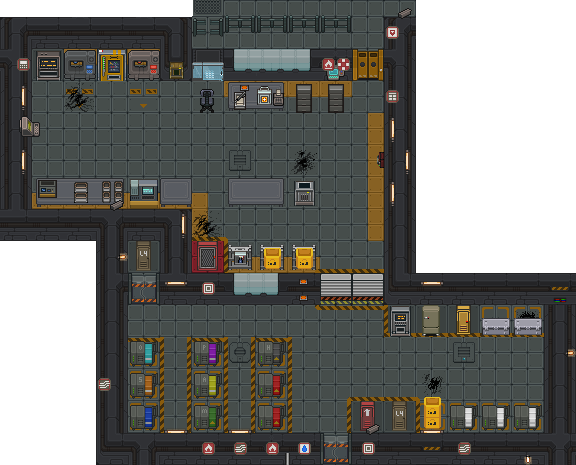
The Almayer's Ordnance Workshop is located in the portside hangar. It consists of the storage room, the workshop, and the reception.
In the storage room you will find all the materials you will need throughout most of the mission. If you run out, you can request bulk supplies from Requisitions. If medbay isn't busy you can try to ask very nicely and they might dispense chemicals for you, but they are not obligated to do so. It is also possible that the ground troops brings up more materials for you. In the workshop, you have the machinery and space required to do your work. The vendors and closets contain various spare items. Keep an eye on the reception for marines and other ship personnel who come to request your service. As your job is working on the ship, you should be providing your custom ordnance to the ground troops for use. Using the labeler is recommended to leave helpful information for how to use them.

Tools of the Trade
Crafting Demolitions
As an Ordnance Technician you have the necessary skills for crafting custom demolitions (chembombs) to improve the USCM arsenal. The types of bombs you can make range from small / large grenades, mines, plastic explosives, and warheads for rockets / mortar shells. All of these follow a similar pattern of construction: printing the necessary casing from the armylathe, adding a detonator assembly, adding containers with chemicals up to the casing's volume, and locking the bomb to finish. With the right combination of chemicals, they can all be made significantly stronger than their standard issue counterparts.
Chemical explosives all have a minimum falloff of 25.
Bomb Casings
Detonation Assemblies
Detonation assemblies can be made by mixing the components below in various ways. The components has two possible states: locked or ready for attachment. Use a screwdriver to switch between the states. When locked, you can use the assembly to change the settings of any sensors inside. The assembly must be locked to attach it to a bomb.
Explosions and Fire
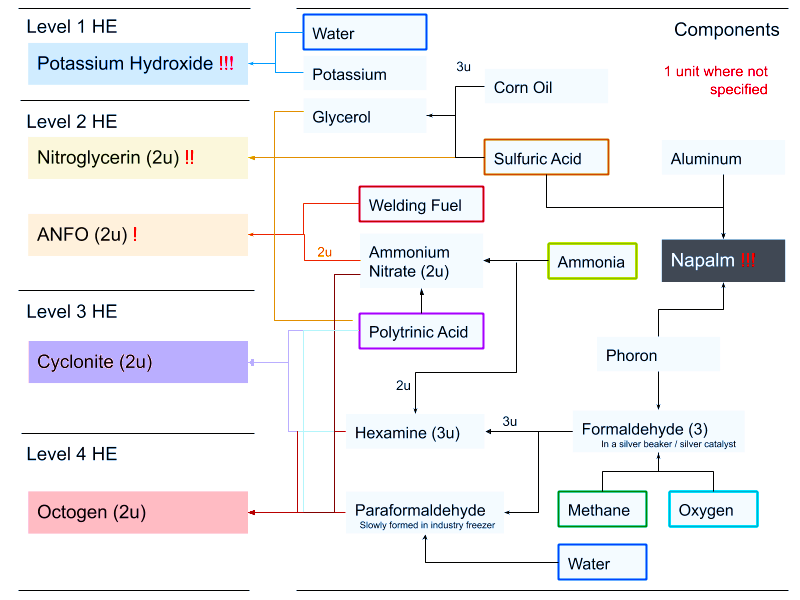
Ordnance Technicians are not chemists and can not make medicine. But they are familiar enough with chemistry to know how to make things go bang. Beware that some chemicals can be sensitive, spontaneously igniting when more than a certain amount is mixed at the same time (! = 60u, !! = 5u, !!! 0u). If research has been making custom explosive chemicals for you, then they will always have some sensitivity. Make sure they tell you about this. Below is a chart for all the chemical reactions you need to know. And a list of all chemicals that can be used in explosions and fire, and how they modify said explosions and fire. Additionally, iron can be used to make shrapnel and phoron can be used to make incendiary shrapnel.

| Code | Name | Rarity | Effect | OD | Crit OD |
|---|---|---|---|---|---|
| EXP | Explosive | COMMON |
|
N/A | N/A |
| FLW | Flowing | COMMON |
|
N/A | N/A |
| FUL | Fueling | COMMON |
|
N/A | N/A |
| OXI | Oxidizing | COMMON |
|
N/A | N/A |
| Name | Power Mod | Falloff Mod | Intensity Mod | Radius Mod | Duration Mod | Burn Color Mod |
|---|---|---|---|---|---|---|
| Ammonium Nitrate | 0.4 | 1.5 | 0.5 | 0 | -0.2 | Orange |
| ANFO | 1 | -0.6 | 0 | 0 | 0 | None |
| Carbon | 0 | 0 | 0 | 0 | 1 | Gold |
| Chlorine Trifluoride | 0 | 0 | 1.6 | -0.08 | -0.8 | Dark Orange |
| Copper | 0 | 0 | 0 | 0 | 0 | Green |
| Cyclonite | 1.5 | -0.4 | 0 | 0 | 0 | None |
| Ethanol | 0 | 0 | 0.2 | 0.1 | 0.2 | Blue |
| Hexamine | 0 | 0 | 0 | 0 | 0.5 | Orange |
| Hydrogen | 0.15 | 0 | -0.5 | 0.2 | -0.5 | Light cyan |
| Lithium | 0 | 0 | 0.15 | 0 | 0 | Deep pink |
| Methane | 0.15 | 0 | -0.35 | 0.1 | 0.25 | Dark blue |
| Napalm | 0 | 0 | 0.45 | 0.06 | 0.75 | Light orange |
| Nitroglycerin | 1 | -0.5 | 0 | 0 | 0 | None |
| Octogen | 2 | -0.2 | 0.4 | -0.02 | -0.2 | Orange |
| Oxygen | 0 | 0 | 0.75 | -0.08 | 0 | Light Blue |
| Phoron | 0 | 0 | 0.4 | 0.05 | -0.75 | Dark red |
| Phosphorus | 0 | 0 | 1 | -0.12 | 0.1 | Peach |
| Potassium-chloride | 0 | 0 | 0.1 | 0 | 0 | Purple |
| Potassium-hydroxide | 0.5 | 0 | 0 | 0 | 0 | None |
| Sodium-chloride | 0 | 0 | 0.1 | 0 | 0 | Yellow |
| Thermite | 0.5 | 1 | 0.3 | -0.08 | 0.9 | Light orange |
| Water | 0 | 0 | -3 | 0 | 0 | None |
| Welding Fuel | 0.12 | -0.1 | 0.1 | -0.08 | 0.7 | Orange |
Maintaining the Orbital Cannons
Using the AA Cannon
| AA Cannon: | Description: | |
|---|---|---|

|
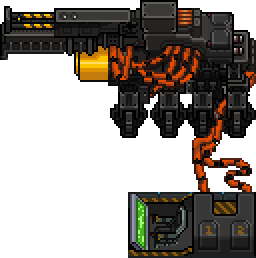
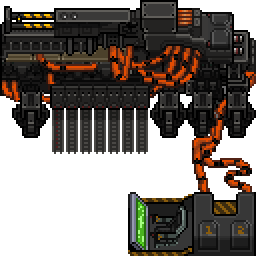
The IX-50 is a state-of-the-art Micro-Gravity and Air Defense system capable of independently tracking and neutralizing threats with rockets strapped onto them. In order to utilise the defensive capabilities, you simply select the area you want to defend. WARNING: You must set the area to be defended before any incoming object is en-route to the ship.
|
Maintaining the Dropships
As an Ordnance Technician, your faster use of the powerloader and inferior rank to the Pilot Officer means you are expected to load their dropships up for them. Head to the hangar, grab a powerloader (click-drag yourself onto it, or right click -> enter powerloader), and ask them what needs loading and where. Pickup the desired modules and attach them onto the appropriate port on the dropship. Communicate with the Pilot Officer in person or over the engineering channel to print new equipment from the dropship fabricator in the future, and be ready to reload their ordinance (Use an empty ripley clamp to take out expended ammunition then use the other hand to load a fresh batch of ammo, for example: 30mm, mini rockets etc.) when they return from close air support missions.
If the dropships seats have been flattened you can re-build them by using a ![]() welder and then a
welder and then a ![]() wrench.
wrench.
Special Duties
Because of your engineering skills, you may occasionally be tasked to perform other duties such as ship maintenance, vehicle maintenance, or FOB duty. You will find the guide to engineering and guide to construction useful for this.
Maintaining the Vehicles
As an ordnance technician you are capable of repairing and replacing vehicle modules. The Vehicle Crewmen will usually take care of this themselves, but special circumstances may require you to assist. Remember to check with the vehicle crewman about which modules they'd like attached.
FOB duty
Command may find it necessary to send a few OTs down to the FOB to keep it running, repaired, and ready for action. Keep in touch with your Chief Engineer as much as possible when deploying. The Squad Engineers will be subordinate to you, so should it be necessary, you can order them around on FOB related matters; try to have them do any dangerous frontline work.
Grunt Work
You may get ordered to replace lights, do cleaning, or look through the disposals room for anything valuable tossed away, because of your maintenance access and often not being particularly busy. Don't whine about it.
Almayer Projects
If you've gotten chamber sick from the workshop, you can always ask for the proper legal authorization to construct or modify a part of the Almayer to occupy yourself with something creative. If you can't think of what to create, ask for ideas from other folks or just explore the Almayer until an idea pops into your head.
Your Skillset
To find out about how the skill system works head over to the skills system page.
Reading and Sources
Kryth's Guide for blowing up marines - By Kryth


