 |
Difficulty: Medium Supervisors: Squad Leader Rank: Not defined Duties: Set up defenses, babysit sentry guns, open doors and spam barbed wire. Guides: Construction, Guide to Engineering Unlock Requirements: Not available. Detailed Description: Not defined |__________| |
But the good news — we got four of these robot sentries with display and scanners intact. They really kick ass, I think they'll come in handy.
―Corporal Hicks, Aliens
As a Squad Engineer, you main goals will be fixing power, getting through doors, and setting up fortifications for a FOB (Forward Operating Base) that'll be used for defence and to secure a supply route. Without you, your platoon will have no power or a FOB which is critical for mission success.
You'll have two different playstyles you can experiment with. One, as a FOB building and Utility Engineer, who sets up defences and makes sure power is running. Another way to play Engineer is to be a Combat Engineer, breaching walls, hacking open doors, and repairing robotic limbs on the field. Both are as good as the other, but too much of one is bad. Make sure there is an FOB that will be able to be defended, and if there is one, make sure marines will be able to effectively make it from building to building.
Equipment and Gear
Sentry and M56D
As an Engineer, you'll have to make a choice at the start of each round on what defensive equipment to vend. Keep in mind you can only pick one so it’s worth discussing with your fellow engineer (if you have one) for the one that best suits your needs.
Your Gear
Get your gear from the Squad Engineer prep room. Most notable gear are:
 Welding Goggles are used to avoid eye damage when welding. Remember to flip them down before you start.
 Webbings can be found in your vendor to help carry additional items, apply the webbing to your jumpsuit. Holds 3 normal size items.
 The gloves in your locker are insulated gloves. If you lose them, get another pair from the vendor.
- For backpacks, you can choose from these two out of the vendor:
 Toolbelt, see the table below for details:
| Item: | Function |
|---|---|
Screwdriver |
Used for securing and unsecuring sentries, also used to open maintenance panels for hacking. |
Blowtorch |
Used for cutting through walls and fixing sentries. Has 20 units of fuel inside. Refillable with fuel tank, welder pack or welding tank (turn off before refilling). |
Crowbar |
Used for Opening unpowered doors and displacing girders so you can move them. |
Wrench |
Used for securing most objects to the ground including girders,vendors, also has another use to rotate sentries. Easily the most used tool in your arsenal. |
Cable coil |
Used for fixing robotics and diverting power to other areas. |
Multitool |
Used to hack doors/ vendors along with disabling mines. |
Wirecutter |
Used for cutting cable coil and barbed wire, and mending it. |
Vendor
| Item | Function | |
|---|---|---|
M40 HIDP Incendiary Grenade (2x) |
Used for setting an area ablaze as area denial. | |
C4 (4x) |
Used for exploding through walls or through people. Mostly used to blow into the CIC to mutiny. | |
Minebox (1x) |
Used for exploding aliens who run over it. Mostly used for killing survivors and exploding dead aliens. Contains 4 mines.
| |
Circuit Boards (10x) |
Used for fixing various things that need circuit boards, such as airlocks, APCs, and or air alarms. | |
| File:Mesons.png Optical Mesons (2x) |
Used for seeing the layout through walls. | |
Light Replacer (2x) |
Used to replace lightubes and light bulbs quickly. 50 uses, feed with glass to refill. | |
Entrenching Tool (3x) |
Used for digging and filling up sandbags, as well as deconstructing them. Can be folded to fit in a backpack. | |
High-Capacity Powercell (10x) |
Used for powering various devices that require power. 10,000W. |
Power Duty
To setup power, you'll want to locate the geothermal generators ![]() and assess the damage. Depending on the sprite, the generator will need different steps:
and assess the damage. Depending on the sprite, the generator will need different steps:
With this done, you'll want to turn it on and set up the Superconducting Magnetic Energy Storages, (SMESes) which can be setup by clicking on them and setting input to 250,000W and output to 200,000W. This'll ensure that they are recieving more charge than they are giving out. Do this for all three, and make sure that the SMESes are charging before you head to your next objective.
Floodlight Repair
While you may have fixed the power for the colony, the xenomorphs will have most likely broken floodlights around the place which you'll need to fix. To fix a floodlight you'll want to use the following steps:
Hacking
Hacking sounds a lot harder than it actually is. To begin hacking a machine, follow these steps:
- Open its maintenance panel if possible with a screwdriver.
- If you have them on hand, you'll want to equip insulated gloves of some kind to protect against shock.
- You will need a multitool and/or wirecutter to manipulate the internal wires. Click on the machine to open the menu with your chosen tool (Multitool/Wirecutter) then cut/pulse each wire until you get the desired result. Memorize the wire which produced that outcome for future reference; the wire functions are listed below.
- If you accidentally turn off a machine's power, or activate its shock wire and need to reset it, simply cut and mend the shock/power wire.
- The most common reason to hack by far is to depower and wrench open a door with the crowbar.
- It should be noted that the wires which govern a machine's functions will be randomized each round, but are the same for all machines of the same type.
Lastly, it should be noted that you can rig wires with signallers that will pulse the wire they're attached to when emitting or receiving as a multitool. This can be used to create traps, such as closing and bolting a door, shocking it, or causing it to open and close rapidly. These traps will often serve to confine an enemy in a disadvantageous place where it cannot escape. This often works best when the target is forced to remain within the line of fire of a sentry.
There are several categories of machines you can hack. These are listed and included first to last in order of importance:
Airlock Wire Functions
- ID wire: Pulsing will flash the 'access denied' red light; cutting will prevent anyone from opening the door if it's a restricted door; otherwise, it does nothing.
- AI control wire: Pulsing will flash the 'AI control light' off temporarily; cutting will prevent the AI and cyborgs from accessing and controlling the door. Generally useless on Colonial Marines.
- Main power wires (Test light wires): Pulsing will turn off the 'test light' and kill the power for 10 seconds; cutting will turn off the test light and make the door unusable until auxiliary power comes on. While a door is depowered, you can wrench it open with the crowbar.
- Backup power wire: Pulsing will turn off the 'test light' kill the power for 10 seconds if the main power is out, otherwise, nothing. Cutting will obviously disable the backup power. There are two of these.
- Bolt control wire: Pulsing will toggle the bolts; cutting will drop the bolts.
- Door control wire: If the door is ID restricted, this is pretty much useless. If not, Pulsing will open/close the door and cutting will keep it that way, similar to bolting. Can be useful for setting up traps when wired to a signaler if the door is non-restricted.
- Shock wire: Pulsing will electrify the door for 30 seconds; cutting will permanently electrify it until mended. This will cause the safety light to flash. You can find the wire easily because the door shoots sparks when pulsed or cut.
- Safety wire: Pulsing will cause the safety light to flash red, causing anyone inside the airlock to be crushed when it closes. Cutting does nothing.
- Timing wire: Pulsing will permanently change the door timing, making the door close faster. This can be useful in conjunction with disabling the safety wire if you intend to create an obstacle/trap, or make it more difficult to follow someone through the airlock. Cutting does nothing.
Vendor Wire Functions
- Firing wire when cut or pulsed, causes the vendor to fire its contents at people. While this effect is active, the vendor's red light will blink.
- Contraband wire does nothing when cut, when pulsed unlocks illegal or rare goods and turns on the green light.
- Access wire when cut it toggles the purple/yellow light, allowing for ID restricted machines to be used by anyone. When the light is yellow it ignores ID restrictions.
- Shock wire Toggles on the orange light, and electrifies the machine, causing anyone to operate or touch it to receive a shock.
APC Maintenance
If the APC is green or blue, it is good.
Replace Powercell
If the APC is not broken and the Power is down (For example Tcomms upon first deployment), you can replace the powercell by:
- Click the APC, swipe your ID card to unlock the interface.
- Disengage the cover lock in the interface.
 Use a crowbar on the APC to open the cover.
- Take out the empty powercell out with an empty hand.
 Put a new powercell in the APC.
 Use a crowbar on the APC to close the cover.
- Re-engage the cover lock.
- Swipe your ID card to secure the interface.
Broken
Upon following the above steps the APC will be fixed don't worry if it still doesn't have power because it'll take time to recharge (if generators are up). Replace the powercell with a new one if you require the APC to be active straight away.
Blown up or destroyed
If someone blew up the apc or blasted it into another dimension follow the steps below.
- First you'll want to whack off the cover; to do this just hit the APC with any sort of weapon, generally a boot knife is good for this. (Don't be disheartened if it takes a while, just keep whacking it.)
- Take out the powercell in the APC once the cover is off with an empty hand.
 Use a screwdriver on the APC.
 Use wirecutters on the APC.
 Use a crowbar on the APC.
- Build an APC frame from 2 metal sheets then click on the APC with the APC frame in hand.
 Use cable coil on the APC.
 Use a power control module on the APC.
 Use a screwdriver on the APC.
 Put a new powercell in the APC.
 Use a screwdriver on the APC.
- Open up the APC pop up window once you've completed all previous steps and turn on the breaker.
FOB Duty
As an Engineer on FOB duty, you'll be setting up the base that the marines will primarily use to organize, to heal up, to retreat to, and to make a final last stand at. To make a good FOB, you'll want to make strategic use of your landmines, the smartgun HMG or the sentry gun, and various defensive emplacements. A good FOB is the difference between losing the round and holding off long enough to make a push back and finally win the round since it provides a safe place for marines to rest, resupply and recover at.
Another important aspect of your FOB is looking out for flanks. The enemy can and will use these to their advantage, either to sneak in and harass wounded, or the burst in and slaughter the entire FOB. As well, you'll want to keep a look out for walls that have acid sprayed over them. This means in time another opening will present itself, and you'll want to throw up more barricades to compensate.
Fortifications of the Trade
| Image | Name | Material Needed | Function |
|---|---|---|---|
 |
Wood Barricade | Wood | Used for a hasty defence against aliens. Mostly seen prespawned. |
 |
Metal Barricade | Metal | Used for constructing auxiliary fortifications. Third most durable fortification. Can be repaired with a blowtorch if not overtly damaged. |
 |
Sandbags | Sandbags | Used for making directional defences, multiple can be applied to a tile. Needs to be filled up with empty sandbags and an entrenching tool. 25 in a filled stack. Second most durable fortification. Can't be repaired. Can be dismantled with an entrenching tool. |
 |
Plasteel Barricade | Plasteel | Used to allow passage by closing it, and providing heavy protection. Can be repaired with the blowtorch if not overtly damaged. Most durable fortification. Can be repaired with a blowtorch if not overtly damaged. |
| Barbed Wire | Metal | Used to make barricades and sandbags stronger, and making it so they can't be ran or climbed over. Also damages any thing that attacks it. | |
 |
Wall | Metal | Used to fully block off an area. |
FOB Construction Quick Tips
Barricade Placement
| Barricade Placement | Description |
|---|---|
|
This is an example of what not to do when constructing a defensive position. In the picture on the left you'll see that the xenomorphs are able to hit the barricade without being shot due to it's forward position and as such the xeno will be able to break through and kill that marine with ease. | |
|
This is an example of what you should do when constructing a defensive position. To rectify the above barricade placement errors you'll want to move the barricades back one tile like the photo on the left. By moving the barricades back this will allow you to shoot xenomorphs who are attacking them. |
Barbed Wire
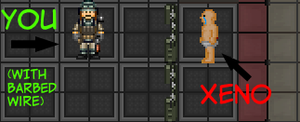
![]() Barbed wire is a string of sharp metal that will harm and prevent xenos from pouncing over barricades once attached. It also gives a small health boost to the barricade itself.
Barbed wire is a string of sharp metal that will harm and prevent xenos from pouncing over barricades once attached. It also gives a small health boost to the barricade itself.
| Barbed Wire Tactics | Description |
|---|---|
| In the picture you'll see that the engineer was killed due to the xeno being able to pounce over the barricade. | |
|
Due to the engineer placing barbed wire onto the barricades the xenomorph was unable to jump over. |
FOB Space
| How To: Fob Space | Description |
|---|---|
|
This is an example of what not to do when constructing a defensive position. In the picture you'll see that the FOB has very little space for the marines to move around in which will lead to:
| |
|
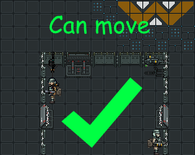
This is an example of what you should do when constructing a defensive position. In the picture you'll see that the FOB has ample space to move which means:
|
Fixing Breaches in Defences
| Fixing Defensive Breaches | Description |
|---|---|
|
This is an example of what not to do when attempting to fix a breach in the defensive line with hostiles nearby. In the picture you'll see that this is a highly dangerous and ineffective way to fix the breach in a defensive line if hostiles are nearby. This will let you get slashed up by an alien running up willy nilly, and will give you less time to react if multiple xenos decide to push the defensive line. | |
|
This is an example of what to do when attempting to fix a breach in the defensive line with hostiles nearby. In the picture you'll see that it shows the optimal way of repairing a breach in your defences if xenos are nearby.
|
Misc. FOB tips
| Fob Tips | Description |
|---|---|
|
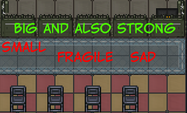
In the picture you'll see that it demostrates that windows, even if reinforced, are not an acceptable replacement for a line of all-american steel barricades.
In summary, avoid using them as a defence. | |
|
Barricades will end up damaged due to the ravages of war and incompetence, and if it isn't horribly damaged, you'll be able to use a blowtorch on it to repair it. This works on metal and plasteel barricades.Note that if a barricade is too damaged you will be unable to fix it.
|
Your Skillset
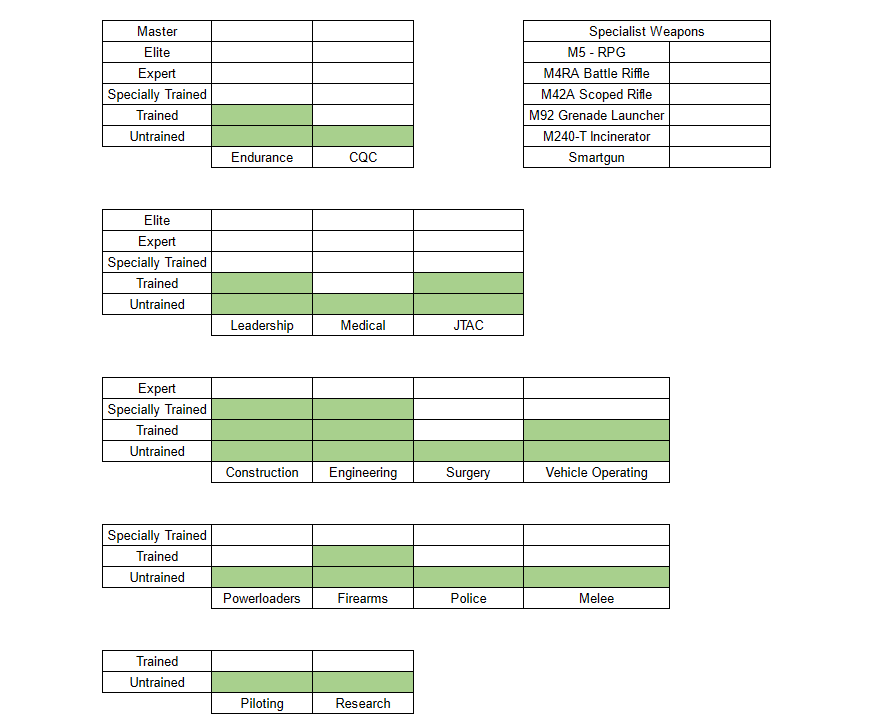
To find out about how the skill system works head over to the skills system page.
General Tips
- Examining an incomplete Sentry frame will list what it is and isn't missing. This can help if you stumble upon somebody's half-assed arts n' crafts project, or if you find yourself forgetting steps mid-construction.
- When constructing your defenses, keep in mind that some of your enemies can simply bypass them due to their speedy and slight nature, plan for this by ensuring some of the men guarding your defenses are geared, or at least prepared, for close quarters combat.
- All vendors contain a 'contraband' wire, pulsing this wire after beginning the hack with a screwdriver will cause a few new items to show up in the vendor, but as a general warning, it is against Marine Law to hack the vendors on the Almayer, so keep an eye out for MP's before you accidentally cause trouble.
- Plasteel and Metal are valuable resources sure, but just remember that you aren't the only person that needs them, don't hoard loads of building supplies otherwise you might find other players unable to perform their jobs.
- In a pinch, even the average door can make a solid defense, by welding a door shut it will no longer be able to be wrenched open, either by Xenomorphs or a man wielding a crowbar. Hacking the door and forcing its bolts down has this same effect, but welding is substantially quicker and a lot safer when you've got bad guys breathing down your neck.
- As an Engineer, it's in your job description to keep any defensive structures you or another engineer builds in tip-top shape, this may include having to repair metal barricades and the like in the midst of combat or replace melted structures with new ones, which is dangerous, but it's what you signed on for. This also goes for APC's and any broken lights you may see, you'll want to replace these post-haste so that marines may benefit from their existence.
- Just as a general reminder, if you intend to be hacking open doors or pulsing wires in vendors, you'll want to be wearing Insulated Gloves, Budget Insulated Gloves work too, but aren't as good. Failure to wear the correct PPE* for your work environment will result in a hearty shock if you touch the wrong wire. (*Personal Protection Equipment)
- You might've noticed that the welder is one of the two most important tools for an engineer to have, you may also have noticed it carries a measly 20u's of welding fuel before it needs to be refueled, or you could replace it with another welder that would eventually also need to be refueled. To do this, you'll need to find either a Welding Kit (It looks like two propane tanks were turned into a backpack, or some kind of futuristic jet pack) or a Fuel Tank (This one is a large gas canister that fills an entire tile, hard to miss it), the Welding Kit can be placed in the backpack slot for easy access, but carries less fuel than the Tank, the Tank carries a large amount of fuel, but can only be dragged around. After you've located your refueling utensil, have your welder in hand, make sure it is turned OFF (This part is key to success) and click on the Kit/Tank, you'll get a bit of flavor text saying 'the welder has been refueled' if you've done it correctly.


 ->
->  ->
-> 


 ->
->  ->
-> 


