So you've just joined for the first time as a Marine? No idea what you're doing? Our Space Station 13 Guide is pretty good as an introduction to the interface! Otherwise, let this guide get you up to scratch! If you have any questions, just A-help (F1 -> gameplay issue) and one of the server's mentors will be happy to help you.
As a foreword, rounds on this server may last between two to three hours! Make sure you have the time commitment to sit a full round (provided that your character survived that long).
The Rules
Read the rules! Colonial Marines is a medium role-play server and you are expected to abide by the rules established by the server staff. If a staff member says do something, do it. If they tell you to stop doing something, stop. It will save both you and the staff a lot of trouble and effort. There is no excuse for not reading the rules. If you have been banned, fairly or unfairly, you may appeal on the ban appeal section of the forums. You have been warned. Thank you and enjoy the game.
Character Setup
This is simple for the most part. You will create your character on the setup character page.
Do take note of the 'occupation' roles. For now you'll want to set only 'Marine' to "High", and everything else to "Never", and the bottom option to "Join as Squad Marine if preference unavailable." Other roles (even those that might appear familiar to other servers, such as Cargo Technician) require a robust knowledge of how the Marines operate. For your first round, try and join a round before it starts. It's no big deal to join in the middle, but starting a round will ensure you aren't kicked out of the freezer into a difficult or deadly situation. First, we'll discuss some basics.
Who Orders Who
As a Standard Marine you're at the bottom of the chain of command. You take orders from all ranks above you, but should focus on sticking to your squad, led by your Squad Leader and Staff Officer. You are assigned to one of four squads at round start - Alpha, Bravo, Charlie, or Delta.
Should your Squad Leader be unavailable to lead, command of the squad will be passed down to the Specialist or anyone named by the outgoing Squad Leader or Staff Officer. You are expected to obey any legal orders given to you by higher ranking marines, especially by your Squad Leader, at all times.
Marine Law
In rare cases, you may be given illegal orders. There is a big difference between orders that violate Marine Law versus orders that violate the RULES. Orders that break Marine Law are considered an In Character (IC) issue and are thus something you may resolve in game so long as the situation is roleplayed. Orders that break the server rules are an Out Of Character (OOC) affair. Should you be given orders that would violate the rules then you should contact the staff via A-Help (F1). It's better to be thrown in the brig because you wouldn't murder someone the Squad Leader didn't like, than being banned for doing so.
Waking Up
At the start of a deployment, you'll wake up in the ship's cryosleep quarters alongside all the other Marines aboard the USS Almayer (Click here for a map of the Almayer). The first thing you'll want to do is examine your identification card ![]() (right-click -> examine, or shift-click in hotkey mode). This will let you know which squad you're in. The colour-coded arrows on the floor guide the Alphas and Bravos north, and the Charlies and Deltas south.
(right-click -> examine, or shift-click in hotkey mode). This will let you know which squad you're in. The colour-coded arrows on the floor guide the Alphas and Bravos north, and the Charlies and Deltas south.
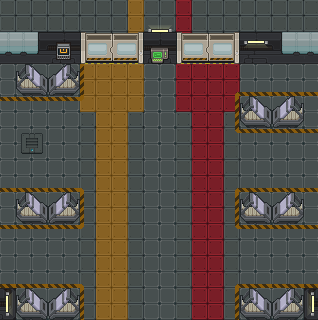

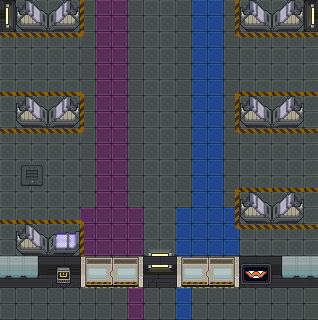
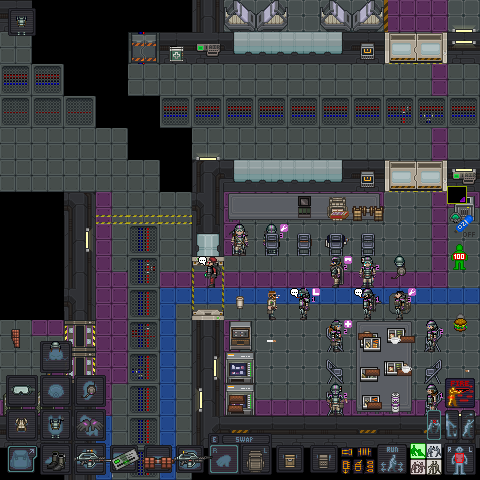
The below image shows us the southern canteen, which is identical to the northern canteen. There are some vending machines at the south-west corner of the room. Click on the food vendors and vend some food for yourself, then click on the food to hold it in your active hand, and finally, eat it by clicking on your character in the middle of the screen. Once you've had your fill, you'll want to head out the door on the left and go to the prep rooms to get geared.
Marine Equipment
One key to success is ensuring that you are well equipped. Attacking without a weapon may result in catastrophe. These next steps should prepare you for combat.
- Go to an equipment locker
 in your squad's room (click it twice with an empty hand to open) and equip all of its contents (press E in hotkey mode). If all the lockers have already been emptied out, take one of everything from the two Surplus Uniform Vendors
  in the west.
  Head to one of the ColMarTech Automated Weapons rack.
 Get a M41A Pulse Rifle. Load it with an M41A magazine
 by clicking on the rifle with the magazine. The Rack offers a good basic attachment, Rail Flashlight
 . Take one and attach it to your rifle just like you reload then click Toggle Rail Flashlight
  at the bottom right to turn it on. Place it onto your suit storage (E).
 Fill your ammo rig with 5 M41A magazines
  .
. Assuming you have a USCM Satchel worn when you woke up, get a M4A3 Service Pistol
  . Load it with an M4A3 magazine
  . Attach a Rail Flashlight, turn it on then place the M4A3 pistol in your Satchel
  .
. Get a Flare Pouch to your pocket slot. See Combat section for its use.
 Get a First-Aid Pouch to the other pocket slot. See First Aid section for its use.
 Get a M5 Survival Knife. Sheath it inside your combat boots.
 There are two slots in your armour, you can put more magazines in it.
 Fill your Satchel with 4 M94 Flares Packs
 . Flares Packs are used to refill your Flare pouch.
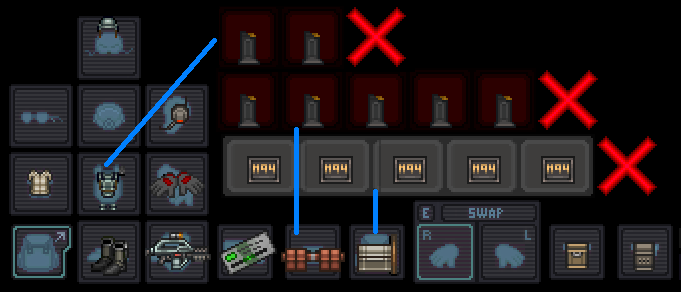
There are many more options for weaponry and gear in the vendor, but it's best to keep things simple and effective while you're still learning the rest of the game.
Communication
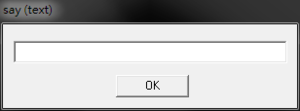
Use F3, T (in hotkey mode), or the chat box at the bottom of the screen (you need to type Say before your message if you use the chat box at the bottom). You can also press F2 to talk in local out of character (LOOC) to ask questions about the game and how to do things.
Once you've geared up and put on your radio earpiece, you should start hearing radio communications. It is very important in this game to communicate with others. As a squad marine, you'll have your squad channel on your earpiece, you can talk on it by typing ; before your message. Your squad channel can be heard by everyone in your squad.
Attachments
After gearing up, you may choose to go to the requisitions office (west of cryo, east of briefing) and line up to receive your optional attachments. The Requisitions Officer and Cargo Techs are not obligated or guaranteed to serve you, but they will usually dispense two attachments, two grenades, and small amounts of extra backroom gear to you - a Standard Marine with the rank of Private First Class. Being polite to the requisitions staff makes things easier for everyone, including saying please and thank you.
Some attachments, such as the Underslung Grenade Launcher, can be enabled, fired, or reloaded. The ![]() at the bottom right will activate your attachment (you can bind a hotkey for it with Macros).
at the bottom right will activate your attachment (you can bind a hotkey for it with Macros).
Briefing Room
- If you joined in late in the game, there will be no briefing thus you should head straight for the hangar.
If you woke up at the start of the round, there will usually be a briefing in the briefing room, opposite requisitions to the west. Find a seat in your squad's colour-coded seating area. The acting Commander will be along soon to describe the situation and his/her overall game plan, and will issue your squad their initial orders. Remember to behave yourself. Listen to what your Commander has to say, listen to your Squad Leader, and overall watch your fellow Marines' backs. Stay with the team and you'll do fine.
The Dropships to the Surface
Once briefing ends, head west of the briefing room to the hangar with the rest of your squad. There are two dropships to the surface, Dropship One ("Alamo"), deploying to Landing Zone 1 (LZ1), and Dropship Two ("Normandy") deploying to Landing Zone 2 (LZ2). Take the dropship your squad is assigned to, or whichever one drops you closest to your squad if you joined late. Ask your squad on the radio what to do if you're unsure. The ride isn't smooth, so you'll want to sit down and buckle in by standing on top of a chair and dragging your Marine's sprite to the chair. To unbuckle yourself, click the chair with an empty hand or click Resist ![]() .
.
Combat
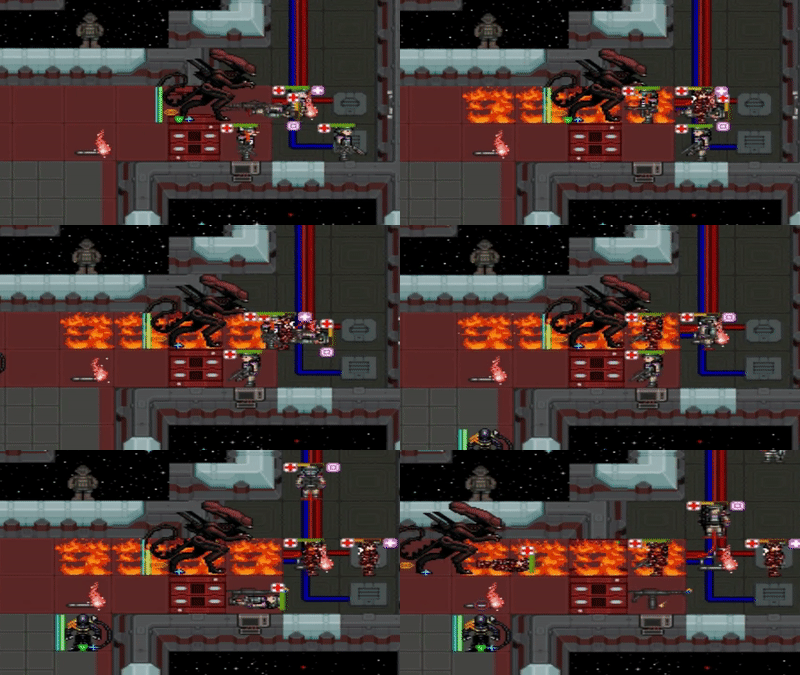
It's highly recommended you read the bullet path guide so that you understand how the bullet mechanics work on this server. In regards of friendly fire, apologise to them and call a medic over or if the person you shot is heavily injured, drag them to one. Once you enter combat you'll want to go into harm intent if you weren't already, this just ensures that you don't accidentally switch places with a marine when they're retreating and firing saving you from being shot by them, it also means you'll point blank any enemies on a tile next to you if you click on them.
Do NOT throw / fire grenades diagonally if there is a marine / wall next to you on the diagonal firing line, while bullets can fly diagonally past a wall, grenades can't and will bounce back to you.
Lighting
Light and vision are vital to your success. There are three main ways to see further into the darkness.
- Turn on your shoulder lamp by clicking the armour iconin the top left corner. This provides a consistent but short range of light.
- Turn on a rail flashlight attachment by clicking the activate rail flashlight button on the bottom right of the UI
 . This provides more light than your shoulder lamp (it also works when the weapon is equipped at waist).
 - Toss flares
 around to illuminate the area around you. To use flares, click the Flare Pouch with an empty hand to take a flare out, clicking the flare (or press Z) to activate it, then either throw it (R) or drop it (Q). If you are pushing and run out of flares, you can pick up flares which are already on the ground and throw them.
 - Turning on floodlights, click the floodlight with an empty hand.
Movement
Stick with your squad, stay away from positions that could easily get you isolated, like corners or being half screen away from your squad, catch up if you lagged behind, wait if you went ahead. If you get isolated and dragged away, you are gone. When engage, watch others' positions and firing lanes, don't move into their firing lanes and stop shooting when others move into yours.
Avoid using Help intent (top left, 1 in hotkey mode) ![]() during combat, use Grab intent (bottom right, 3 in hotkey mode) instead. The reason being it replaces shoving with pushing when there is another marine in your way. Remember not to push others into dangerous situations (Fire, Xenos, Boiler acid globs) when you have Grab Intent active.
during combat, use Grab intent (bottom right, 3 in hotkey mode) instead. The reason being it replaces shoving with pushing when there is another marine in your way. Remember not to push others into dangerous situations (Fire, Xenos, Boiler acid globs) when you have Grab Intent active.
Overcoming obstacles
- Climb: drag yourself onto the obstacle (barricades without barbed wire, window frames and tables).
- Move marines over obstacles: Grab or right-click -> pull a marine, then click
 (Z) two times (few seconds cooldown in between) to upgrade it to
  . Then drag them onto the unbarbed wire barricades/window frame/table next to you. You can also use throw
  to throw them up to 7 tiles away and over unbarbed wire barricades but not over window frames/tables.
 - Flip tables: drag the table to the direction you want to flip toward then release, or right-click -> flip table. Reverse the drag or right-click -> flip table again to set the table back.
Rifle Handling
The pulse rifle takes two hands to shoot properly. If it's in one hand, you can fire the weapon, but accuracy will be severely reduced and recoil is greatly increased. To ready it for firing, click on the rifle in your active hand (or Z in hotkey mode). You'll know you've wielded your rifle when your other hand shows that it's occupied, your character's graphic readies the rifle, and you move slower. To shoot the rifle, just point the cursor at a spot and click. Be very careful not to shoot fellow Marines. Aim for centre mass ![]() , so a friendly fire will not be too deadly. To lower the rifle again, click it in your active hand.
, so a friendly fire will not be too deadly. To lower the rifle again, click it in your active hand.
You will eventually need to reload your rifle once it runs out of ammo. If you hear a long beeping sound, your rifle's automatically ejected its magazine. You can also unload the magazine early by clicking the rifle with your other hand or by clicking the eject magazine button ![]() in the bottom right. Then you can reload the gun by clicking the weapon with a magazine in your hand or drag a magazine onto your weapon to reload it.
in the bottom right. Then you can reload the gun by clicking the weapon with a magazine in your hand or drag a magazine onto your weapon to reload it.
- Shoot point-blank: switch your intent to Harm, click on their sprite. Though, there is a bug where buckshot weapons and weapons that fire bursts will treat pointblank firing into one shot resulting in less damage.
- Walk mode to improve accuracy: your accuracy will improve when you toggle to walking mode. Walking also let you go over wet tiles without issue, instead of slipping and falling over.
- Turn on/off gun's safety: alt-click the gun.
Interacting with the environment
Ladders & Wall Holes
- Look up or down a ladder or through a wall hole: drag the ladder or wall sprite onto your character, to cancel this view you can either walk away from the ladder or click Cancel camera view in the OOC tab (you can bind a hotkey for it with Macros).
- Throw a flare up or down a ladder or through a wall hole: activate the flare then click on the ladder/wall hole. Also applies to flashlights.
- Throw a grenade up or down a ladder or through a wall hole: without priming the grenade, click on the ladder/wall hole with a grenade in your hand, the grenade will be automatically primed and thrown.
- Righting a fallen vendor: click on the fallen vendor with an empty hand.
Team Work
Foolishly stumbling out into the darkness alone is one of the easiest ways to get dragged off and killed, or worse. An effective and protected marine is one who sticks with as many fellow marines as possible. For your first game, you may want to play a little safer and stay alive longer to get used to the experience, so try to hang around the back or find a well-lit, well-populated area to guard. There's no shame in being terrified of your enemies.
First Aid
First-Aid Pouch
In the First-Aid Pouch (![]() ), there are:
), there are:
 An one-use Pain-stop autoinjector to help against pain.
 An one-use First-aid autoinjector for minor brute and burn damage.
 Ten-use gauze for bleeding and brute damage.
 Ten-use ointment for acid/fire burns.
Gauze and ointment need to be targeted to the specific injured body part, you can do this by selecting the body part ![]() at the bottom right. Expended autoinjectors can be restocked at NanoMed
at the bottom right. Expended autoinjectors can be restocked at NanoMed![]() on Almayer and Dropships by dragging them to the NanoMed.
on Almayer and Dropships by dragging them to the NanoMed.
Helping yourself
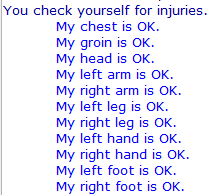
You can examine yourself for injuries by clicking yourself with an empty hand with Help intent (top left) ![]() .
.
The levels of injury are
- Brute damage: bruised -> battered -> mangled -> MISSING.
- Burn damage: numb -> blistered -> peeling away.
If you catch on fire, click Resist ![]() to roll on the floor and extinguish the flames (you can bind a hotkey for it with Macros).
to roll on the floor and extinguish the flames (you can bind a hotkey for it with Macros).
If your health went to flashing CRIT![]() , disengage, apply first aid and seek a medic. Otherwise, you will collapse mid-fight.
, disengage, apply first aid and seek a medic. Otherwise, you will collapse mid-fight.
If you feel a sharp pain/broken bone in a body part, it might be a fracture or shrapnel that Medics can't treat other than applying a splint, meaning you will eventually need to medevac. If a Medic tells you to evac, do it.
If your health worsens/vision goes blurry without being attacked, you might have organ damage, seek a Medic and evac if told to do so.
Helping others
You can examine (Shift + Click or Right click -> Examine) other marines to see their visible injuries. If the marine has blood soaking through from under his _____, it means he is bleeding. Use gauze![]() on the body parts
on the body parts ![]() to stop the bleeding.
to stop the bleeding.
It is vital to move fellow marines out of danger and pull them to a Medic (Medics can revive dead marines), especially if they can't move. One less marine being left behind and captured means one less xeno to be dealt with in the future. To pull, you can:
- Ctrl + Click (in hotkey mode, you don't need to switch to the empty hand with this method)
- Click with an empty hand using Grab intent
- Right Click -> Pull.
To help put out the fire on a marine, click them with an empty hand using Help intent.
If a marine has fallen over, you can help get them up by clicking on them with an empty hand using Help intent. It works for neurotoxin spit, facehugger (after fallen off) and pain (if not critical).
Dead
Once your character is dead you have two options:
- Stay in your body and wait for revival.
- Ghost in the OOC tab, then observe the round (Medics can still revive you if you Re-enter Corpse in the Ghost tab).
- To play as Xeno, click Toggle SpecialRole Candidacy in the Prefernces tab, then turn on Xeno preference, you will get this message: You will now be considered for Xenomorph events (where possible). You can also click Join as Xeno in the Ghost tab to see if there is any SSD (i.e. away from keyboard) Xeno you can take up.
Tips
- Check out the FAQ for more information (how to throw grenades, move a marine over a window frame/barricades, look up/down ladders, etc).
- See Collective small tips thread
- Don't panic.
- Follow orders.
- Stay with the Squad Leader unless otherwise ordered.
- Never go anywhere alone.
- Communicate as much as possible with your squad. It would be hard to talk too much.
- Report all enemy contact.
- Damage is relatively realistic and getting wounded sucks. Don't rambo around or charge in.
- Be safe, fall back, stay alive.
- Stay one tile behind barricades.
See also
The following are some links that go further into explaining details and some other Marine roles:
- Roleplaying Guide and Stricter enforcement on Round-Start shenanigans
- Marine Equipment Wiki Page: Allows you to see all weapons and attachments the game has to offer.
- Standard Marine Wiki Page: Provides some quick tips.
- Macros: Making your own key bindings and one-click multi-functions for in-game actions.
Other combat roles
- Squad Smartgunner Wiki Page: Gives tips on how to effectively use the smartgun
- Squad Engineer Wiki Page: Provides in-depth information on how to build, hack, repair, and setup FOBs
- Squad Medic Wiki Page: Provides in-depth information on how to heal, what chemicals to do, and what to expect.
- Squad Specialist Wiki Page: Teaches you how to effectively use your weapons to assist your squad
- Squad Leader Wiki Page: Provides insight on how to lead your squad to greatness.
