No edit summary |
|||
| Line 160: | Line 160: | ||
You can learn more about alien stats [[Xenomorph Stats|here]]. | You can learn more about alien stats [[Xenomorph Stats|here]]. | ||
= | =Tips= | ||
* | * If you empower from less than three enemies your abilities will be significantly weaker, So it is usually better to retreat when that happens. | ||
* Whenever you slash an enemy your charge cooldown will be reduced by 4 seconds and the empowered charge counts as a slash if it hits an enemy, So if you charge into an enemy and slash it two times you can either charge out or kill another one. | |||
* Your main threats are the demolitionist specialist and the grenade launcher specialist, If they're around it might be better to try a different angle or just be extra careful. | |||
[[Category:Alien Castes]] | [[Category:Alien Castes]] | ||
Revision as of 14:49, 30 January 2022
 |
Evolves From: Lurker Evolves To: N/A Role: Bring death to all that face you. Use charge to close the gap between you and a marine, and finish them off with powerful blows capable of chopping limbs clean off. Hit and run and frontal assaults are your bread and butter, get used to tanking damage and dealing it. You don't need to hide any more. Guides: Art of the Ravager |
Playing a Ravager
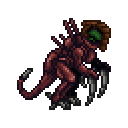
The huge red unfriendly Barney with the power slash the sh*t out of anyone alive. The Ravager's current incarnation is designed around being a tough, front-line combatant that will either spearhead a push or be a strong flanking force.
I won't say you're wrong, but that sort of mentality also leads to bad Ravager plays. Though you are very tanky, don't rely on it as much. Your frontline prowess of dealing and taking damage is as good as your competency. Keep an eye on your health and armor when tearing up marines into swiss cheese. The Ravager also has access to temporary shields with most of the existing strains, which further enhance your ability to tank damage.
Overview
The Ravager is a tier three Alien of the ambush caste. It means you'll have to evolve three times to become one. From larva, to Runner, to Lurker, to finally Ravager. Your best chances of becoming Ravager lie with being a round-start Alien. Until you can evolve fully, do the standard early-round cycle of looking for monkeys and survivors.
Runners are more likely to evolve if they fear their mortality, and I can't stress that enough. Don't take unnecessary risks, don't get cornered, and you'll be fine. Stick your neck out too far, and some bumbling Marine is bound to come around and blow it off with a point blank buckshot blast.
The Ravager is, the slowest of the tier threes, perhaps only slower than a 100% healthy and fed Marine with heavy armor or a walking Crusher. The Ravager is a very offensive Alien that excels at dealing damage to enemies. Her claws are extremely sharp. She's fire-proof, explosion-resistant, and armored. Ravagers can tank a lot of damage, and deal a lot of damage. Ravagers can shred through tables and slice them into metal. As the ultimate killing machine, she's designed to eliminate tough foes. But always be aware that while Ravagers have quite large health pools, their armor is only slightly above average in most instances, and AP ammo is particularly deadly against them. Direct hits from rockets and Close Air Support will still deal significant damage as well.
Understanding Your Limits
A lot of people tend to think of Ravagers as pretty much behaving in the same way as a Runner. Here's how most runners live and die:
- Evolve from a Larva
- Find a Marine
Attack- Find out that the marine wasn't alone
- Get surrounded
- Scream at the queen for "HEALS MOM"
- Escape with 10% of your health around the corner and rest up while the marines complain about you being too tanky
They are not necessarily wrong, in this regard. A lot of Ravagers end up going into combat alone and wind up dying in some far-flung southern end of the map. Such behavior earns the vitriol they receive from their comrades. As a Ravager, it is vital to know when it's high time to back the hell off and charge away to safety. The yellowish-green meter on the side of your HUD is your health indicator. Trust it and don't trust it. It's a little finicky and doesn't give an accurate representation of your actual health, but it's still a good indicator. Use the 'Stats' tab to get an exact value for your health and armor, as well as your damage and shields.
Perhaps tend to retreat when at half health or below. Technically, the tanking capabilities of a Ravager mean you'll always be frontlining, but truly stop fighting at half health or below. Leg it back to the Hive for health or find a safe spot with a recovery node, a drone, or a Warden Praetorian to top your health pool off. The Ravager works best when assisted by faster aliens such as Runners, Spitters, or in flanking maneuvers where the marines will be unable to fight back effectively.
Much like all tier 3 aliens, you must be VERY careful to avoid getting surrounded by marines on all sides, as they will box you in and point blank you with shotguns until you are dead. Your large sprite only makes it easier to pull off point blank shots, as the Ravager's sprite is on par with the Queen, Carrier, and Praetorian in terms of sheer size.
Abilities
| Abilities: | Description: |
|---|---|
 Rest |
Used to rest and get up. Xenos heal faster when resting on weeds. |
 Regurgitate |
To devour, grab a host with Ctrl + Click or
Grab intent (3 in hotkey mode) then click yourself, standstill. To stop the host from getting up and running away, you can switch to an empty hand (X in hotkey mode) and keep tackling them using Disarm intent (2 in hotkey mode) when you are devouring them. Xenos with devoured humans inside them can not vent crawl but Xenos with devoured monkeys can. Hosts with boot knives can injure the Xenomorph they are inside if they are conscious. (Edit this template) |
| Cruelty | PASSIVE: Your slash damage is increased by up to 10 based on the amount of targets you are currently empowering from. |
| Cutting Claws | PASSIVE: Your slashes cut deep and swiftly through metal, Dealing double damage to armored tall-host vehicles (All strains). |
 Empower |
On first activation, grants you 75 shield points. On second activation for every enemy in your line of sight (up to 5) and within a range of 3 tiles gain an extra 80 shield. If you empowered from 3 or more enemies you become super empowered for 5 seconds, gaining vastly strengthened effects for your other two abilities. Shield gained lasts 15 seconds.
|
 Charge |
Lunge 5 tiles in the direction you selected. If you are super empowered and charged into an enemy they will be knocked down for 2 seconds, slashed and flung 3 tiles away. Slashing a target will reduce this ability's cooldown by 4 seconds.
|
 Scissor Cut |
Slash a 1x4 line on the tile you click on damaging anyone from you to the end of the line for 45 damage. If you are super empowered whoever hit will be super slowed for 3 seconds as well.
|
Attainable Strains
| Strains: | |
|---|---|
Strain Abilities
Berserker
- Health: 590
- Armor: 30
Hedgehog
- Health: 650
- Resistance to minor explosions.
| Abilities: | Description: |
|---|---|
| Bone Shards | PASSIVE: Your abilities now cost shards instead of plasma to use. For each 50 shards you have stored, gain 2.5 additional armor. You gain shards upon taking damage and they will grow over time. You may only store a maximum of 300 shards. |
 Spike Shield |
Expend shards to gain a temporary shield that lasts for a short amount of time. Whenever the shield is damaged, spray bone shards around you in a 3x3 AoE centered on yourself. Shield lasts for 2 seconds.
|
 Fire Spikes |
Launch 8 small shards of spikes in the direction you click embedding shrapnel into tall hosts slowing them down for 8 seconds. Though the spikes themselves don't do much damage, it causes brute damage to the host when they move.
|
 Spike Shed |
Shred all of your shards to launch them all in all directions around yourself. Lose the bonus armor in the process while also gaining a speed boost. This will disable you from gaining any shards for 30 seconds.
|
Ravager Maturity
Ravagers can not Evolve any further, as they are a Tier 3 Caste.
Ravager Stats
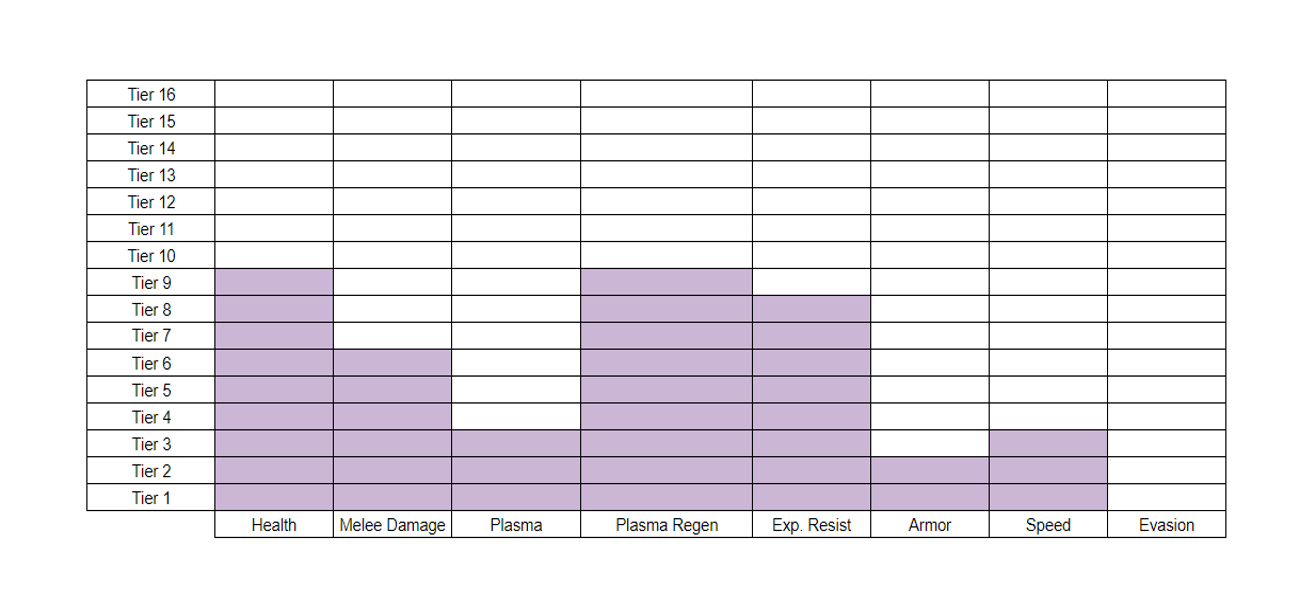
 You can learn more about alien stats here.
Tips
- If you empower from less than three enemies your abilities will be significantly weaker, So it is usually better to retreat when that happens.
- Whenever you slash an enemy your charge cooldown will be reduced by 4 seconds and the empowered charge counts as a slash if it hits an enemy, So if you charge into an enemy and slash it two times you can either charge out or kill another one.
- Your main threats are the demolitionist specialist and the grenade launcher specialist, If they're around it might be better to try a different angle or just be extra careful.


