NoahKirchner (talk | contribs) m (→Duties: Weird abrupt cut off sentence) |
|||
| Line 21: | Line 21: | ||
= Duties = | = Duties = | ||
As the Squad Leader, you need a robust and sophisticated knowledge of fighting a war and protecting your squad, as well as fighting. Manage your squad's supply lines and make sure your marines make it back in one piece. No one wants another folded flag being sent home so keep as many of them alive. | As the Squad Leader, you need a robust and sophisticated knowledge of fighting a war and protecting your squad, as well as fighting. Manage your squad's supply lines and make sure your marines make it back in one piece. No one wants another folded flag being sent home so keep as many of them alive as possible. | ||
== Know the Map == | == Know the Map == | ||
Revision as of 23:19, 18 June 2018
 |
Difficulty: Hard Supervisors: Commander, XO, Staff Officers (Overwatch) Rank: Not defined Duties: Lead your team. Follow orders from command. Guides: Leadership Unlock Requirements: Not available. Detailed Description: Not defined |__________| |
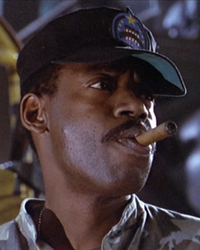
"All right, sweethearts, what are you waiting for? Breakfast in bed? It's another glorious day in the Corps. A day in the Marine Corps is like a day on the farm: Every meal's a banquet. Every paycheck a fortune! Every formation's a parade! I love the Corps!" - Gunnery Sergeant Apone, Aliens
You are the Squad Leader (SL) of one of the main squads aboard the USS Almayer. You are entrusted with the lives of your soldiers, the men and women you will be fighting with on the frontiers of space, and the battlefields on various stations and colonies. You're the one keeping your squad together, so do it right. Your role is primarily Leadership and only secondarily combat. You're practically the only one with a brain down there, so you should do most of the thinking, and let your marines do most of the shooting. Don't leave your squad leaderless by ramboing into combat and becoming a casualty. It's important to know when to fall back. Ensure that your squad makes it back in one piece.
Should a Squad Leader go AWOL, KIA, MIA or just not wake up, a member of the squad (usually Specialists or other high-ranking marines) will be chosen by Command to become the Acting Squad Leader (aSL). They almost have the same abilities as an ordinary Squad Leader; however, the acting squad leaders issue orders ability will be weaker.
Duties
As the Squad Leader, you need a robust and sophisticated knowledge of fighting a war and protecting your squad, as well as fighting. Manage your squad's supply lines and make sure your marines make it back in one piece. No one wants another folded flag being sent home so keep as many of them alive as possible.
Know the Map
For you to survive, you need to know the ins and outs of the battlefield. There are maps of the Area of Operation (AO) located in your Squad Leader vendor. They can be a useful asset when you’re new to the role.
Communication
Use ; for your squad channel and :v for the command channel. Please communicate with command to relay any information. Your Staff Officer should be able to give you a lot of useful information about your squad's composition and whereabouts, along with what's happening with the other squads or aboard the Almayer. You must follow the chain of command, meaning you follow orders from your superiors, meaning the Commander, Executive Officer, and the SOs all outrank you. You should always follow their orders. This also means that if you're denied supply from the Requisitions Officer, then you're denied. If a lieutenant gives you an order, they expect you to follow it.
Squad Leader Equipment
The squad leader ranks as a very important soldier on the field. The equipment they are issued includes:
| Equipment: | Description: | ||||||||||
|---|---|---|---|---|---|---|---|---|---|---|---|
 M240 Incinerators |
The ultra-deadly M240 is one of the most fearsome and savage weapons in the arsenal of the Colonial Marines. Firing extra-thick sticky napthal fuel from detachable fuel tanks, the M240 is able to both set hostiles ablaze and to section off an area with a wall of fire. For extended field operations, users of the M240 often find themselves refilling their tanks with whatever flammable material is available, with welding fuel being an effective and popular choice. A big drawback to the M240 is that due to the nature of the tanks, they cannot be refilled unless they are completely empty. The Squad Leader can vend two of these to give out amongst their squad.
| ||||||||||
 Squad Leader Headset |
This headset allows the squad lead to communicate with the marines in their squad and the command staff during an active operation. Acting Squad Leaders can use this headset for as long as they're aSLs. | ||||||||||
 Whistle |
A whistle reserved for Squad leaders and the Command Staff, to help coordinate marines. To use the whistle you can click on it while it's in your hand or you can wear it in your mask slot and then click it with an empty hand. Click and drag to take it out of your mask slot. | ||||||||||
 M11 Helmet |
A highly durable helmet reserved for squad leaders in the USCM, has a built in camera like all other standard issue Colonial Marine helmets. | ||||||||||
 B12 Armor |
A highly protected set of armor reserved for squad leaders in the USCM. | ||||||||||
 M40 HSDP Smoke Grenade |
Standard issue USCM smoke grenade, does what it says on the tin. Primarily useful to deal with insurgents in colonies or potential hostile boarders. | ||||||||||
 Tactical Binoculars |
A pair of binoculars, with a laser targeting function. It is used to send a CAS mission or a mortar target to the targeted location. Ctrl + Click to target something. | ||||||||||
Squad Supply Beacon |
A rugged, glorified laser pointer capable of sending a beam into space. Activate and throw this to call for a supply drop. | ||||||||||
Orbital Beacon |
A bulky device that fires a beam up to an orbiting vessel to send local coordinates for a fire mission. | ||||||||||
 Webbing |
Sturdy mess of synthcotton belts and buckles, ready to share your burden. Holds 3 normal sized items. Squad Leaders start with one per vendor. | ||||||||||
 C4 Explosive Charge |
C4 is typically issued to Squad Leaders, Specialists (Using the Demolitions Loadout), Engineers and Responders. C4 is primarily used for quickly breaking into secure buildings, but its also the most effective method to destroy alien tunnels. The minimum time that can be set on a charge is 10 seconds and detonates in a 1.5 meter radius. Combat Engineers start with 4 per vendor, Demolition Specialists start with 2 in their crate and Squad Leaders start with 1 per vendor. | ||||||||||
 Motion Detector |
The Motion Detector highlights anything not wearing an ID that is on your screen. For example, if a xenomorph is on the other side of a wall, it will be highlighted and give off a high-pitched pinging sound. Hold the motion tracker in your hand, and turn it on either by clicking on it or Z (in hotkey mode).
| ||||||||||
 Large Magazine Pouch |
Special issue pouch that can hold up to three magazines. Issued to Squad Leaders. Contains 3 slots. | ||||||||||
 Large General Pouch |
A general purpose pouch used to carry even more small items and also magazines. Contains 3 slots. | ||||||||||
 Pistol Pouch |
A holster to carry pistols, typically a standard issue M4A3 handgun, or 88M4 Pistol. | ||||||||||
 M4A3 Armor Piercing Magazine |
Holds twelve (12) 9mm pistol rounds. Has better armor penetration, but lower overall damage. The Squad lead can vend one mag. | ||||||||||
 M4A3 Hollow Point |
Holds twelve (12) 9mm pistol rounds. Has lower overall penetration but better damage. The Squad lead can vend two mags. | ||||||||||
| Operation Maps | A map of the operation area so squad leaders can coordinate effectively with the command staff. For you to survive, you need to know the ins and outs of the battlefield. The maps can be a useful asset when you’re new to the role. | ||||||||||
 
Box of Zip-ties |
A box containing 14 one use zip-ties for apprehending disgruntled colonists and loose cannon marines. Found in the Squad Leader Vendor. | ||||||||||

H5 Pattern M2132 Machete Scabbard |
A large leather scabbard used to carry an M2132 machete. It can be strapped to the back or the armor. It is one of the scabbards inside USCM Cargo Vendors. They all start with machetes inside. |
Support Equipment
Supply Beacons and Orbital Beacons
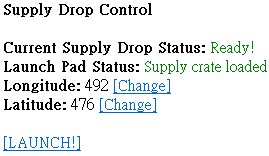
Squad Leaders begin the game with 3 Supply Beacons and 1 Orbital Beacon in their vendor. The beacons are a one-time-use item, but more can be ordered from Requisitions. Supply beacons allow the squad to resupply in the field by airdropping supply crates, and Orbital Beacons enable the Almayers heavy cannons to lock on and fire at the beacon's position.
 Supply beacons
|
Offsets
|
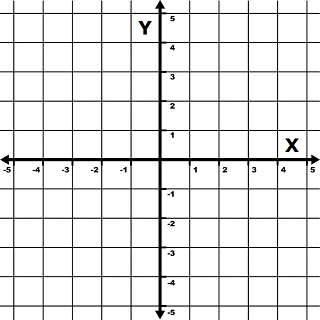
The X and Y offsets allow a SO to target a specific location relative to the beacon. +X is east, -X is west, +Y is north, -Y is south, up to 5 tiles. The SO can coordinate with the SL to set appropriate X and Y offsets if it's necessary to drop something a good distance away from the beacon itself. Offset Graph: |
 Orbital Beacons
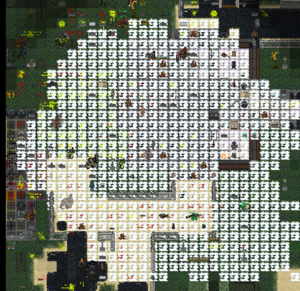
|
Tactical Binoculars
Tactical Binoculars to mark a location with a laser (up to glass ceilings, examine a tile to see ceilings), this allows the Pilot Officer to perform a Flyby Fire Mission on the designated target with an array of ordnances. The Tactical Binoculars can also acquire the coordinates of the laser, relay them to your Squad Engineers mortar team to fire.
Tactics and Fighting
On the frontlines:
Whether it’d be on small skirmishes, large-scale offensives or just the random encounters of hostiles in the AO, you and your squad will need to fend off the invaders or if you’re attacking, eliminating the hostile that is present.
- Squad organisation
You are the man that can lead from the front when ever you’re going out on patrol or moving to another location, everyone is going to follow the SL since you are the person leading them so where ever you are going, they better support you.
Your squad consists of the two to four engineers, two to four medics, one specialist, one smart-gunner and an endless swarm of grunts. Where you are the man on the ground giving orders, they will need to follow.
You may want some men to cover the rear or the sides of your squad, preventing the enemy from attacking weak points.
With the ability to assign fire teams, your squad can split up into smaller teams to cover objectives.
For example:
Fire Team 1 will patrol around the F.O.B,
Fire Team 2 will help repair the power plant.
- Situational analysis:
When in the heat of battle, you’ll need to assess the current situation, how many hostiles are in the area, who are injured and who isn’t and how much control of the battlefield you have.
Certain situations will require quick judgment and others, a more calculated choice. While the marines are fighting for control of the frontlines, you will need to support them in their offensive and make the call on when to push or when to retreat.
Other times will be defending at specific locations, and whether it’d be in entrances or at the FOB, you’ll need to devise a plan of action. Will your squad flank from a different location and fight your way from another angle, possibly forcing the enemy away from the defender’s position? Or will you gather your men to hold your ground until a relief force arrives?
Every decision you make has a cost to it; whether it’s lives or time, you will have casualties.
- Corridors and tight spaces:
Every so often your commanding officer will task you with searching areas where you may find challenging to retreat from. This is especially evident in tight spaces. Cave systems and narrow corridors are a gamble to investigate. This is due to possible guerrilla fighters lurking in the darkness or behind corners and suddenly BAM, it’s an ambush, and your entire squad is wiped off the face of the sector.
To deal with situations like these, there are very few practical solutions to use. You can’t predict an ambush from occurring, but you can send scouts ahead of your position to “test the waters.” Squad leaders will know this is suicide, but you must protect the lives of your squad members and to bring as many of them home.
Although a cowardly way of preventing an ambush is to run at the first sight of danger. This only applies to patrolling and scouting objectives. You’ll have most of your marines hopefully back in one piece, but the downside is that the enemy might reinforce the unsecured position and you’ve gathered little to no intelligence on the sector you were tasked with scouting.
- Assaulting the enemy:
With the possibility of having your squad, accompanied by other troops, to bring the battle to the enemy’s doorstep, you will need to fight alongside your marines. Although how you will fight is primarily up to you, many squad leaders prefer a more aggressive stance with an active role in combat as to some passive squad leaders, directing the battle behind the frontlines and supporting them with supplies and other essentials.
An Aggressive stance:
What many squad leaders tend to do is join the marines in the fighting at the frontlines, although there’s nothing wrong with it, you’re more likely to die from direct conflict with an enemy. Although your firepower of issuing orbital strikes and inspiring leadership will bolster the marines to act, you are putting yourself in harm's way.
You’ll be fighting with the main force of the marines, gunning down enemy contacts as well as directly supporting your squad. Exploit weak points in the enemies defenses and advance with your men to push the enemy to eliminate the threat.
A Passive stance:
With your marines on the frontlines, you are behind them or close to them to observe the battle and issue orders when necessary. You will primarily deploy supply beacons to re-supply the marines and mainly your support class marines. Although this means that you’ll need to rely on one of your marines to issue an orbital strike as well as the loss of another gun on the field.
You’ll primarily watch the battle unfold, seeing from a safe distance and calling them back when your marines are either too deep in the hot zone or pointing out gaps in the offensive.
- Sacrifices
No one wants to sacrifice good men and women for a cause that may be unjust and fruitless. But sacrifices must be made to save the lives of the many. As a leader, the decision weighs on your shoulders for quick decision making, and some of them will cost lives. The needs of the many outweigh the needs of the few. You will have to make the tough calls that will leave some of your marines to their doom to save the rest of the squad.
- Defending the F.O.B:
If hostile forces defeat your offensive and launch a counterattack against your defenses, prepare for the worst. Expect most of the enemies forces to invade, this is the battle that determines the outcome of the next few moments, whether it’d be retreating to the ship or another marine offensive. Expect siege units and other supporting enemies to attack as well as the bulk of the enemies forces.
Depending if your engineers and other squad engineers have fortified the F.O.B or not, it will either hinder or help you defend the area.
How the enemy will fight depends on what siege units they have.
They will either bombard you or directly attack through hit and run means. And you will need to respond to these dangers in an appropriate way.
Abilities: Orders
Orders are a timed active ability that characters trained in leadership can activate. The duration of the ability is related to how high the characters leadership skill is, an example being that the commanders order will last longer then a squad leads. The intensification of the ability is also determined by the leadership skill, the higher it is the more intense the orders effects are on surrounding players. Note that these abilities do not stack and that the abilities cover your visual view range and no further. To choose an order to activate go into the IC tab in the top right then select "Issue Order".
| Orders: | Description: |
|---|---|
| Move! | Increased mobility and chance to dodge projectiles. |
| Hold! | Increased resistance to pain and combat wounds. |
| Focus! | Increased gun accuracy and effective range. |
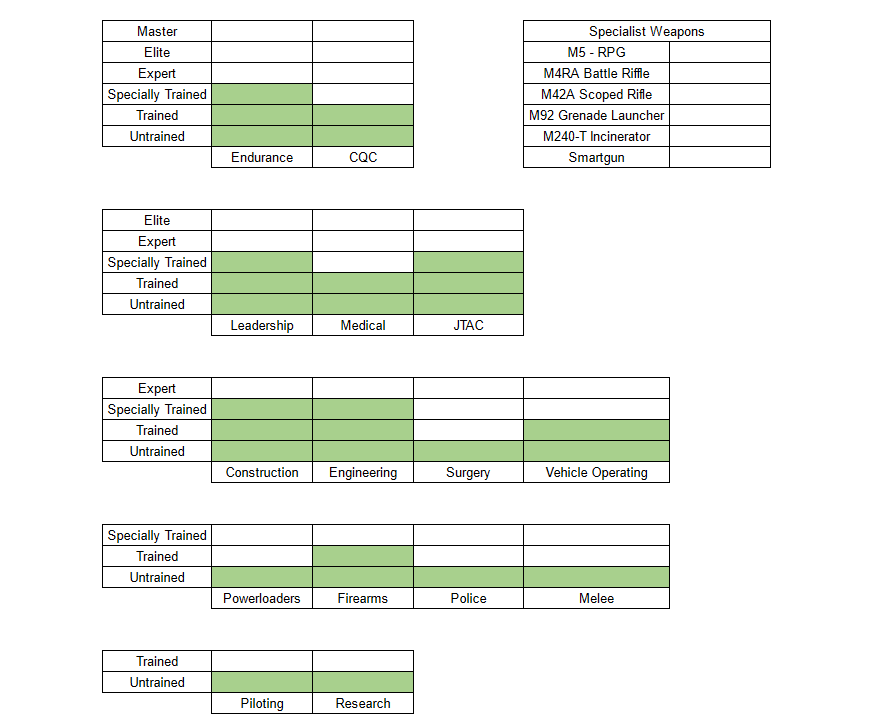
Your Skillset
To find out about how the skill system works head over to the skills system page.
Guides
- Regular/Operation squad management thingies by Kesserline
- Leadership phenomenon : Squad Cohesion by Kesserline
- Some Psychology and Management as a SL by Kesserline
- Tactics on the field : some tips by Kesserline
Good luck, your squad depends on your decisions during the mission.
