The old man still doin' some wiki work. And yes, I was the guy who uploaded most of the marine (but not currently Command) images and so on.
Some bonus pics that I took during some of the rounds, including self-edited ones and event ones.
https://cdn.discordapp.com/attachments/219732615295533056/309658780587786240/xenogun.png

Marine Combat - Omega Edition
So, you've managed to end your round by going out in the woods/snowstorm/plains/station by going into the darkness and eventually get killed by an Alien. NOW you're looking for a guide on Marine Combat? Well this may be a guide for you. Currently, we have # steps, but first! Let's get to the bit of what makes a good squad for combat?
HISTORY PAGE DRAFT
Role History
USCM Roles
 Commander |
The Commander role was a non-whitelisted role back then, they had a unique laser gun that was very effective against aliens. |
 Logistics Officer |
The Logistics Officer had a similar role to the Requisitions Officer, but assigning Squad Marines to various squads. |
 Combat Marine |
The Standard Combat Marine initially does not have a squad on round start, so they need to depend on their Logistics Officer in order to be assigned of one of the four squads in the game. Alpha, Bravo, Charlie and Delta. |
Commander |
Due to an increase of bad players playing as Commander, the role was whitelisted and only reserved for the people who can actually lead the Marines to victory. The aforementioned laser gun was replaced by a Vintage Desert Eagle. And later on, the Desert Eagle was replaced by the M4A3 Custom Pistol because the Desert Eagle was not accurate to the Lore. |
Combat Marine |
The Standard Combat Marine now starts with a squad assigned. |
Commander |
The aformentioned M4A3 Pistol was replaced by the Mateba Autorevolver Special. |
 Squad Specialist |
The Specialist's inventory inside the vendors is shared, meaning each Specialist from each squad will have different loadouts and they cannot pick the same loadout twice. The B18 and Grenade Launcher was merged into the Heavy Grenadier loadout and the Scout loadout was overhauled. There is also a new loadout, called the Pyrotechnician Loadout. |
Squad Marine |
The Standard Combat Marine now starts either with the Backpack or Satchel at round start. |
ERT Roles
 Heavy Infantry Team |
The HIT was previously the only Response Team available during the Pre-Alpha stage and these people were armed advanced laser weaponry, riot shields and other special weapons that were in par with W-Y Commandos today. They're a group of specially trained Marines, trained with the knowledge learned from their advanced training courses. They're usually called in when the Marines cannot complete the assigned mission on their own. Many players who are new to SS13 in general may think that this is a Deathsquad that is there to exterminate whatever is in this station. It was shortly removed when the game reaches the Alpha phase. |
 Freelancer Mercenaries |
The Freelancers were added after the removal of the HITs. They had unique average weapons and start with a civilian hardsuit. Which most players complain that the hardsuit was bulky and it never protected the mercenary. |
Dutch's Dozen |
The Dutch's Dozen or Dutch's Mercenary Team was loosely based off of the team led by Dutch in the movie Predator which they're added after the removal of the HITs, they had firepower equal to the Freelancers, with their main objective to hunt down any possible Predators. Along with the Iron Bears, they were removed after some time during the Omega phase and not made an appearance since. They were techincally replaced by the Colonial Liberation Front. Though they're not the same faction, they still use the headsets of the Dutch's Dozen today. |
 W-Y PMCs |
The W-Y PMCs were added after the removal of the HITs. They have not changed since Omega phase. |
 Iron Bears |
The Iron Bears were added after the removal of the HITs. They were the first ERT to be hostile against the Marines, but not initially. They were removed after some time during the Omega phase and replaced by the Union of Progressive Peoples because of the server's new Lore. |
Freelancer Mercenaries |
During the Omega phase, the Freelancer Mercenaries are reoverhauled thanks to their new lore. Instead of wearing compression suits, they wear regular cuirass armor as well as having new selection of weapons along the way. They also have a medic to aide the squad during medical operations. |
W-Y PMCs |
The PMCs were not changed during the Omega phase, besides the removal of armoed balaclavas on their kit. |
 The Union of Progressive Peoples |
The UPP were added along with the reoverhaul of the Freelancers and the addition to the CLF. They're the second enemy response team introduced in the game, and unlike the Iron Bears, the USCM are always aware of the UPP's hostile intent. Which means the USCM are cleared to attack any UPP soldier on sight. |
 The Colonial Liberation Front |
Like the UPP, the CLF was also added along with the reoverhaul of the Freelancer Mercenaries. They're the third enemy response team introduced in the game, and unlike most response teams which they usually come with 8 members. The CLF comes with 12 - 16 members and armed with weak to average powered weapons against the xenomorphs and the USCM. |
Xenomorph Roles
 Drone |
Support: Grow the hive and support the Queen. |
|---|---|
 Sentinel |
Defence: Defend the hive,guard captured prey and eliminate and deter threats from range. |
 Runner |
Offence: The fastest Xeno with the most constant speed (besides the Ravager). Leap over tables with ease and pounce on the enemy. Capture and harass prey. Recon threats. |
 Spitter |
Defence: Defend the hive, employ your more powerful acid to better stun targets and break down fortifications. |
|---|---|
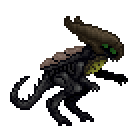
 Warrior |
Offence: Capture and harass prey. Use stealth to turn nearly invisible and set up ambushes or assault prey positions. |
 Hivelord |
Support: The ultimate support. Very large plasma capacity for spreading weeds and resin. Dig holes into the ground to create pathways for other Xenos to travel between. |
 Carrier |
Support: Carry a pile of facehuggers and throw them at prey, or use them as area denial. |
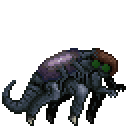
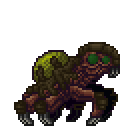
 Corroder |
Defence: Very strong and quick-firing acid. Able to melt space itself. Is the embodiment of marine fear. |
|---|---|
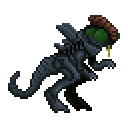
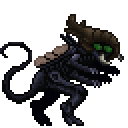
 Ravager |
Offence: The bringer of death. Very powerful claws, and able to charge to close short distances. |
| File:PA-Queen.png Queen |
Lead the hive. |
|---|
| File:PA-Larva Larva |
Hide from tallhosts and eventually complete the alien lifecycle. |
|---|---|
| File:PA-Facehugger Facehugger |
Description here. |
 Drone |
Support: Grow the hive and support the Queen. |
|---|---|
 Sentinel |
Defence: Defend the hive,guard captured prey and eliminate and deter threats from range. |
 Runner |
Offence: The fastest Xeno with the most constant speed (besides the Ravager). Leap over tables with ease and pounce on the enemy. Capture and harass prey. Recon threats. |
 Spitter |
Defence: Defend the hive, employ your more powerful acid to better stun targets and break down fortifications. |
|---|---|
 Hunter |
Offence: Capture and harass prey. Use stealth to turn nearly invisible and set up ambushes or assault prey positions. |
 Hivelord |
Support: The ultimate support. Very large plasma capacity for spreading weeds and resin. Dig holes into the ground to create pathways for other Xenos to travel between. |
 Carrier |
Support: Carry a pile of facehuggers and throw them at prey, or use them as area denial. |
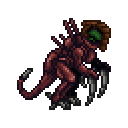
 Praetorian |
Defence: Very strong and quick-firing acid. Able to melt space itself. Is the embodiment of marine fear. |
|---|---|
 Ravager |
Offence: The bringer of death. Very powerful claws, and able to charge to close short distances. |
 Crusher |
Make use of your armored front crest and your massive body to shield and tank bullets. Eat up explosions without flinching thanks to your thick hide. Charge your foes down and stomp on them to dislodge every single bone in their body. |
 Boiler |
Bring the Hive's ranged combat castes to their maximum potential with long range acid glob shots, allowing you to bombard and heavily damage areas after a bit of setup. Use your enhanced vision to locate targets without being seen and shot. Use your acid spray for close range defense. Use your incredibly strong acid to make short work of everything in your way. |
| Lead the hive. |
 Larva |
Hide from tallhosts and eventually complete the alien lifecycle. |
|---|---|
| File:Facehugger Facehugger |
Description here. |