Currently WIP.
Alpha Trivia
- The Infestation Gamemode (Default game mode in CM) previously has 5 victory conditions. Marine Major Victory is total eradication of the Aliens, and Marine Minor Victory is when the Hive has no queen for 20 minutes. Alien Major Victory is the complete eradication of the Marines, and Alien Minor Victory is when the entire crew of the Sulaco has successfully evacuated from alien infestation. And Planetary Eradication, where both sides are eradicated.
Pre-Alpha Trivia
- Ravagers for a brief period could slash through walls and doors due to having a two tile slash. It was later removed.
- Colonial Marines use to have text to speech, but it was later removed because it caused massive lag.
- Aliens could strip marines in their nests of certain clothes and items.
- If you stood one tile directly in front of the HMG there was a bug which allowed you not to be hit by the bullets as they only appeared on the second tile in front of the HMG not the first.
- Custom events were plentiful, some of which being: Necromorphs, The Re-enactment of 1812, Space Marines, Aka Bruva Spess, Borers, Zombies and more.
- Firing a taser at a Xeno would slow it down.
Pre-Alpha Marines
These are how the Marines look like during Pre-Alpha stage.
Pre-Alpha Marine Equipment
| Weapon: | Description: |
|---|---|
Colt 1911 Service Pistol |
The Colt M1911 was the predecessor of most pistols on CM and was used as the standard sidearm players should carry. It functions much like the M4A3 Pistol currently in that respect. Post-Alpha Weapon: M4A3 Service Pistol Ammunition: Colt 1911 Magazine |
 S&W Revolver |
The S&W was the predecessor of revolvers on CM. Post-Alpha Weapon: M44 Revolver
|
M39 Submachine Gun (Pre-Alpha) |
The M39 was a classic SMG during Pre-Alpha. Post-Alpha Weapon: M39 SMG (Post-Alpha)
|
 M37 Shotgun (Pre-Alpha) |
The traditional shotgun used during Pre-Alpha times of CM. Post-Alpha Weapon: M37 Shotgun (Post-Alpha)
|
| File:M41A with ammo.png M41A Pulse Rifle (Pre-Alpha) |
An iconic Pulse Rifle that lived on throughout CM's history. Although it began as a CR20. Post-Alpha Weapon: M41A Pulse Rifle Mk2 (Post-Alpha)
|
L6 SAW Light Machine Gun |
The L6 SAW was the only LMG in Pre-Alpha stage and could be used in one hand in combination with a Riot Shield which was often seen players with it. Post-Alpha Weapon: M41AE2 Heavy Pulse Rifle
|
 Heavy Machine Gun |
The HMG was the backbone of the Marines during Pre-Alpha stage before Sentry Guns were implemented to the game. To use the HMG all you had to do was stand on the tile with the HMG and make sure it was wrenched down after that you just clicked on the enemy or a tile to fire. Do note that the HMG could only fire three tiles and could not fire diagonally, and this made it extremely useful for defending long hallways. Post-Alpha Weapon: M56D Mounted Smartgun
|
Heavy Infantry Team
Before Emergancy Response Teams were introduced, the Marines can call in a Heavy Infantry Team (HIT). The HIT was the only Response Team available during the Pre-Alpha stage, and these people were armed advanced laser weaponry, riot shields and other unique weapons that were in par with W-Y Commandos today. They're a group of specially trained Marines, trained with the knowledge learned from their advanced training courses. They're usually called in when the Marines cannot complete the assigned mission on their own. Many players who are new to SS13, in general, may think that this is a Deathsquad that is there to exterminate whatever is in this station.
Goal
Like every Response Team today, the HIT's objectives is to find the Marine's Commanding Officer for their objectives then assist the marines in their mission whenever possible and protect them as they complete their mission. Likewise, they obey the Marine's In-Game knowledge of RP, meaning that HIT's DO NOT know aliens and they were sent because of a distress signal sent by the station. Like the ERT today, this ERT was rarely called due to a certain circumstance that must be met to call them. These circumstances are that:
- The evacuation shuttle has not been called.
- The Aliens outnumber the Marines at a certain ratio.
- There must be about five or more ghosts (dead players) to join the HIT.
- High Command (Admins) is informed about receiving the message.
Pre-Alpha Aliens
Tier 1 Evolution
You have a choice of three castes of xenomorph: the Runner, the Sentinel, or the Drone. After that, advanced evolutions become available as long as the hive has a living Queen. Each caste has its pros and cons.
| Job | Role | Difficulty |
|---|---|---|
 Drone |
Support: Grow the hive and support the Queen. | Medium |
 Sentinel |
Defence: Defend the hive,guard captured prey and eliminate and deter threats from range. | Medium |
 Runner |
Offence: The fastest Xeno with the most constant speed (besides the Crusher). Leap over tables with ease and pounce on the enemy. Capture and harass prey. Recon threats. | Hard |
Tier 2 Evolution
| Job | Role | Difficulty |
|---|---|---|
 Spitter |
Defence: Defend the hive, employ your more powerful acid to better stun targets and break down fortifications. | Hard |
 Warrior |
Offence: Capture and harass prey. Use stealth to turn nearly invisible and set up ambushes or assault prey positions. | Hard |
 Hivelord |
Support: The ultimate support. Very large plasma capacity for spreading weeds and resin. Dig holes into the ground to create pathways for other Xenos to travel between. | Medium |
 Carrier |
Support: Carry a pile of facehuggers and throw them at prey, or use them as area denial. | Hard |
Tier 3 Evolution
| Job | Role | Difficulty |
|---|---|---|
 Corroder |
Defence: Very strong and quick-firing acid. Able to melt space itself. Is the embodiment of marine fear. | Hard |
 Ravager |
Offence: The bringer of death. Very powerful claws, and able to charge to close short distances. | Hard |
Tier 4 Evolution
| Job | Role | Difficulty |
|---|---|---|
| File:PA-Queen.png Queen |
Lead the hive. | Very Hard |
Supermatter Engine
Basic Setup
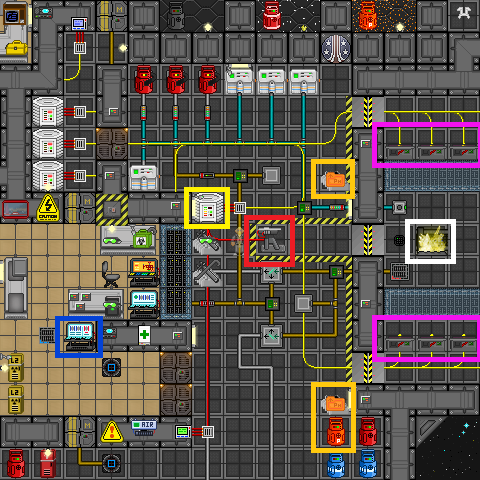
The Supermatter Engine was the Engine during Pre-Alpha and Alpha stages before the USS Almayer were introduced. It is mostly set up already and ready to provide power the USS Sulaco. There are just a few additional steps a player should undertake before flipping that Emitter on. But first, put on a handy pair of Optical Meson Scanners and put on a Radiation Suit and Radiation Hood. Remember, the SM (White) will ruin one's eyes if you look at it without Mesons and you will receive radiation damage without the suit simply from being too close to an active super matter core.
The SM Engine Area
1. Ensure cooling loop is functional
Check on the computer (blue) and refresh until it shows that the SM chamber is 'Injecting' coolant at a rate of 700 L/s. The output pressure should then be toggled to 'Open'. Make sure that the input is maximized and open because otherwise, the coolant loop will not function correctly.
2. Prep the radiation collectors
The radiation collectors (magenta) are what powers the Sulaco once the SM is active. First go to the phoron tanks (in orange) and fill them to the maximum 1013 kPa capacity using the phoron canister; (orange) To do this first grab a phoron tank in hand, then click the phoron canister, (orange) the phoron tank should then be inserted into the canister, (you will know if it is inside because a black mark will appear on the side of the canister if it is) after that set the kPa to 1013, then open the release valve, when the tank is full close the release valve and eject the phoron tank. Open the blast doors to the collector and put one full phoron tank into each collector. Make sure click on all eight of the collectors to activate them.
3. Turn on the Engine Room SMES
Turn both the input and output of the SMES (yellow) to maximum and set the input to Auto.
4. Fire the emitter
Open the blast door to the SM chamber using the handy toggle. Fire the emitter (red) 10 times. Emitters fire four shots before a long pause so count carefully; the audio cue helps here. Turn the emitter off and close the blast door.
5. Maintain an eye on the SM
Use the engine chamber console (blue) to check that the temperature and pressure remain stable. An excellent safe goal to shoot for is a core temperature of under 500K. After you have done these steps the temperature and pressure should stabilize, which then tells you that you are all safe to walk away, do remember to check up on the SM every once in a while though to see if the temperature/pressure is dropping or rising.
On a side note, this SM Engine setup will last you 6 hours and more.
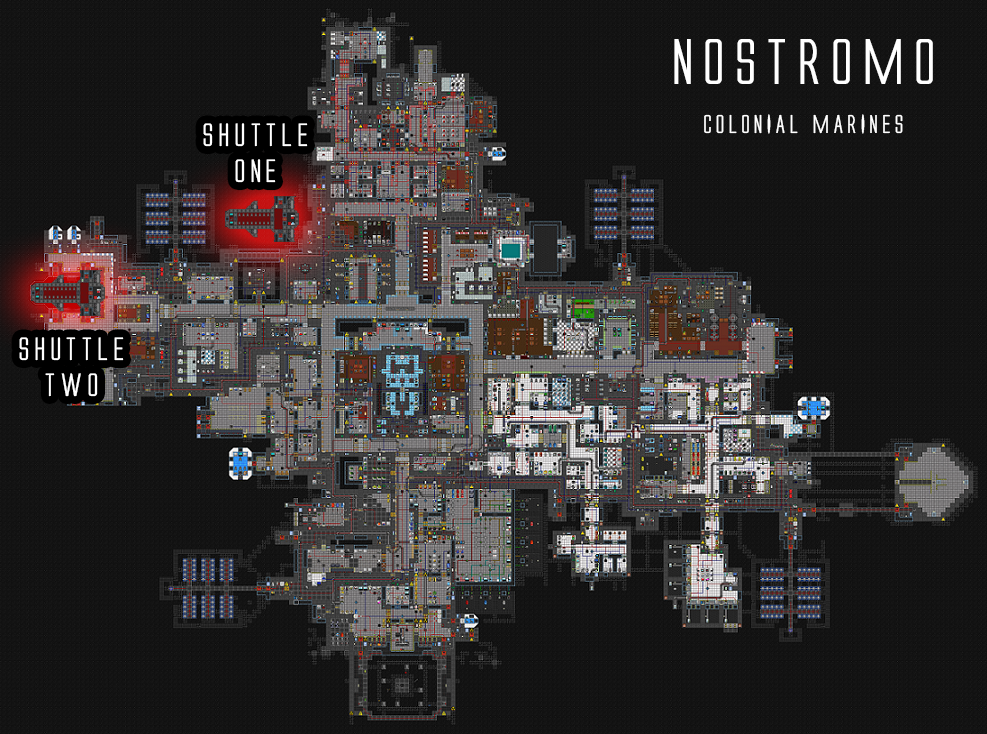
Alpha Maps
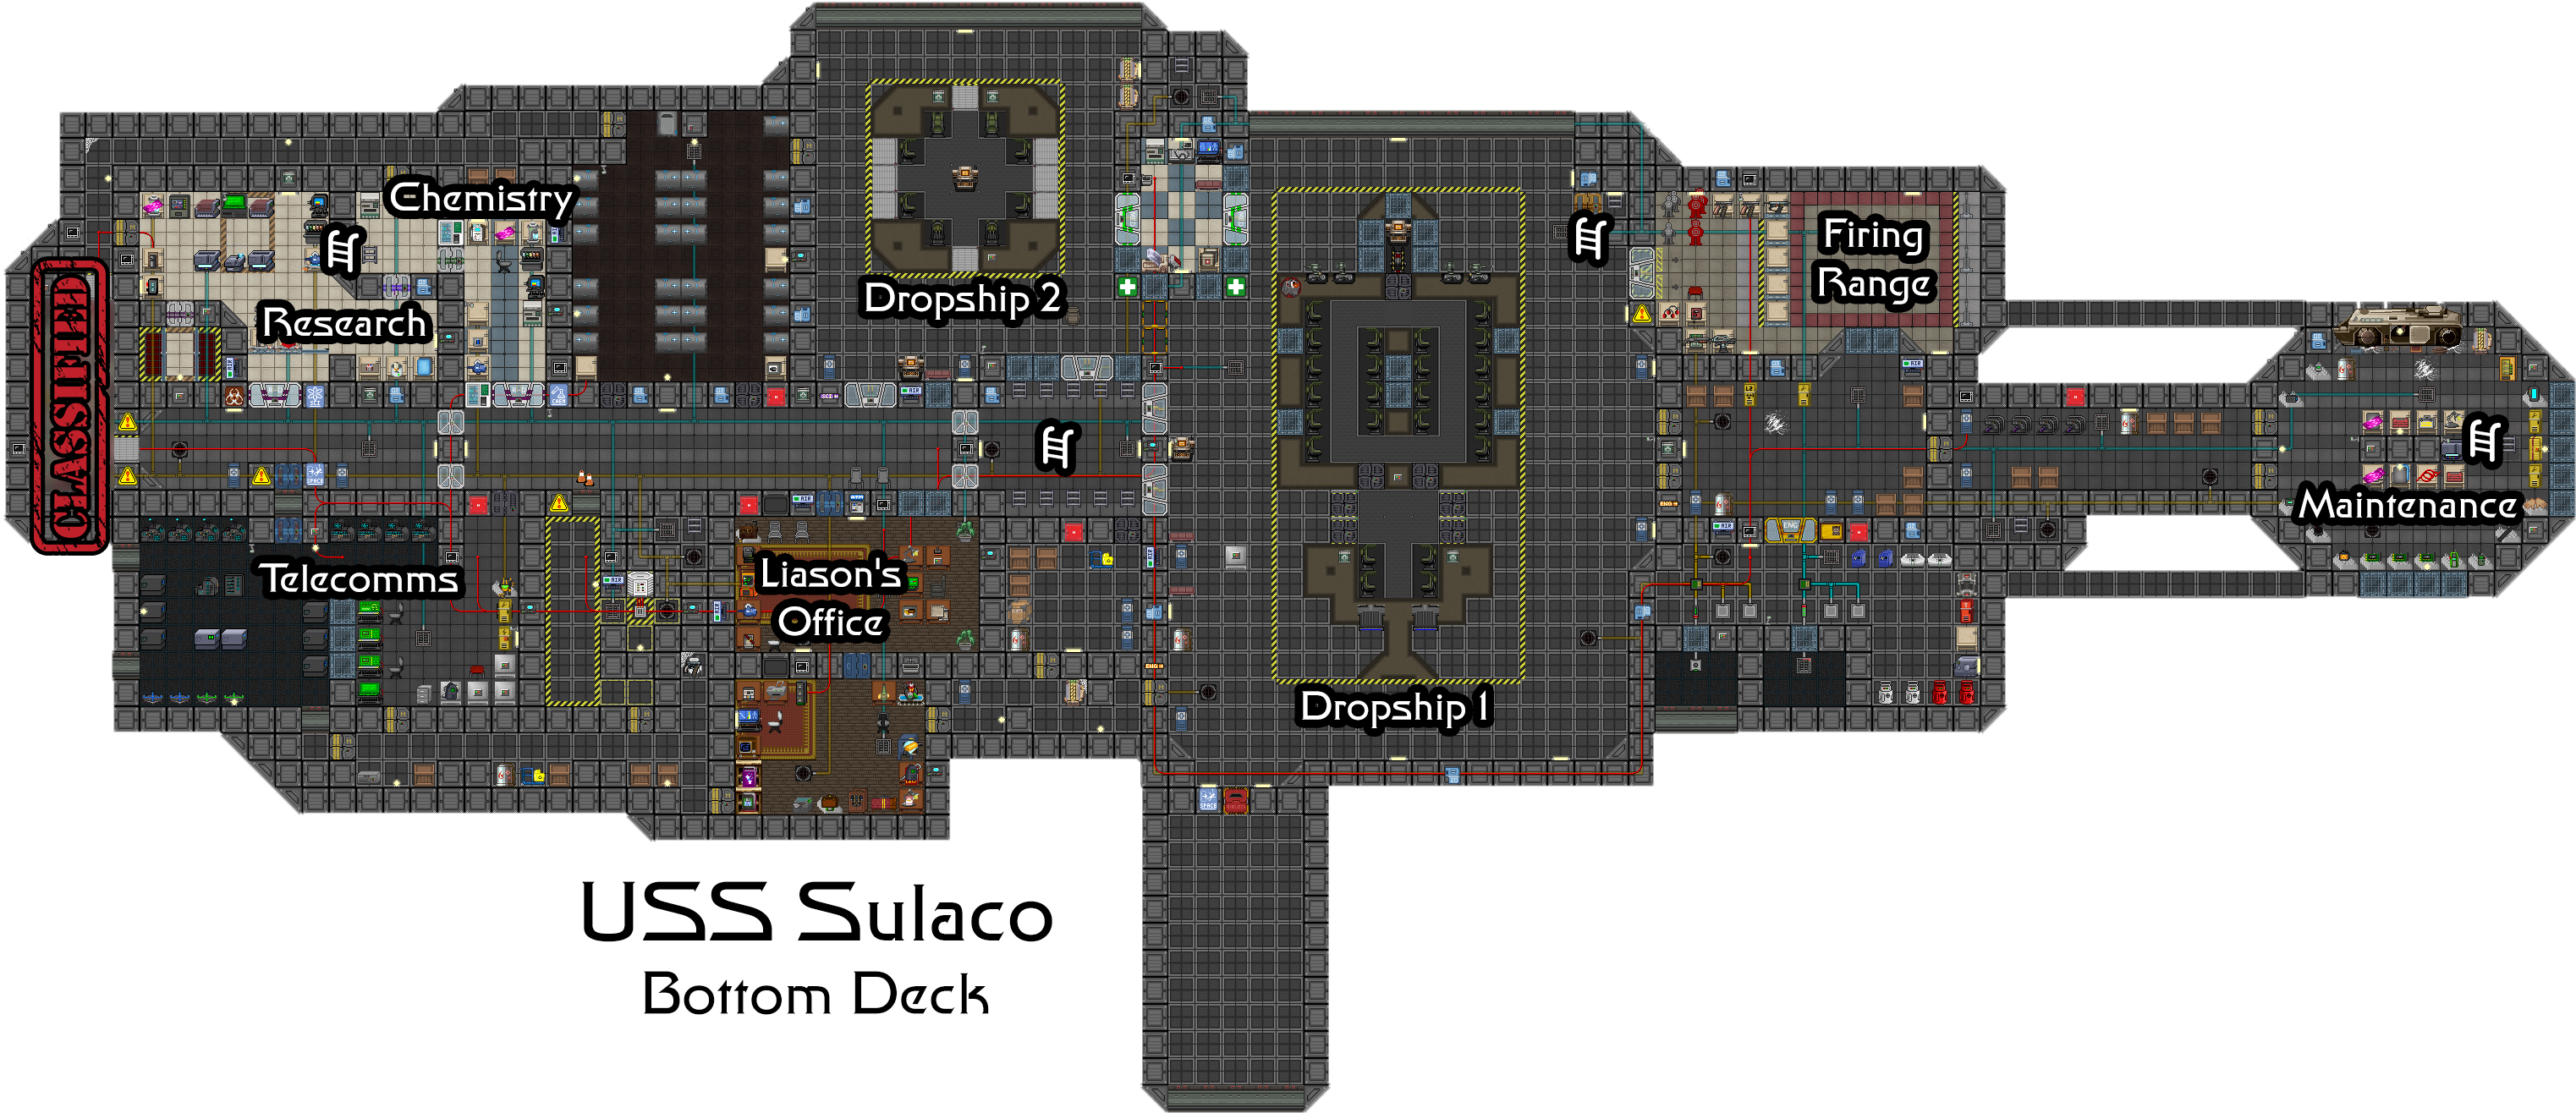
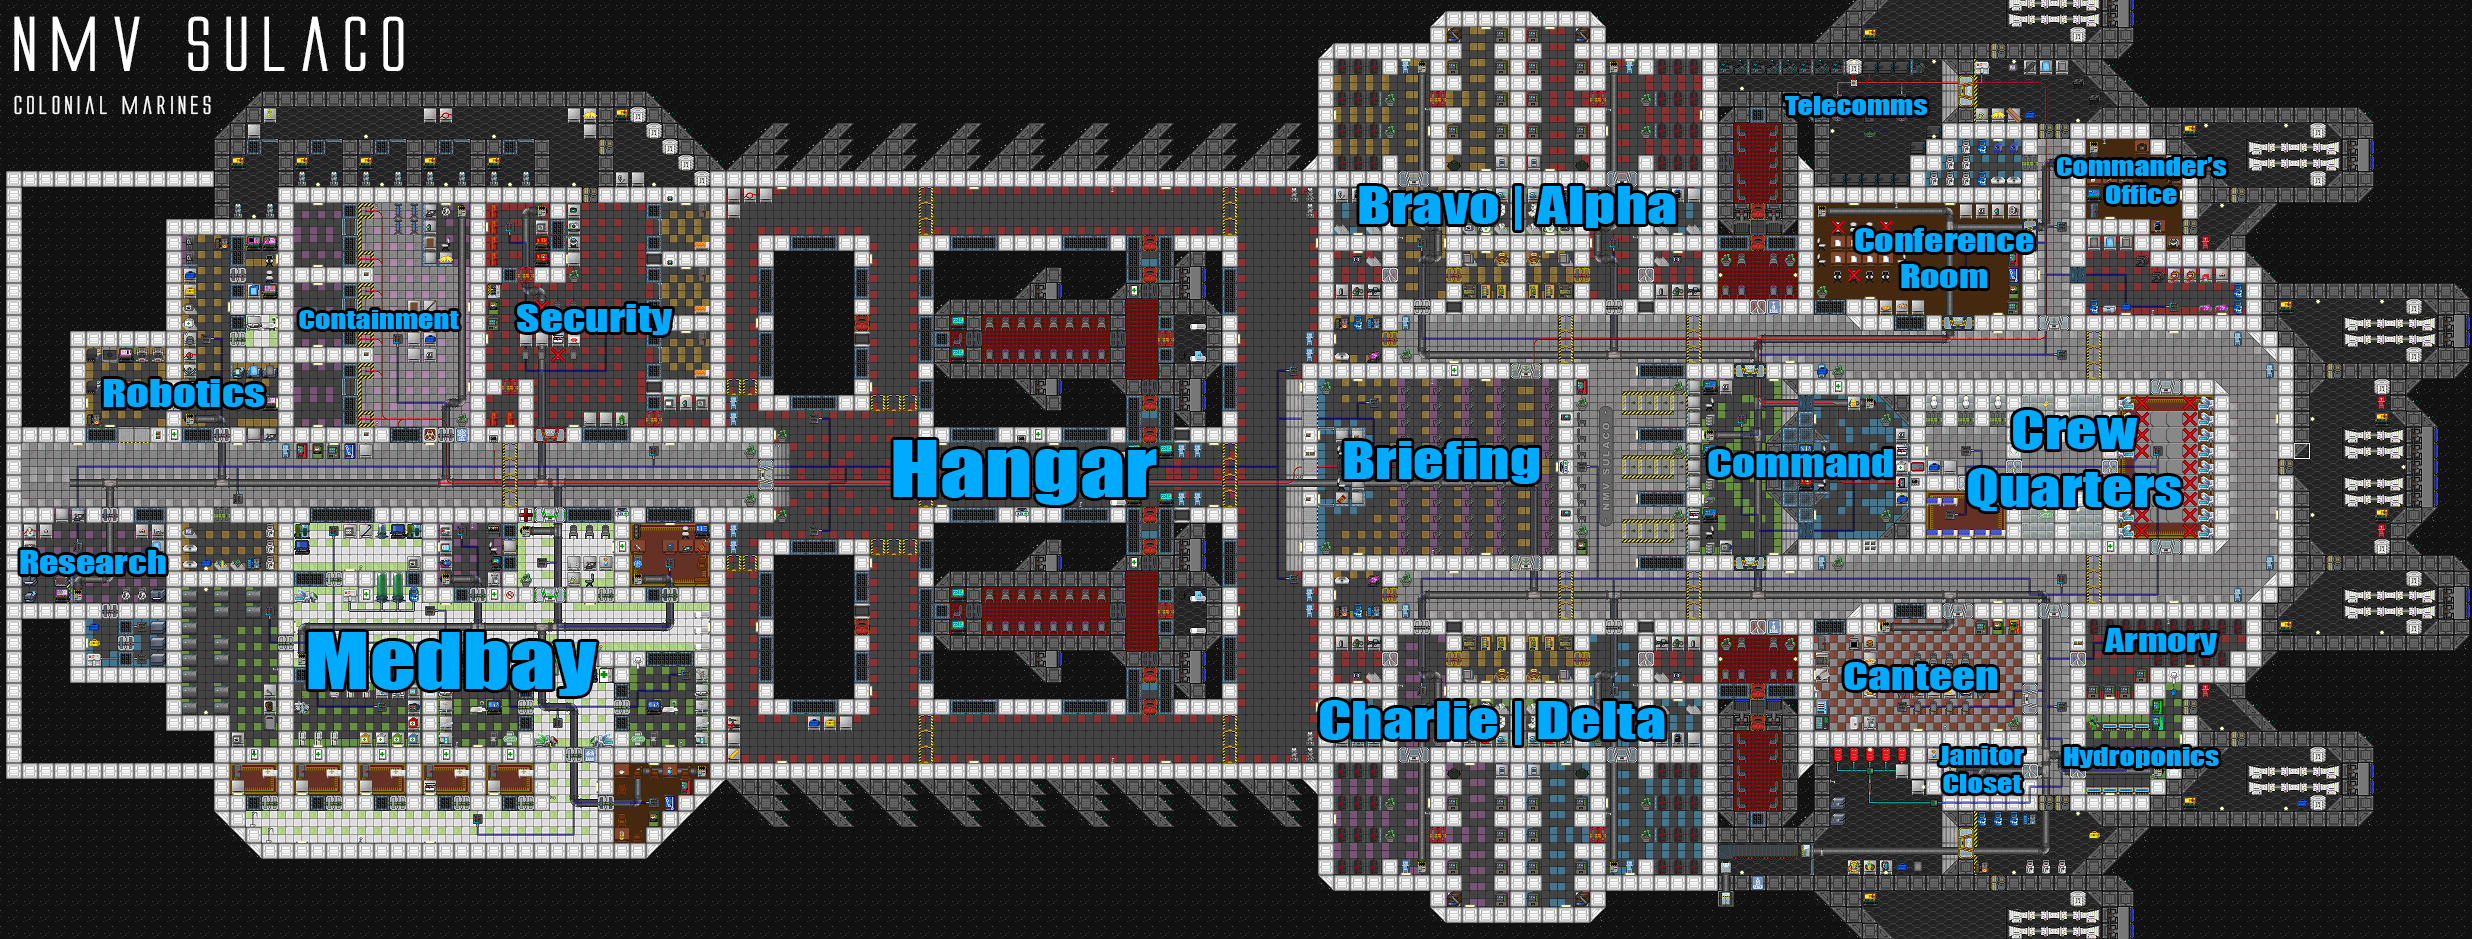
Sulaco
The USS Sulaco is a Conestoga-class troop transport employed by the 2nd Battalion of the United States Colonial Marines. The Conestoga-class ships are manufactured by the Weyland-Yutani corporation with their dry-dock division, knitted specially for the USCM corps, containing everything to serve the USCMCs mission: To serve as "force-in-readiness" and operate independently in environments far from home for extended periods of time without any support and alone, fighting specially colonial rebels, pirates and raiders. The USS Sulaco has been missing since 2179, and it is unknown whether the crew aboard the vessel are still alive or worse.
The ship has two decks. The upper is the operational part of the ship while the lower is the hangar and maintenance.
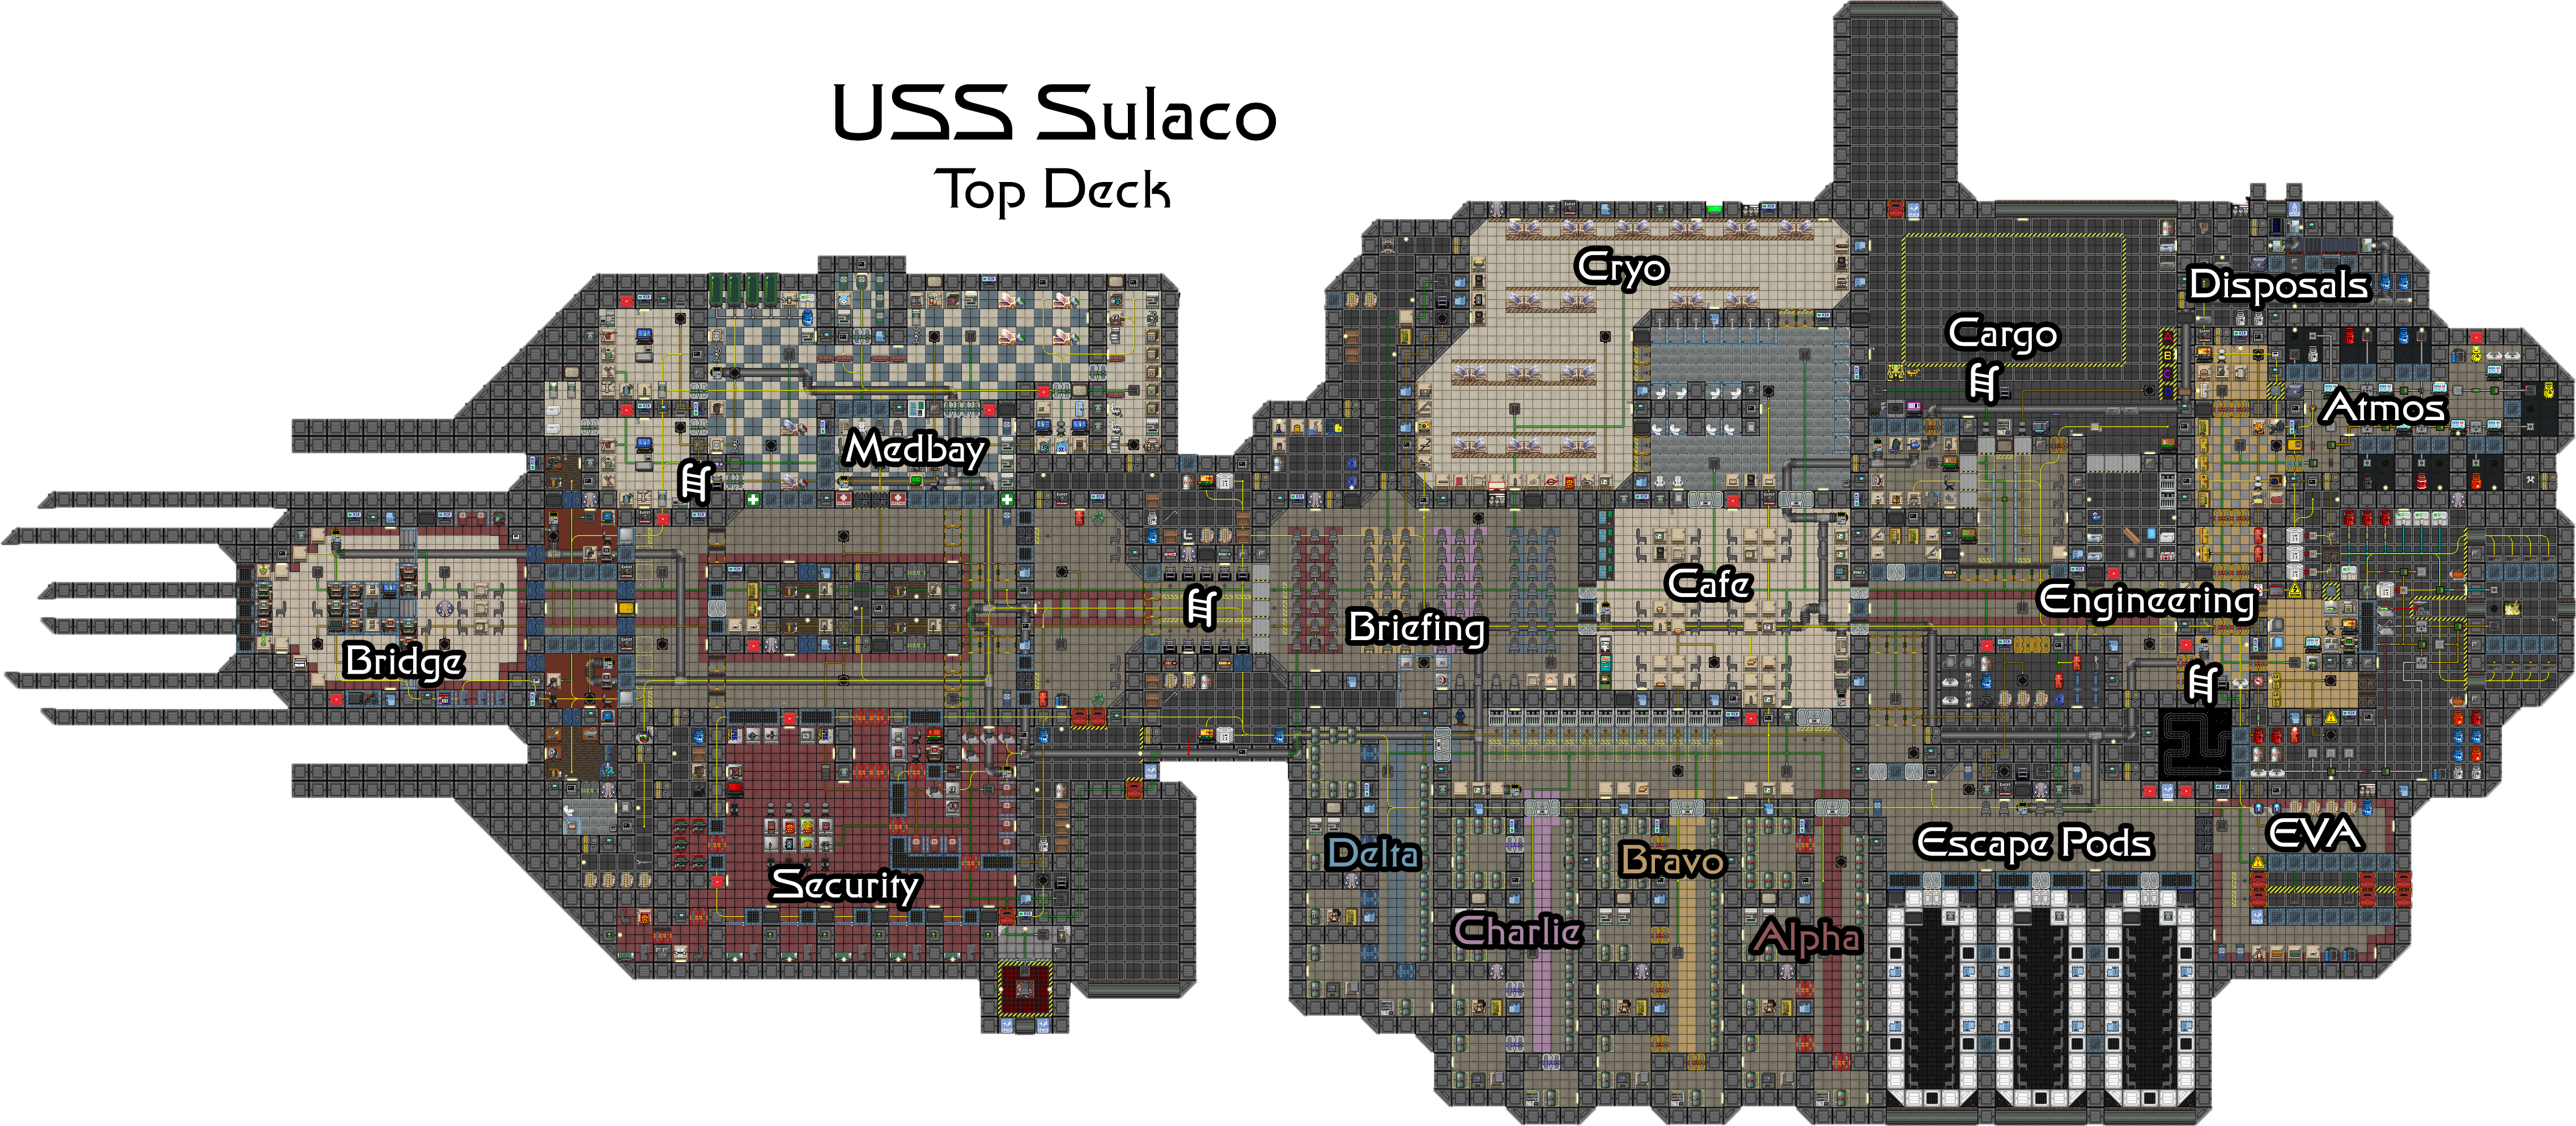
The upper deck is the main part of the USS Sulaco, it contains the bridge of the ship - where the command crew stays - the medical bay, the brig - where criminal marines are locked by the Military Police, the barracks, armory, cantina, the cargo bay with the logistics division, engineering -where the engine and atmospherics of the ship are located- and the escape pods. This deck is the most important of the two, containing the facilities necessary to conduct the operations on the ground and maintain the integrity of the ship. Losing any part of this deck will mean that the Sulaco is in danger of destruction, the engine is one of the most sensitive parts of the ship, and the loss of it will spell bad news for the crew.
In contrast, the lower deck is less critical than the upper deck, although it's the main point where it can be boarded. It contains the Research/cloning, Morgue, Telecommunications, the Hangar with the two ships that the Sulaco has - The Rasputin and the Vindictaor - and the lower maintenance part


